How to start reading your dough and making more confident decisions in 25 minutes
It’s a system that will help you see, feel, and check what’s happening when your dough doesn’t behave the way the recipe says it should.
This guide is for people who already know how to follow instructions but still don’t understand why their dough turns out perfect one time, then sticks or refuses to rise.
We’re not talking about PRO-level baking here, with 80% hydration, chasing the perfect open crumb, or measuring panettone acidity.
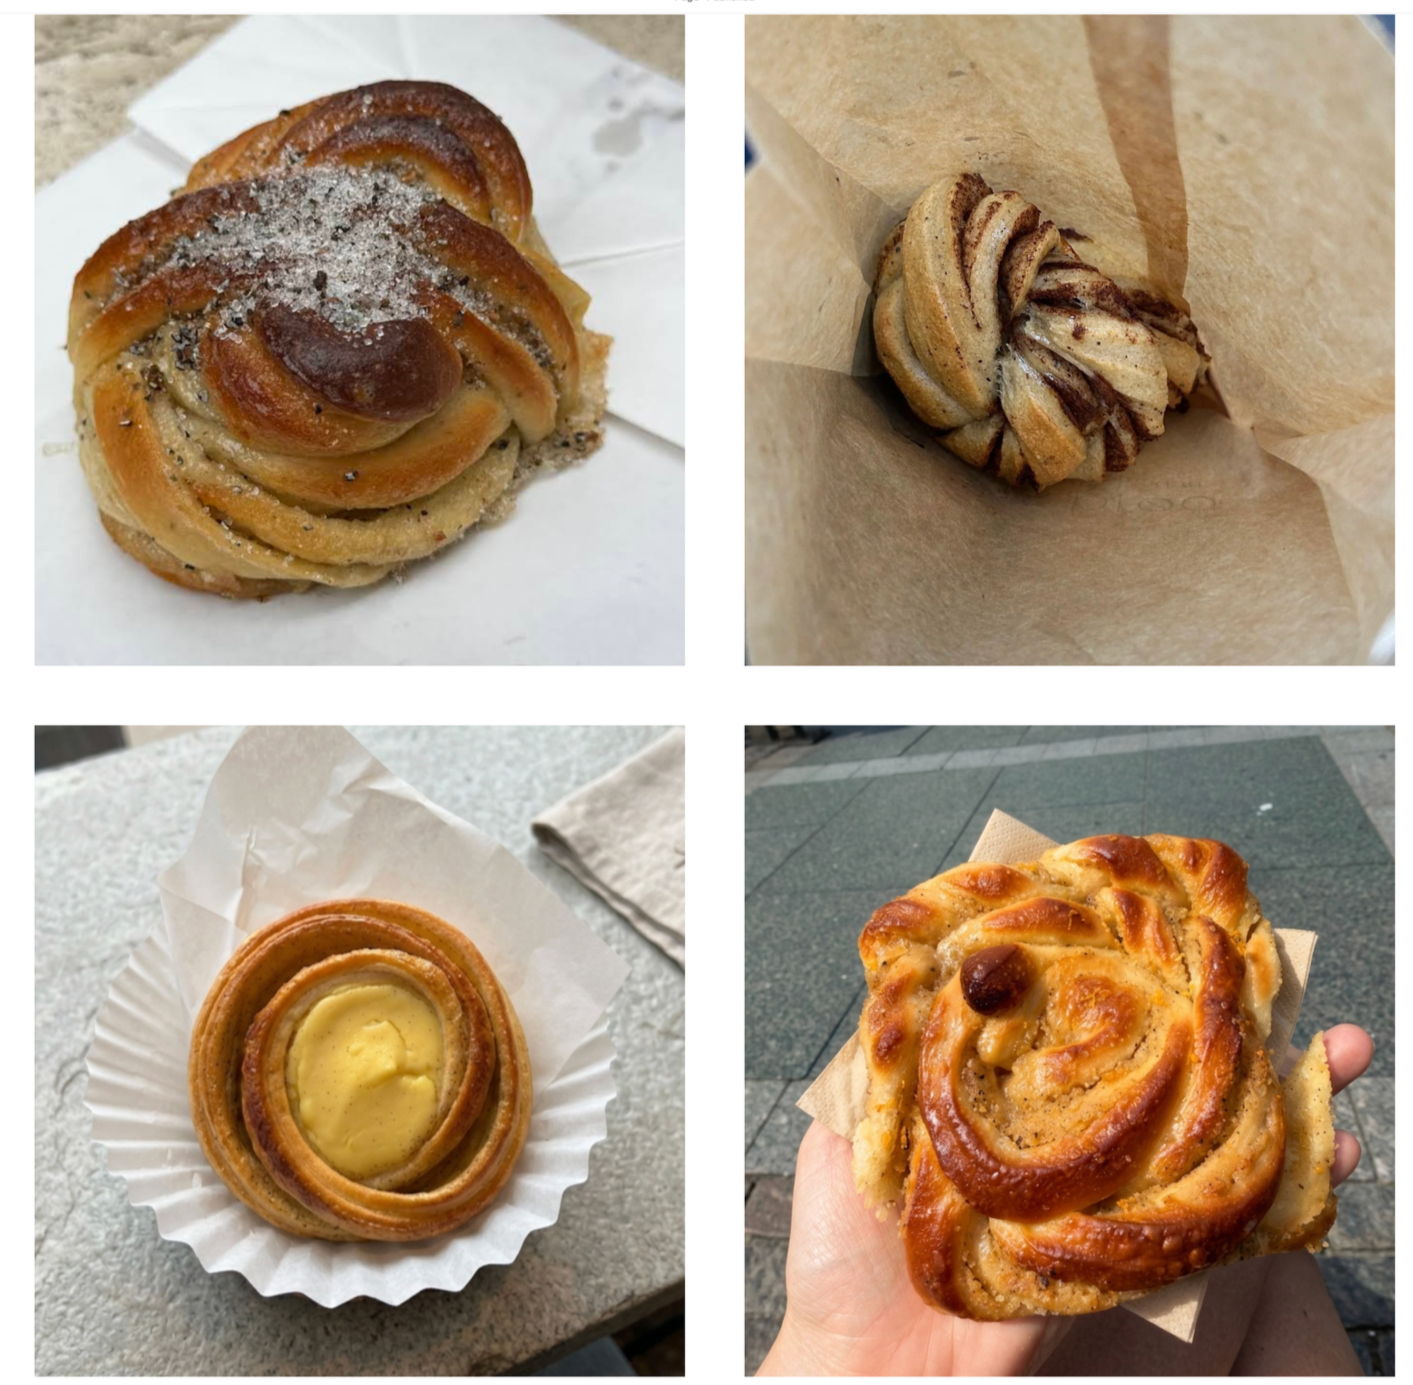
It is about making good-looking, genuinely tasty baked goods at home. Bread, pizza or sweet buns. The kind you’d happily give to a friend, serve to guests, or make for your family.
1. You might think I’m gonna tell you to trust your feelings
Maybe this is how you picture intuitive baking:
An experienced baker throws in flour, pours in water, adds some yeast without measuring anything, and somehow gets a perfect result every single time.
Nope! I mean learning to notice specific signs, watch how the dough behaves, and understand what those signs might be telling you.
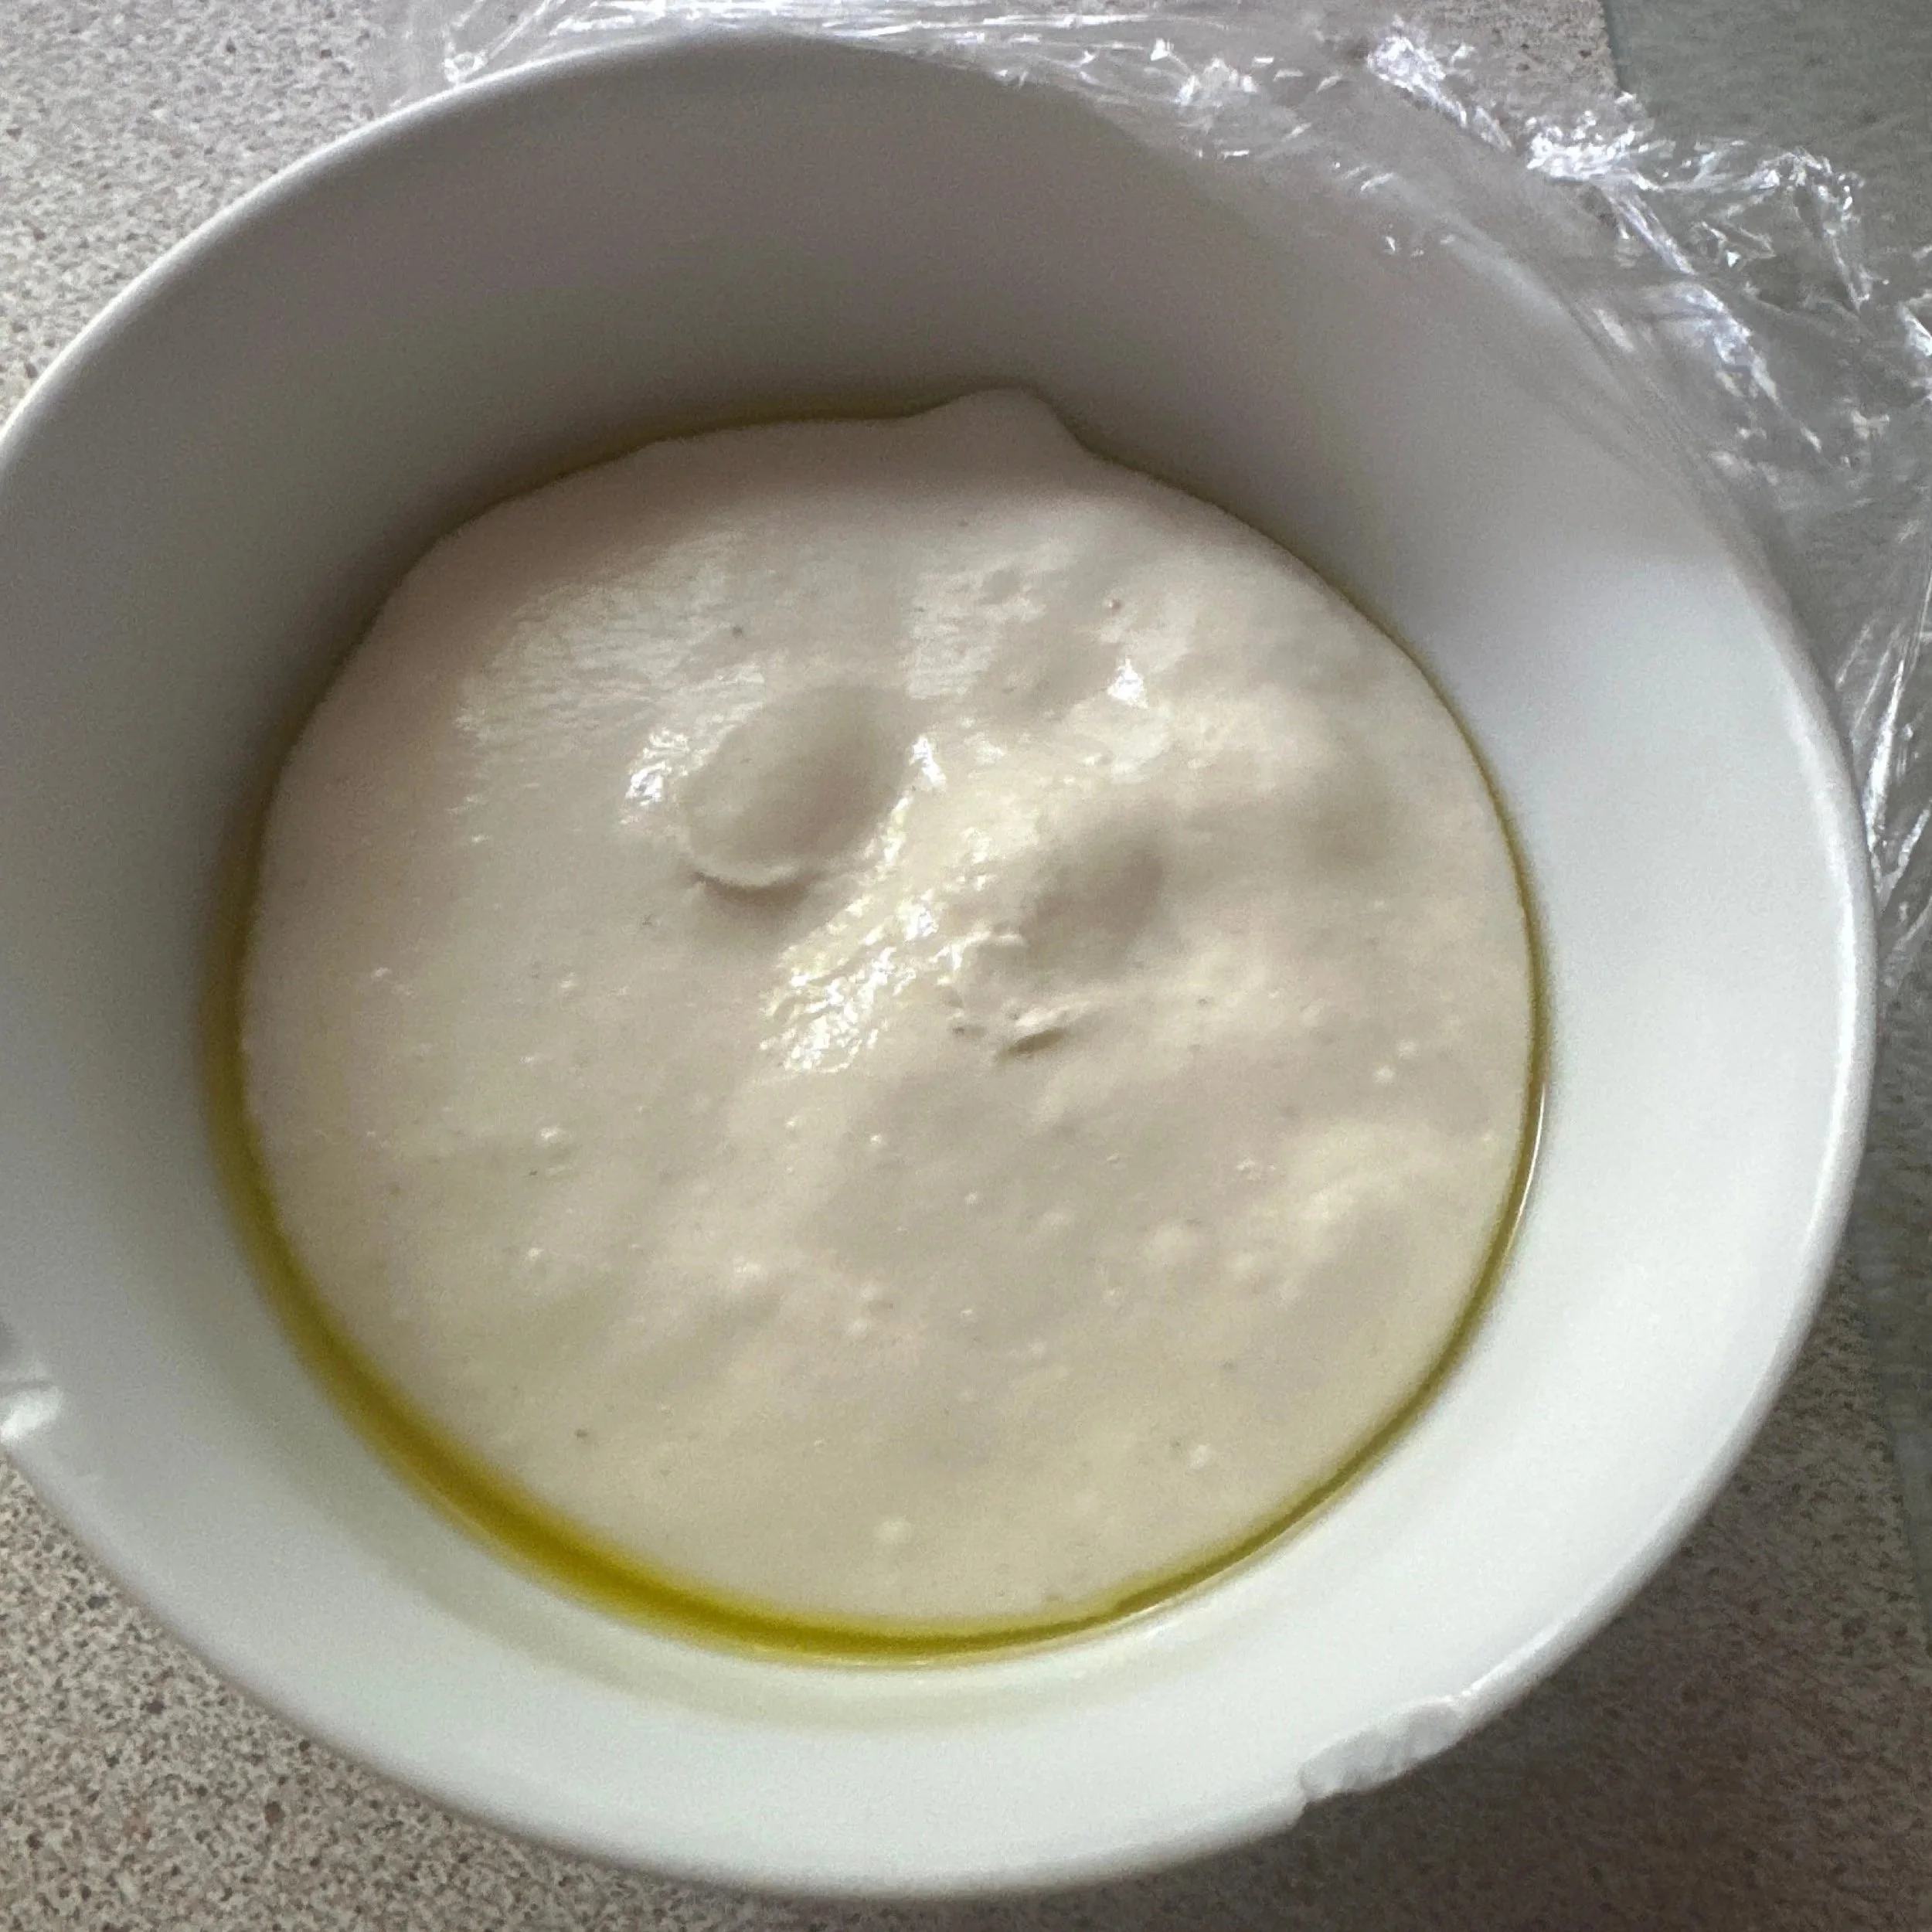
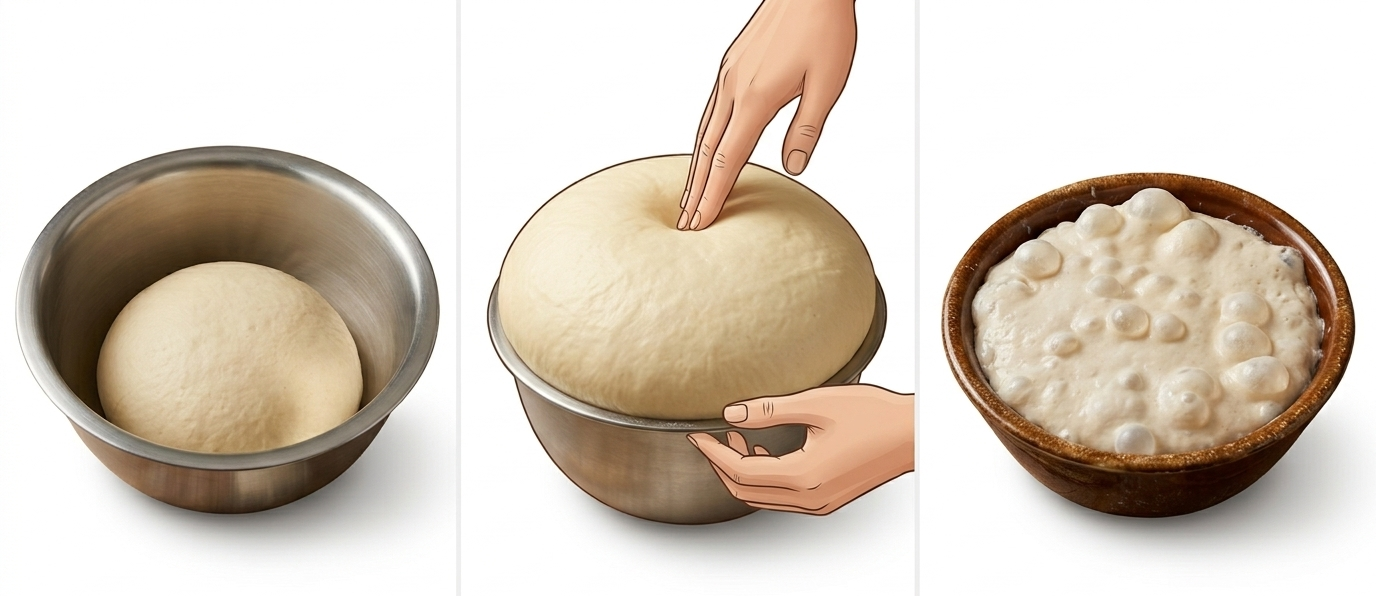
You look at the dough and see that it has grown, become smoother, and filled with air.
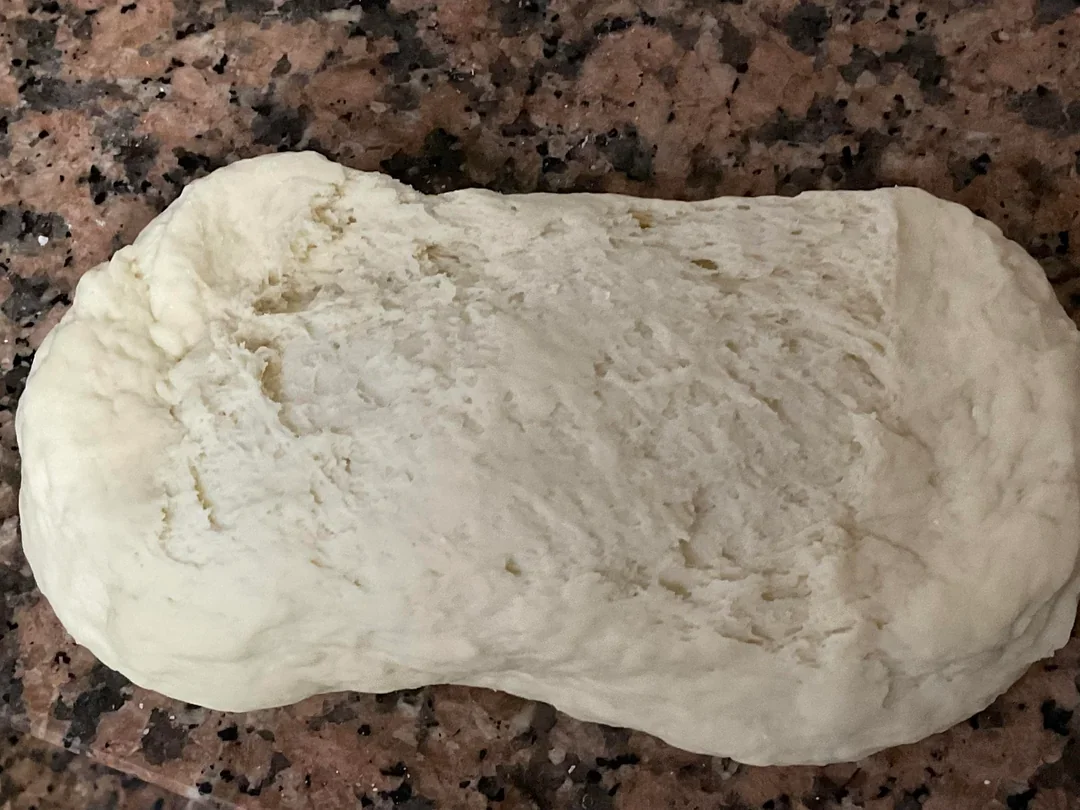
You're kneading the dough and feel it tearing.. you realize you need to cover it with a towel and let it rest for 20 minutes
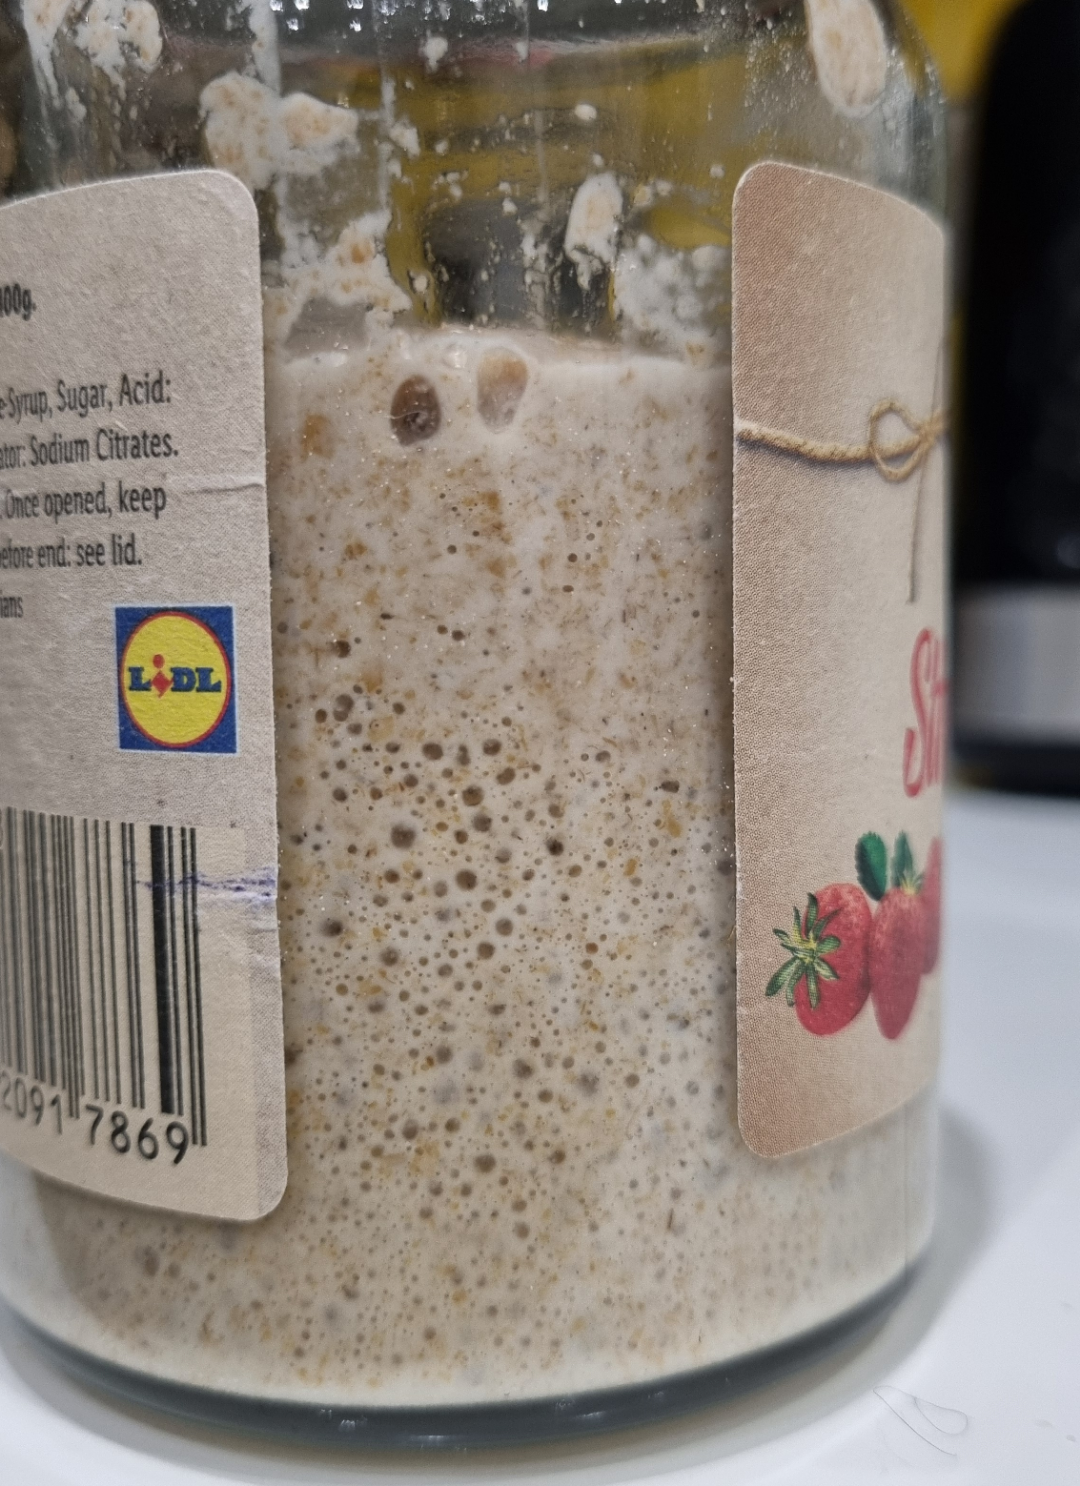
You check your sourdough starter: you look at the bubbles in the jar and taste the starter.
Hmm, it tastes bitter. I’ll feed it one more time before baking.. otherwise, the bread may turn out too sour.
We always weigh everything in grams, follow the recipe, and use a thermometer where it matters.
Then we adapt the process to your flour, your room temperature, your refrigerator, and your oven.
2. Why the same recipe gives you different results
Five years ago, my friends and I had a few drinks and threw together my first surprisingly decent pizza.
A week later, I thought I could definitely make it even better.
I bought special flour, found an improved recipe, tried to do everything properly — and ended up with a bland flatbread.
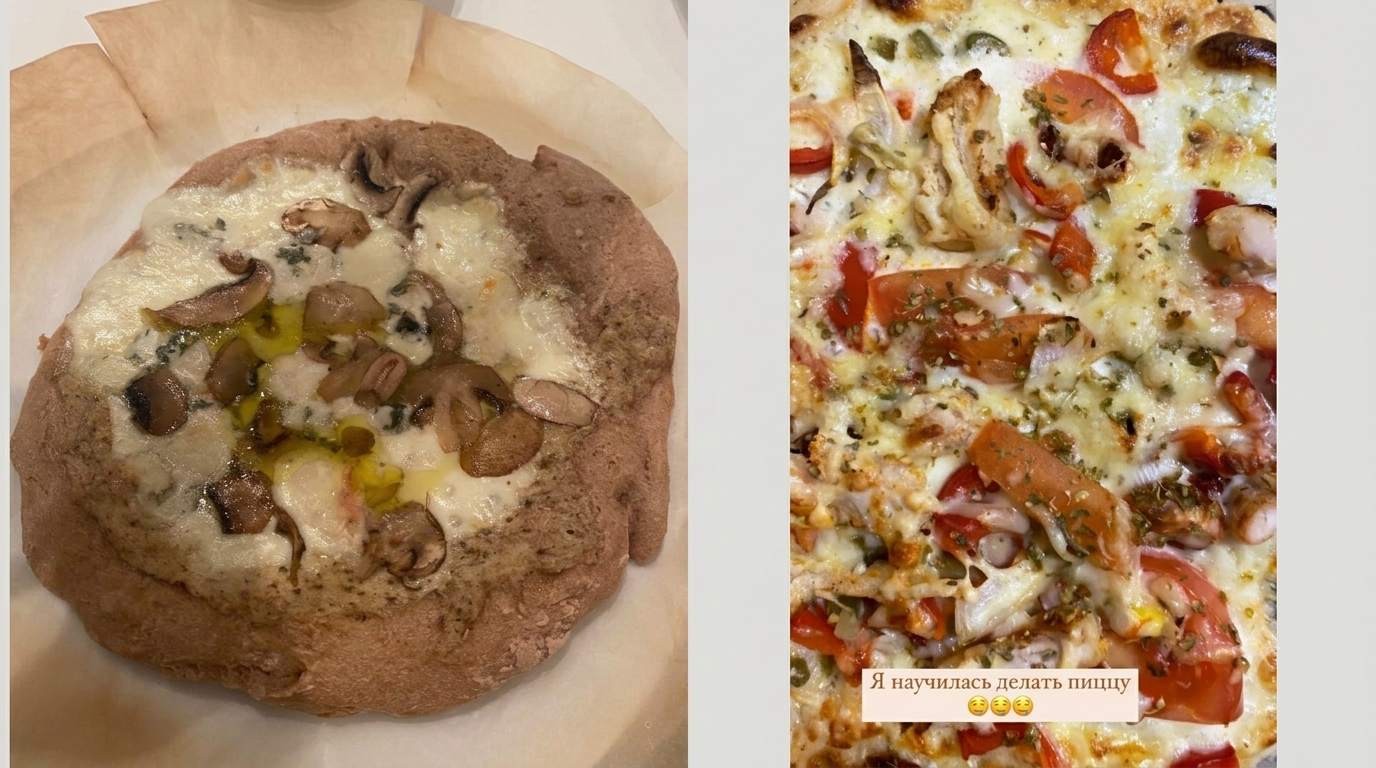
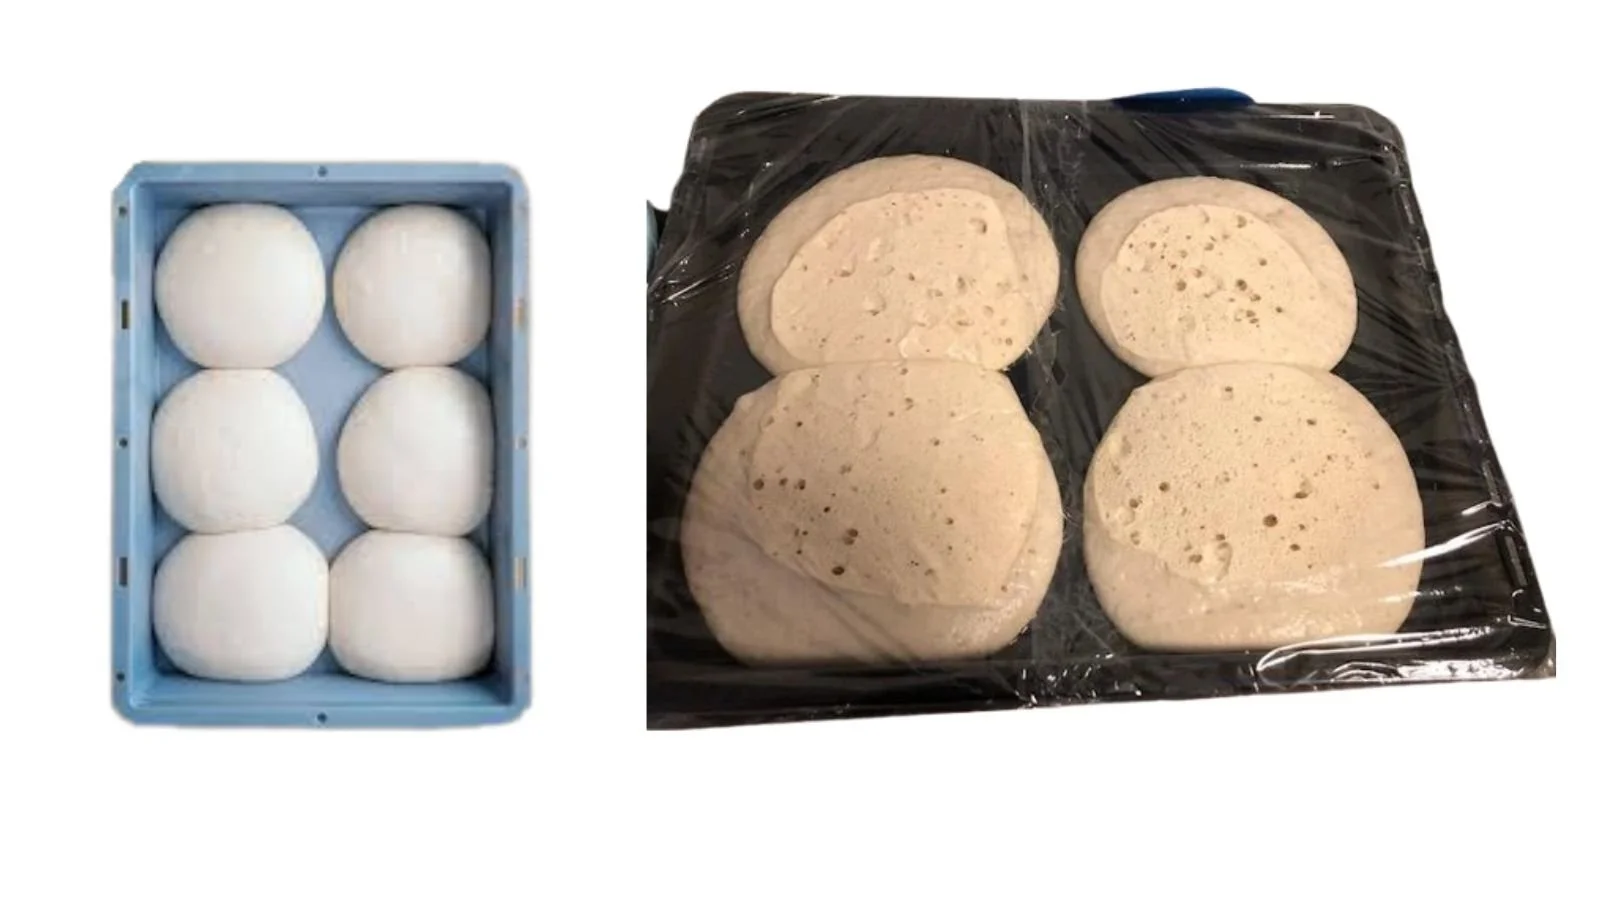
Attempts to make pizza in 2021
What went wrong if I followed the recipe?
the kitchen may have been warmer the first time, so the dough rose faster;
the second time, the room may have been cooler and two hours simply wasn’t enough;
the water may have been colder;
the new flour may have absorbed water differently;
the yeast may have worked more slowly;
my oven may have baked completely differently from the recipe writer’s oven.
At the very least, I ignored the temperature and trusted the sentence, “Wait two hours.”
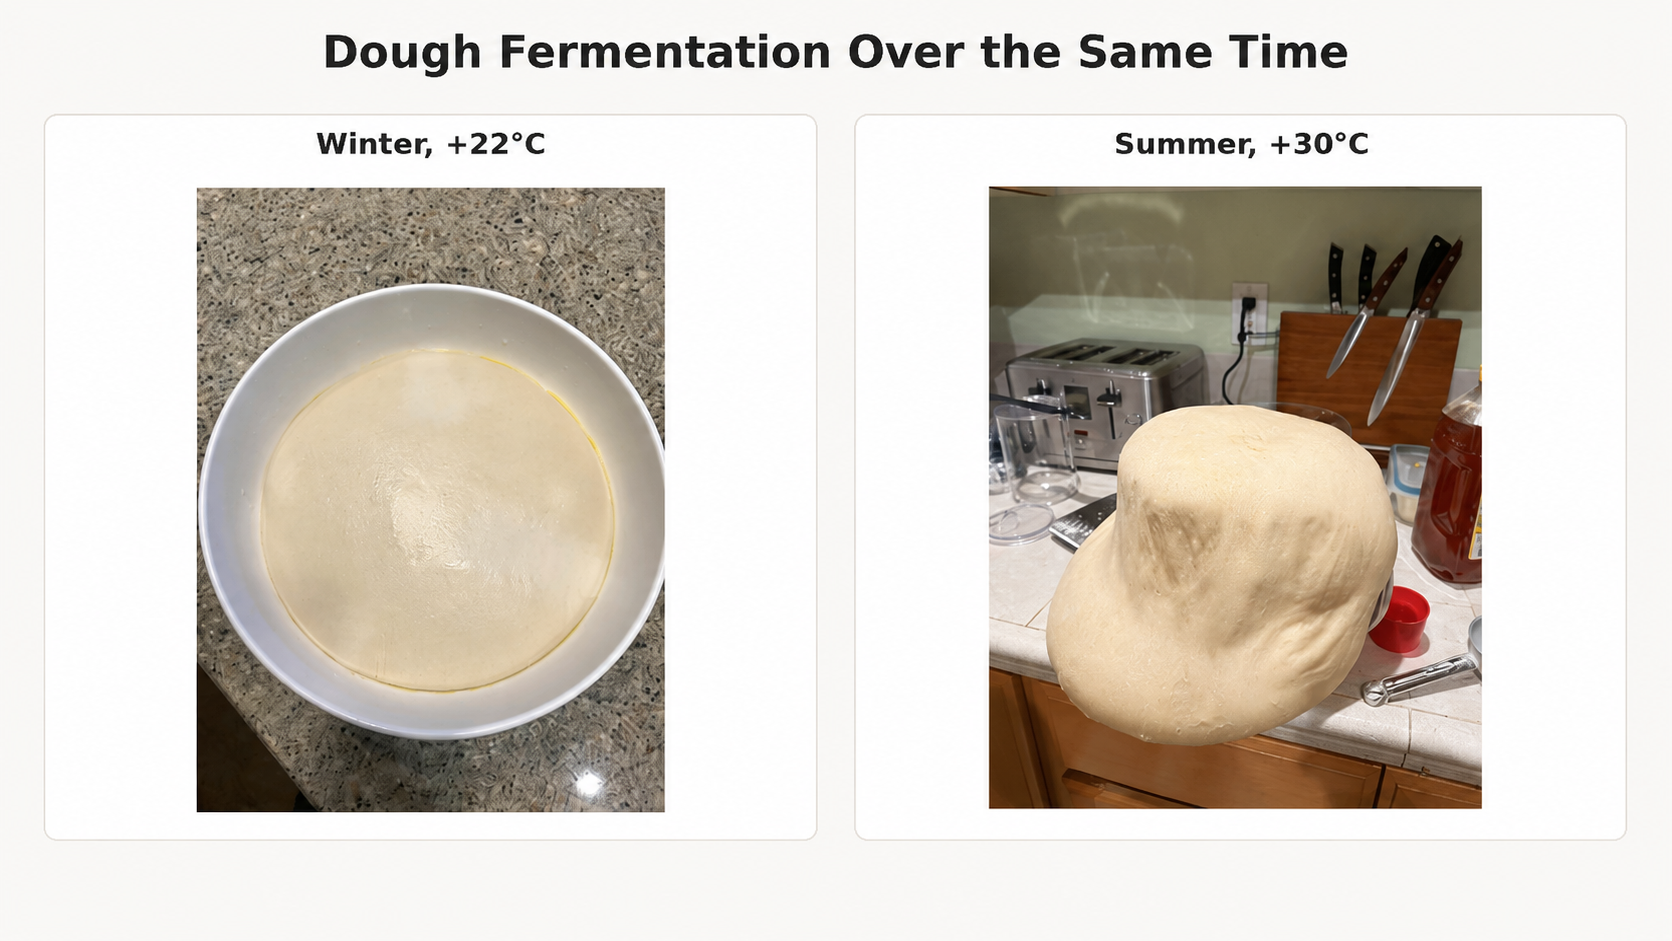
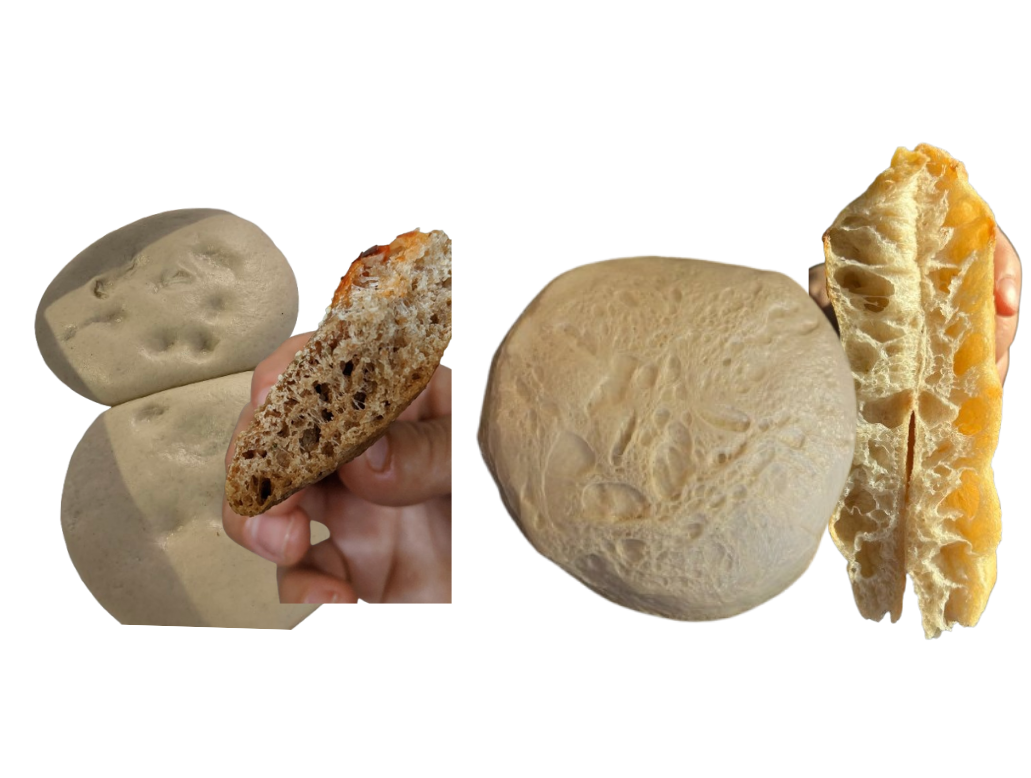
Left: dough fermented in winter at a kitchen temperature of +22°C. Right: dough fermented for the same amount of time in summer at +30°C.
But a recipe describes assumed conditions. You’re working with what you actually have:
flour from your local store;
the temperature in your kitchen;
your yeast or starter;
your refrigerator;
your oven.
The recipe writer may be using Italian flour and a professional oven.
You may be using your local supermarket flour and a gas oven.
That doesn’t mean you can’t get a great result at home. Sometimes the recipe alone isn’t enough, and you also need to look at the dough.
Maybe that sounded complicated, and you thought, “No way….this is too hard…. it’s not for me! I’d have to learn so much!”
Nope!
A relatively small amount of knowledge gives you most of the result. You need to learn how to:
notice how the dough changes;
understand what each stage is actually supposed to achieve;
account for temperature;
stop correcting the dough automatically;
change one variable at a time;
connect the final bake with what you saw and felt before it went into the oven.
Before
The recipe says: "Wait 2 hours."
→
After
After 2 hours, I check the volume, surface, bubbles, temperature, and how the dough feels.
Intuitive baking does not mean measuring ingredients by eye.
We still weigh the flour, water, salt, yeast, and everything else.
We don’t replace wheat flour with rye just because they’re both called flour.
We don’t dump in more flour the second the dough sticks to our fingers.
First we measure and then we watch what happens.
3. What intuitive baking means
Use your eyes, hands, sense of smell, and a thermometer to evaluate the dough and decide what to do next.
Measure → look → compare → decide
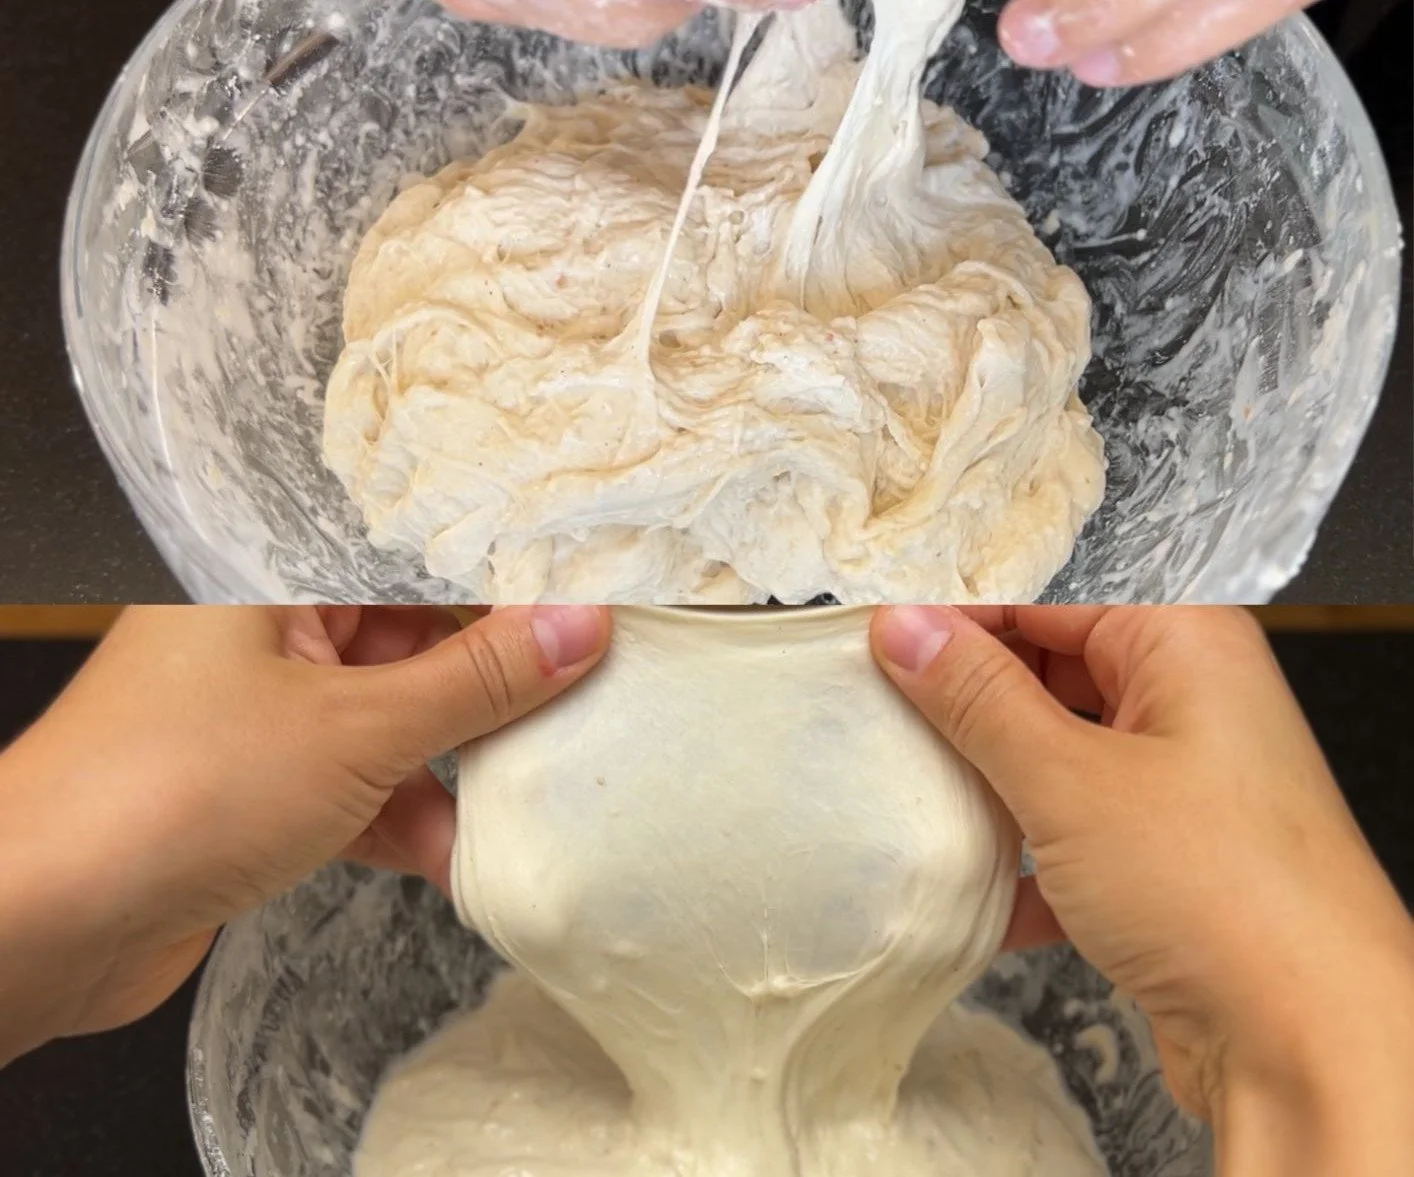
You mix the ingredients. The dough tears and looks uneven.
Instead of immediately adding more flour or continuing to beat it to death in the mixer, you cover it and leave it alone for 15–20 minutes.
After the rest, it becomes more cohesive and elastic, and you move on.
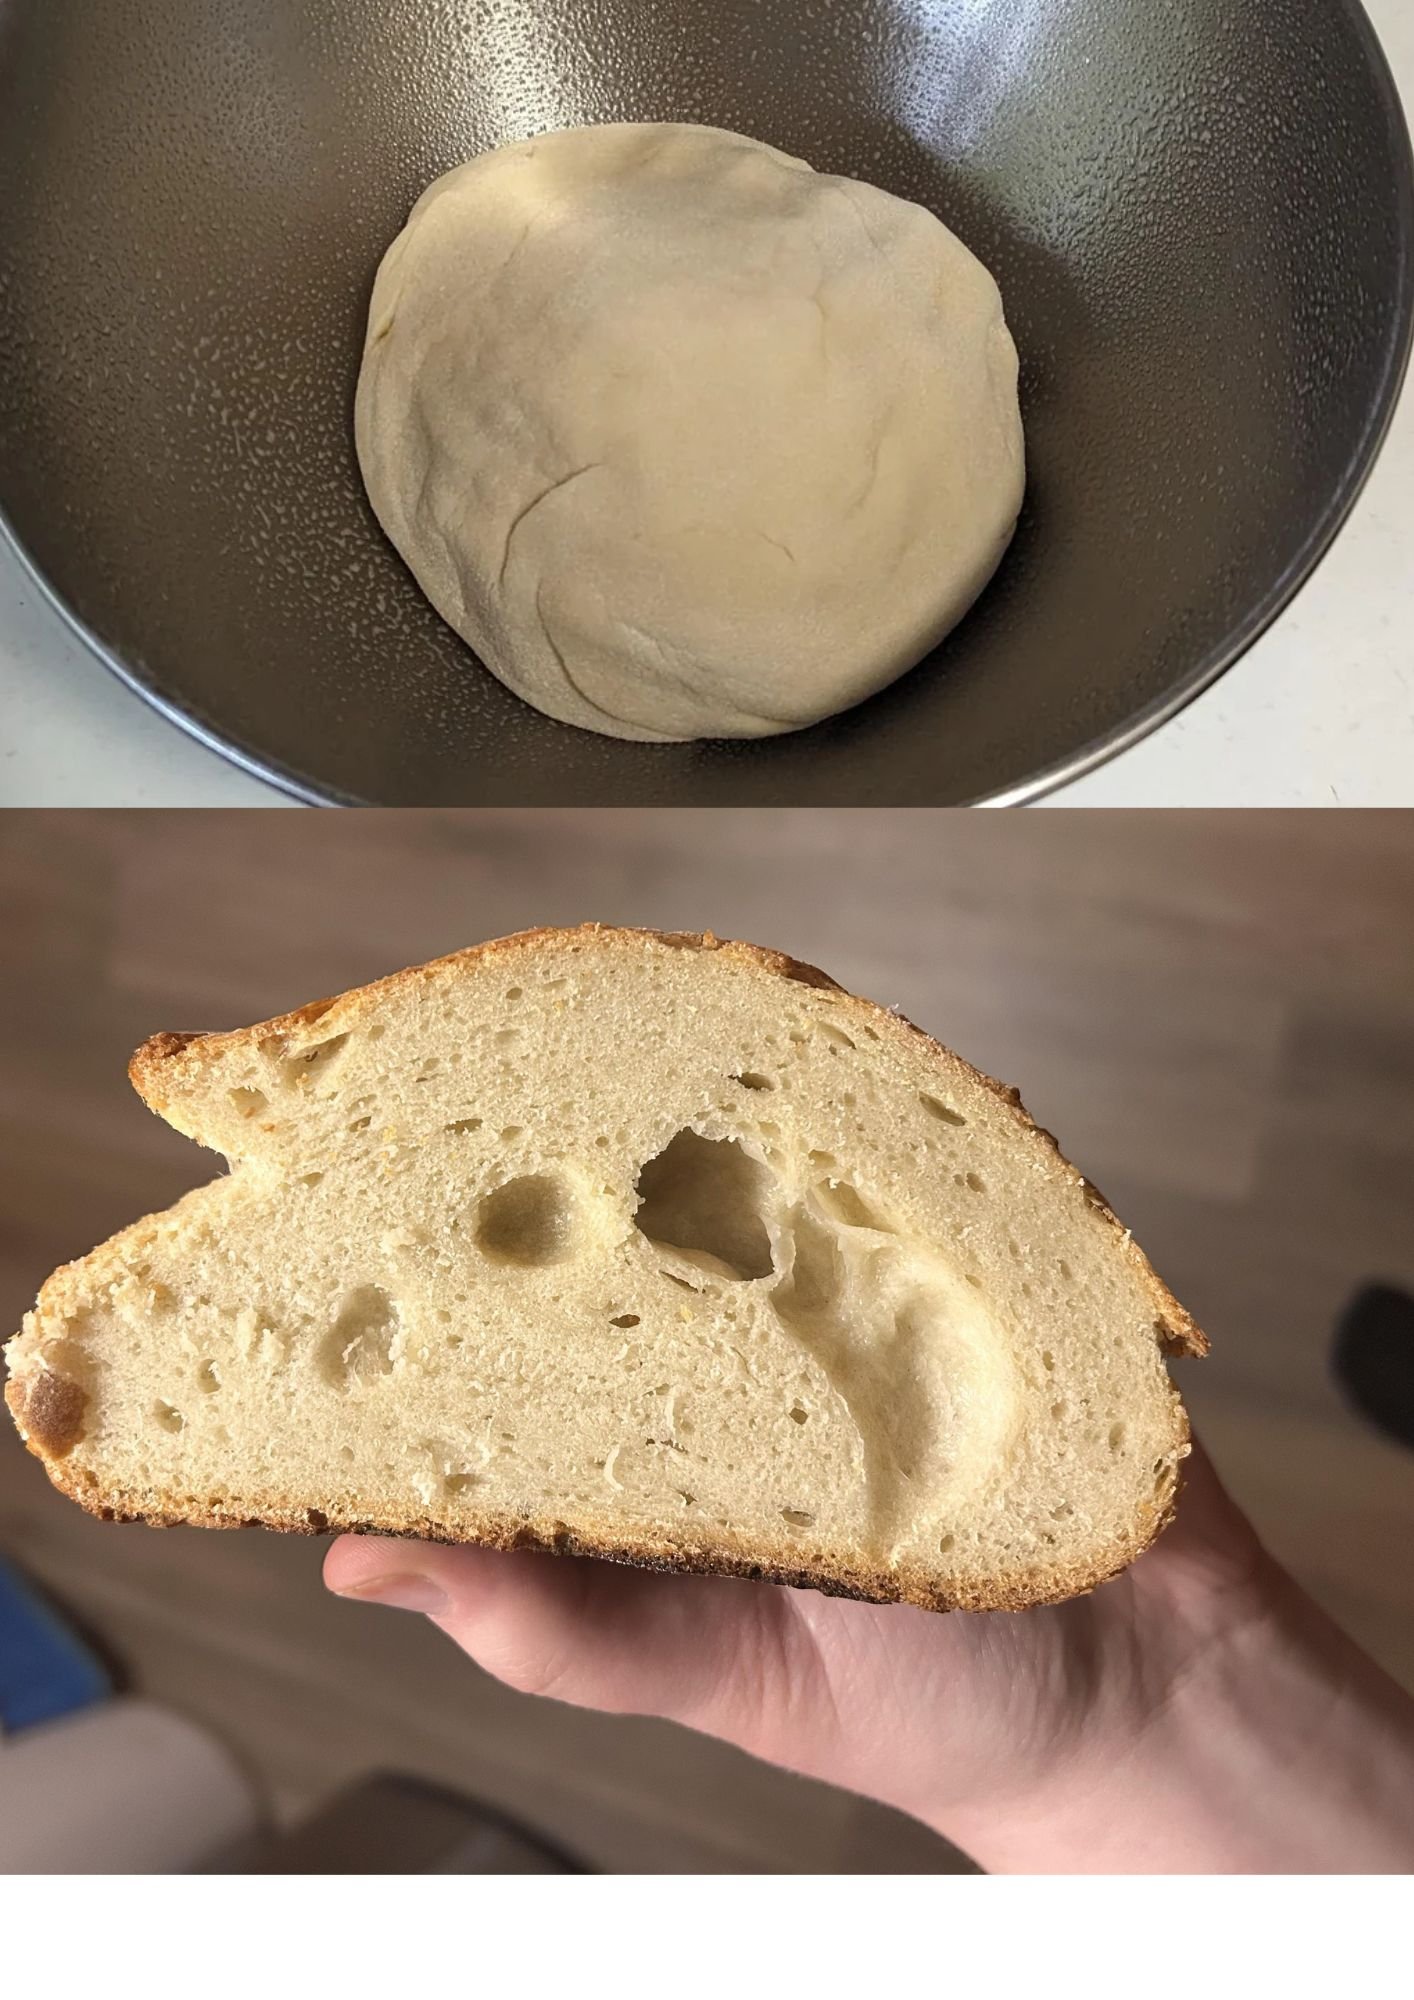
Or maybe the recipe tells you to let the dough rise for two hours.
Two hours later, you check it and barely see any change. It’s still dense and springy, with very little air inside.
Maybe the room is too cold. Maybe the yeast or starter wasn’t active enough.
But the recipe said to bake after two hours, so you bake it anyway. The result is a dense, heavy crumb that looks nothing like what you expected.
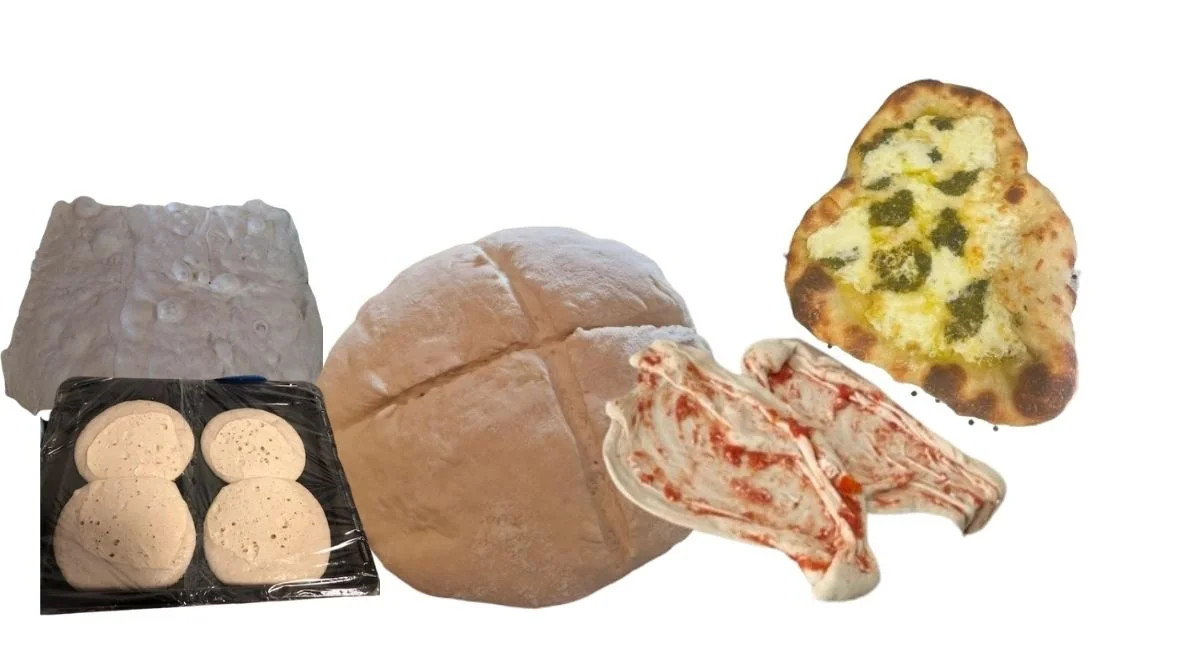
You want to make pizza, and a pizzaiolo tells you the dough absolutely has to ferment for 48 hours or it won’t be good.
But your flour isn’t designed for that schedule, your kitchen is warm, and you used more yeast than necessary.
After 48 hours, the dough has lost its shape, spreads everywhere, and tears easily.
The problem is that time can’t be separated from your conditions. Flour, temperature, and the amount of yeast. The recipe explains ”how”. The dough and your conditions show you when it’s time to move on.
4. Your main tools: eyes, hands, nose, and temperature
You look at several things at once and compare the dough with how it looked at the beginning of the stage.
With your eyes: what has changed?
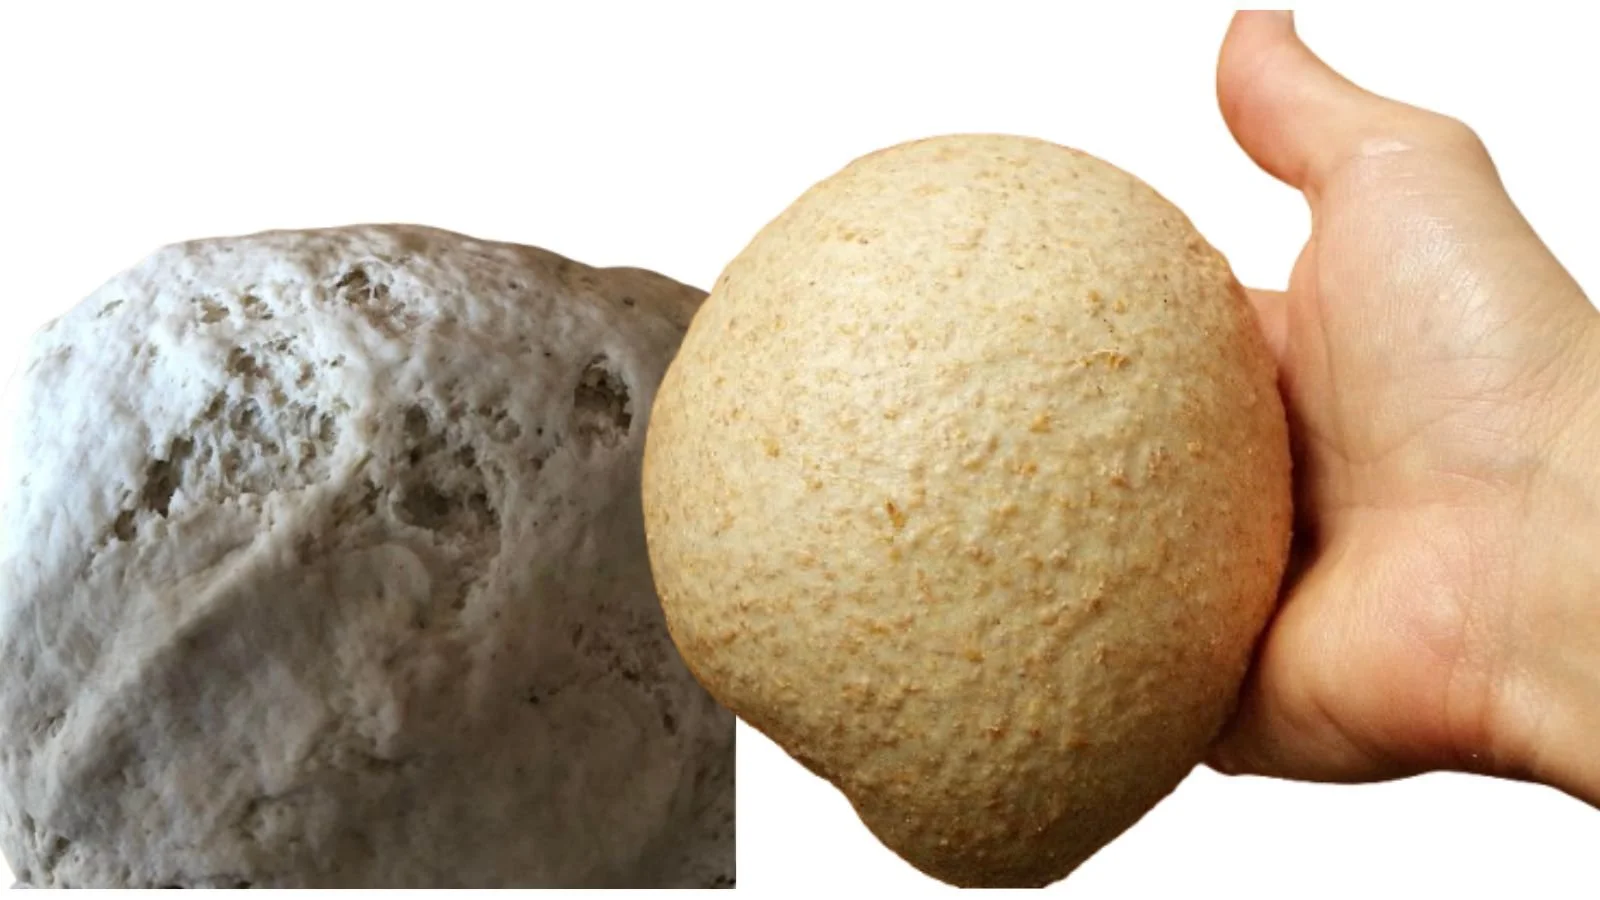
has the surface become smoother, or is it still rough and torn?
does the dough hold its shape, or is it spreading?
has it clearly increased in volume, or barely changed?
does the surface still look taut, or has it started to collapse
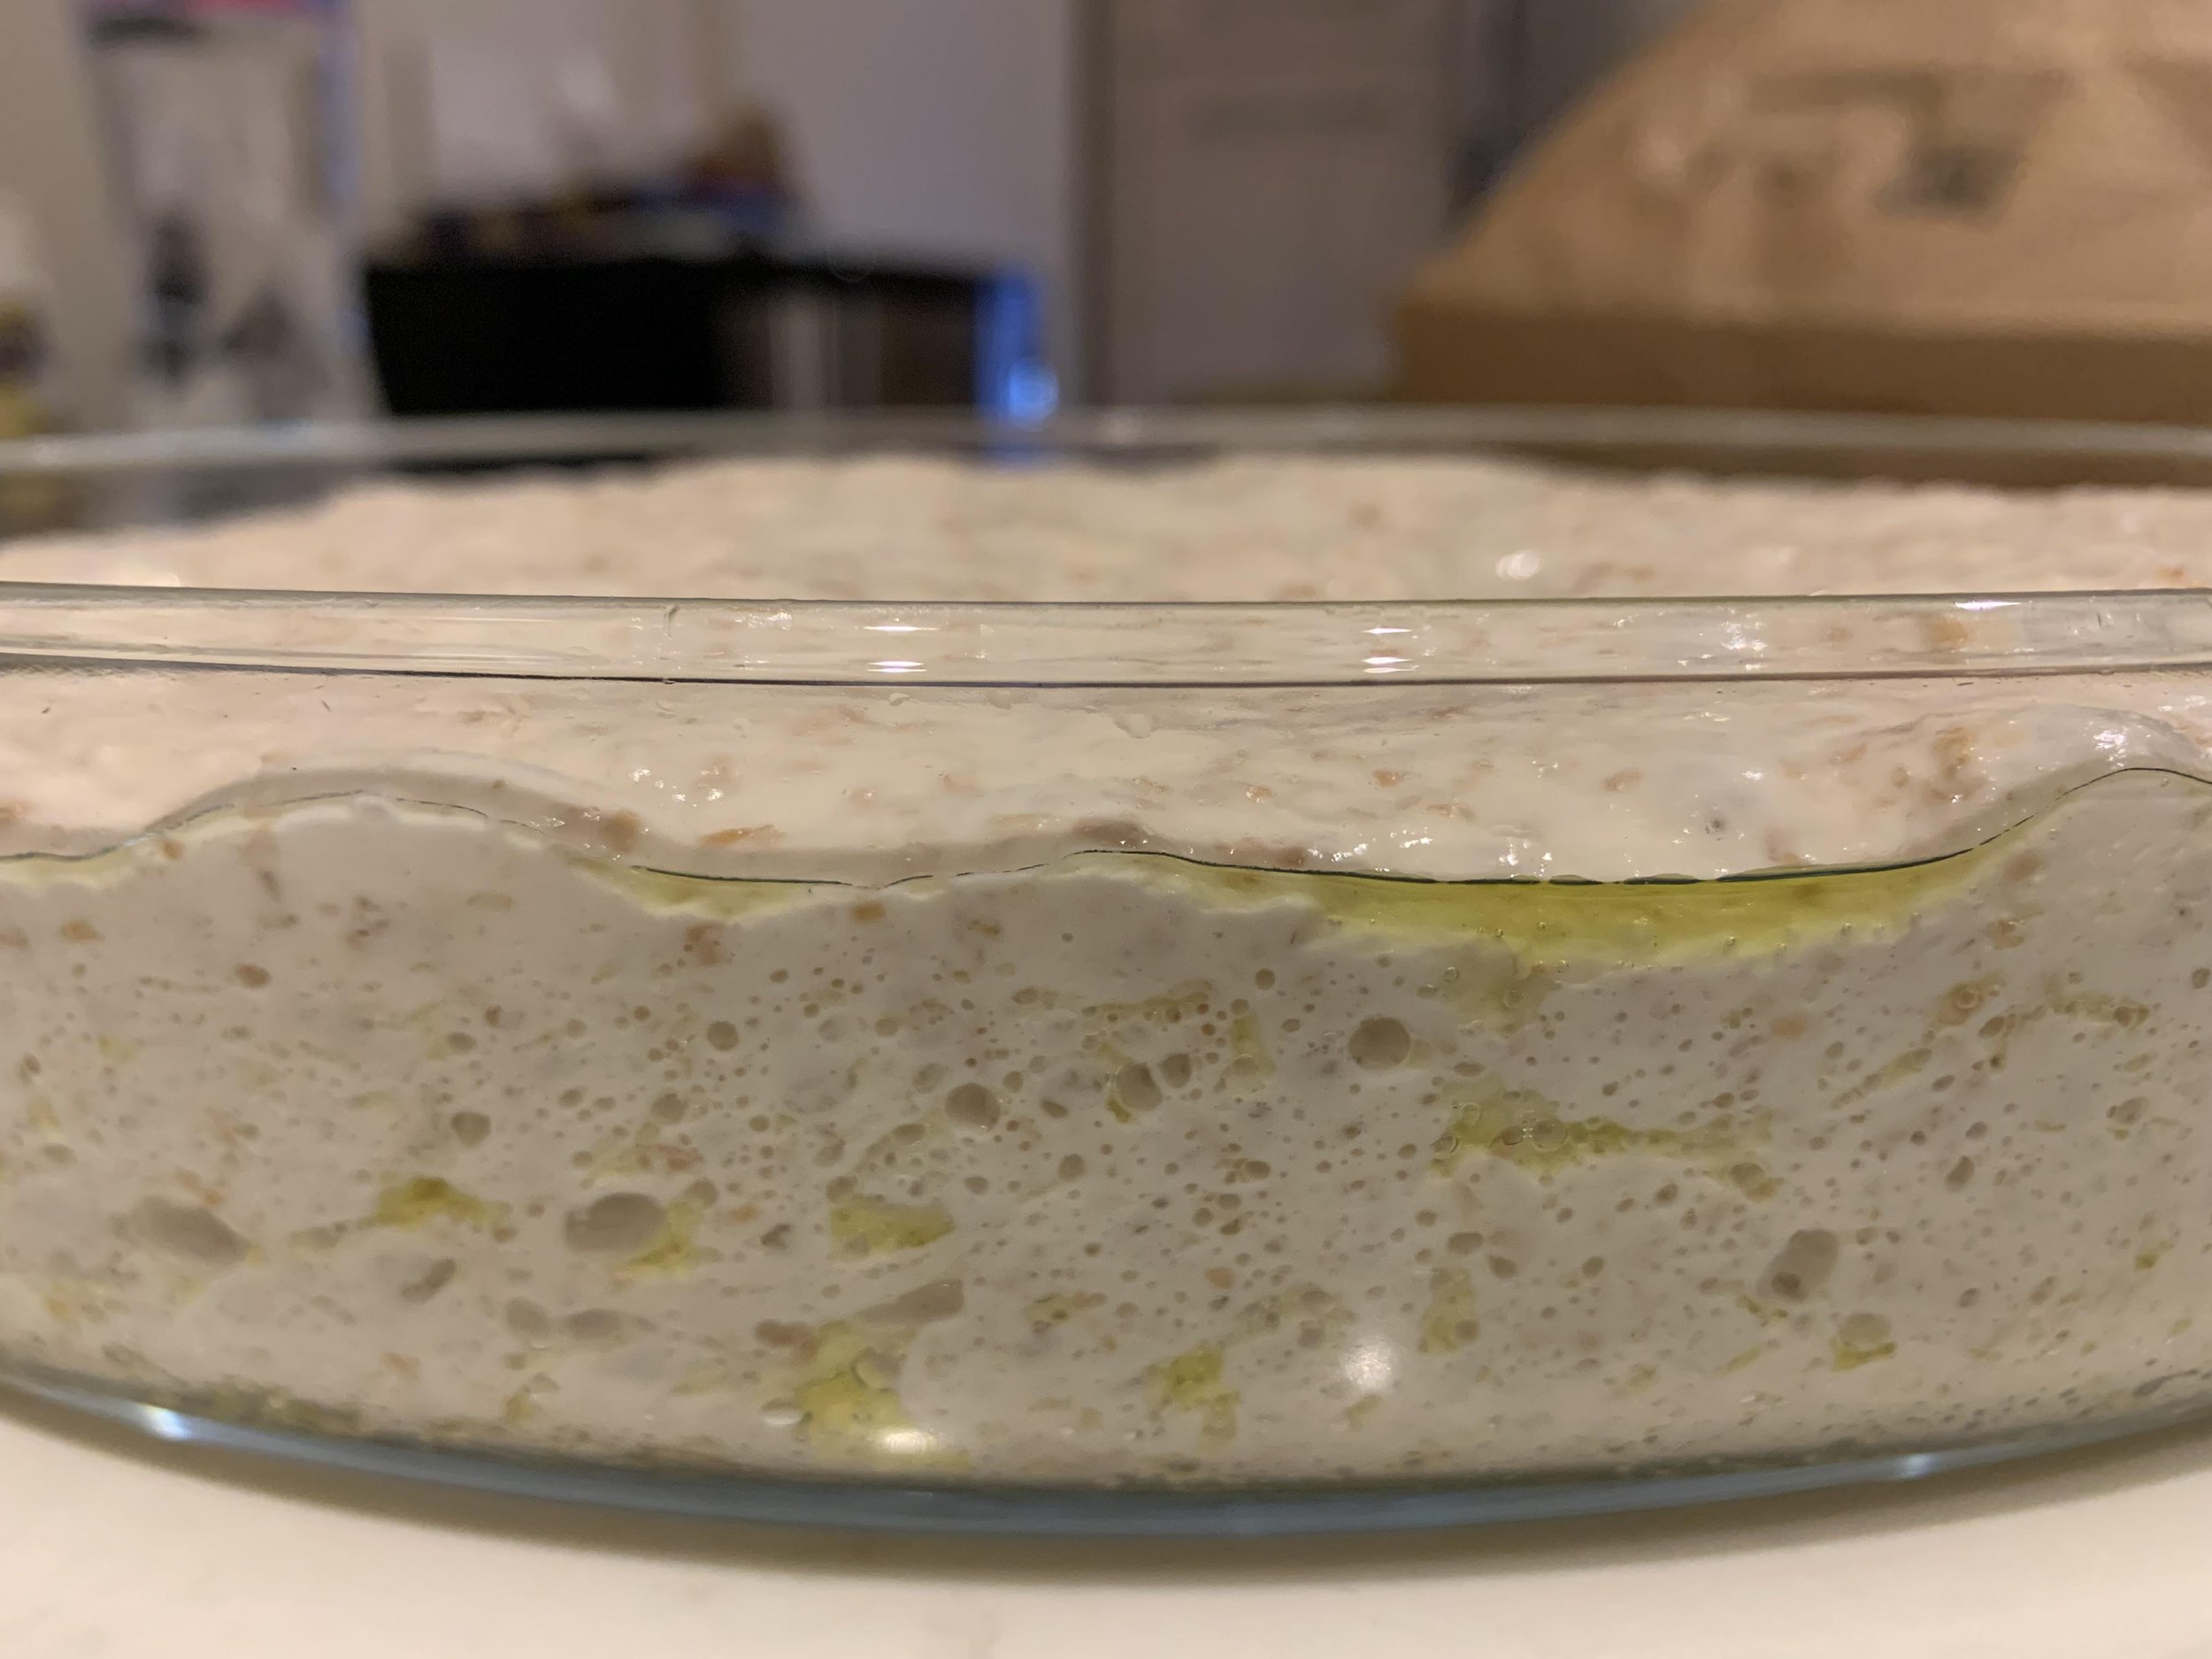
can you see bubbles through the sides of the container?
With your hands: How does the dough respond?
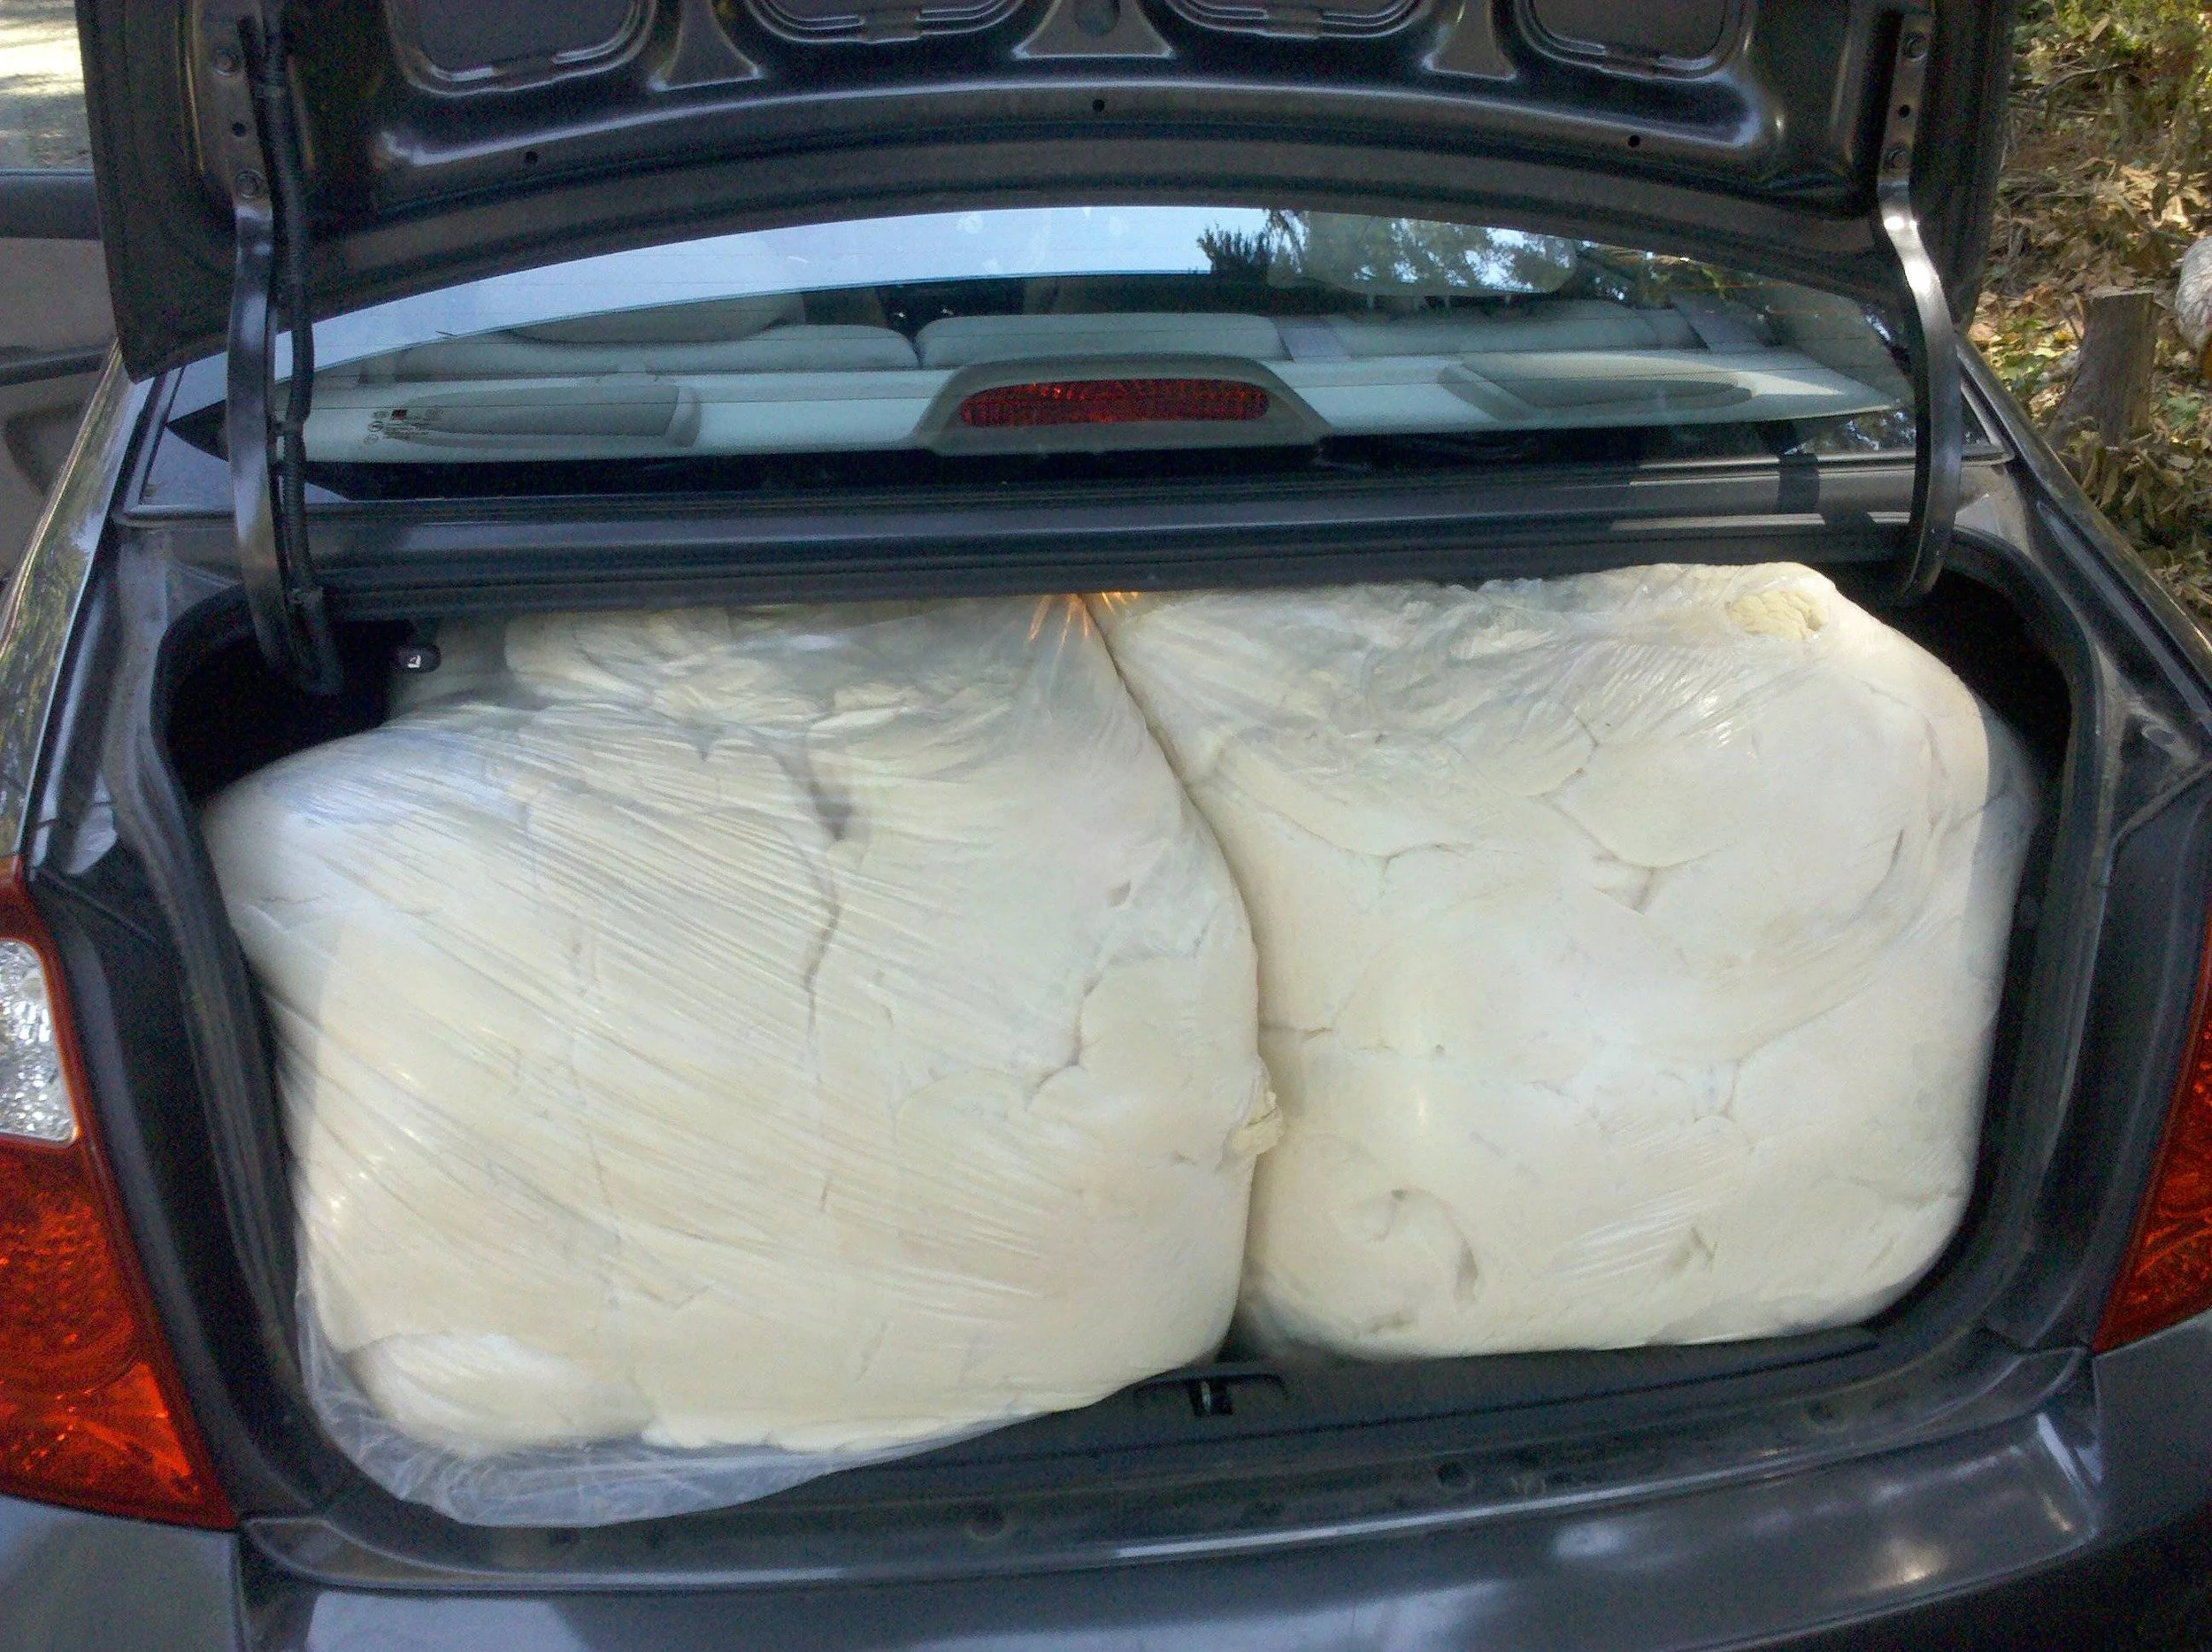
it feels cold, comfortably warm, or noticeably hot?
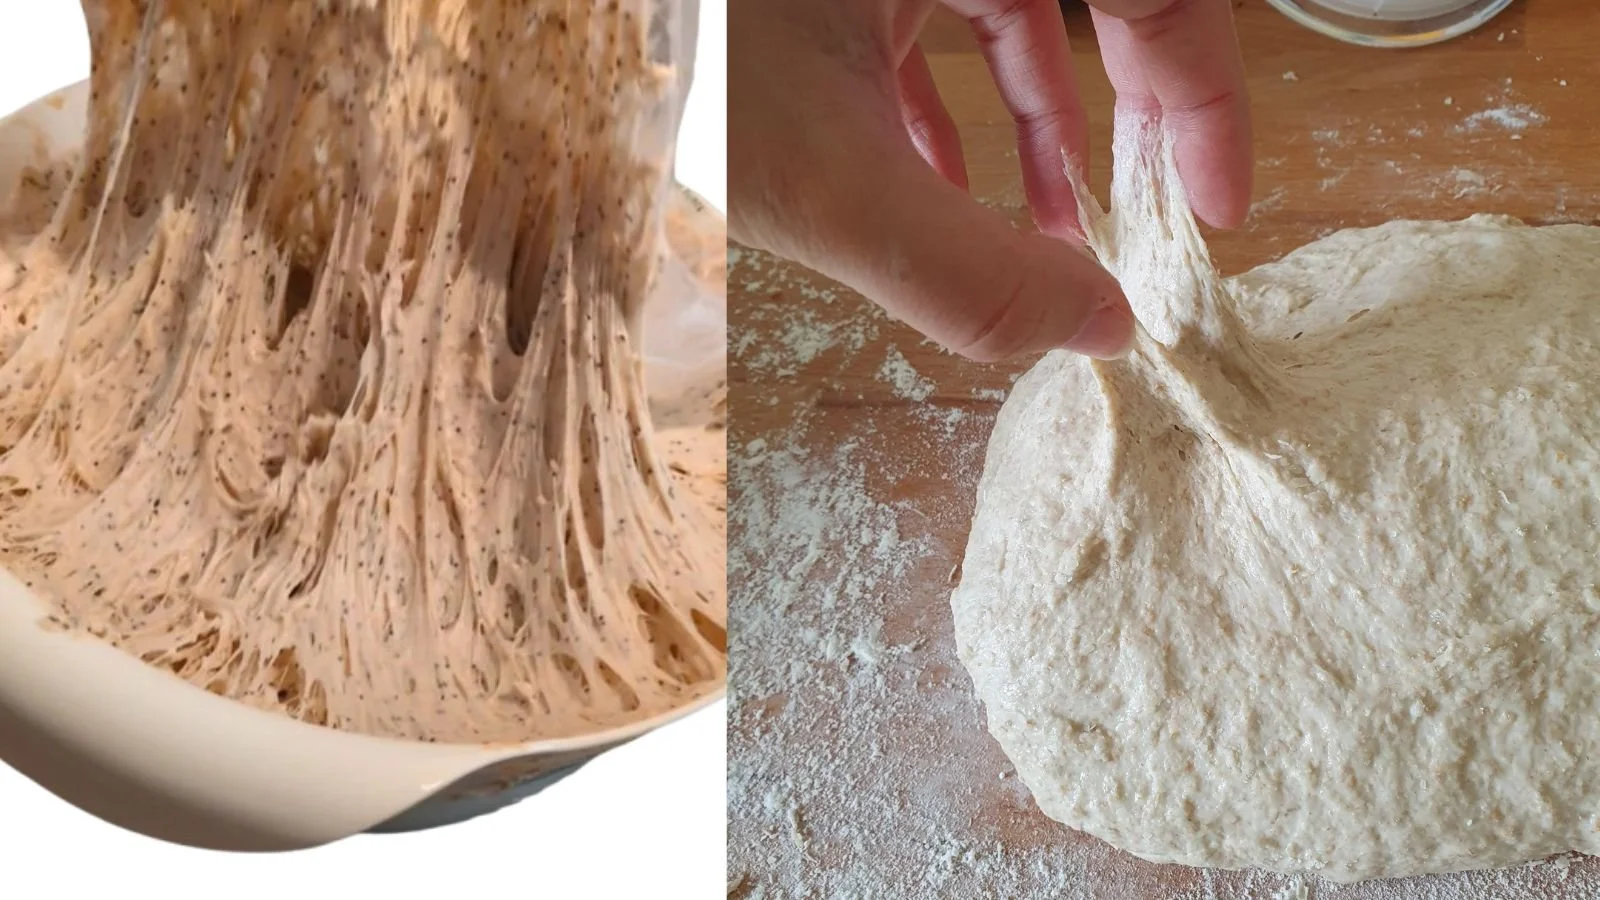
it sticks badly or only catches slightly?
it stretches or tears right away?
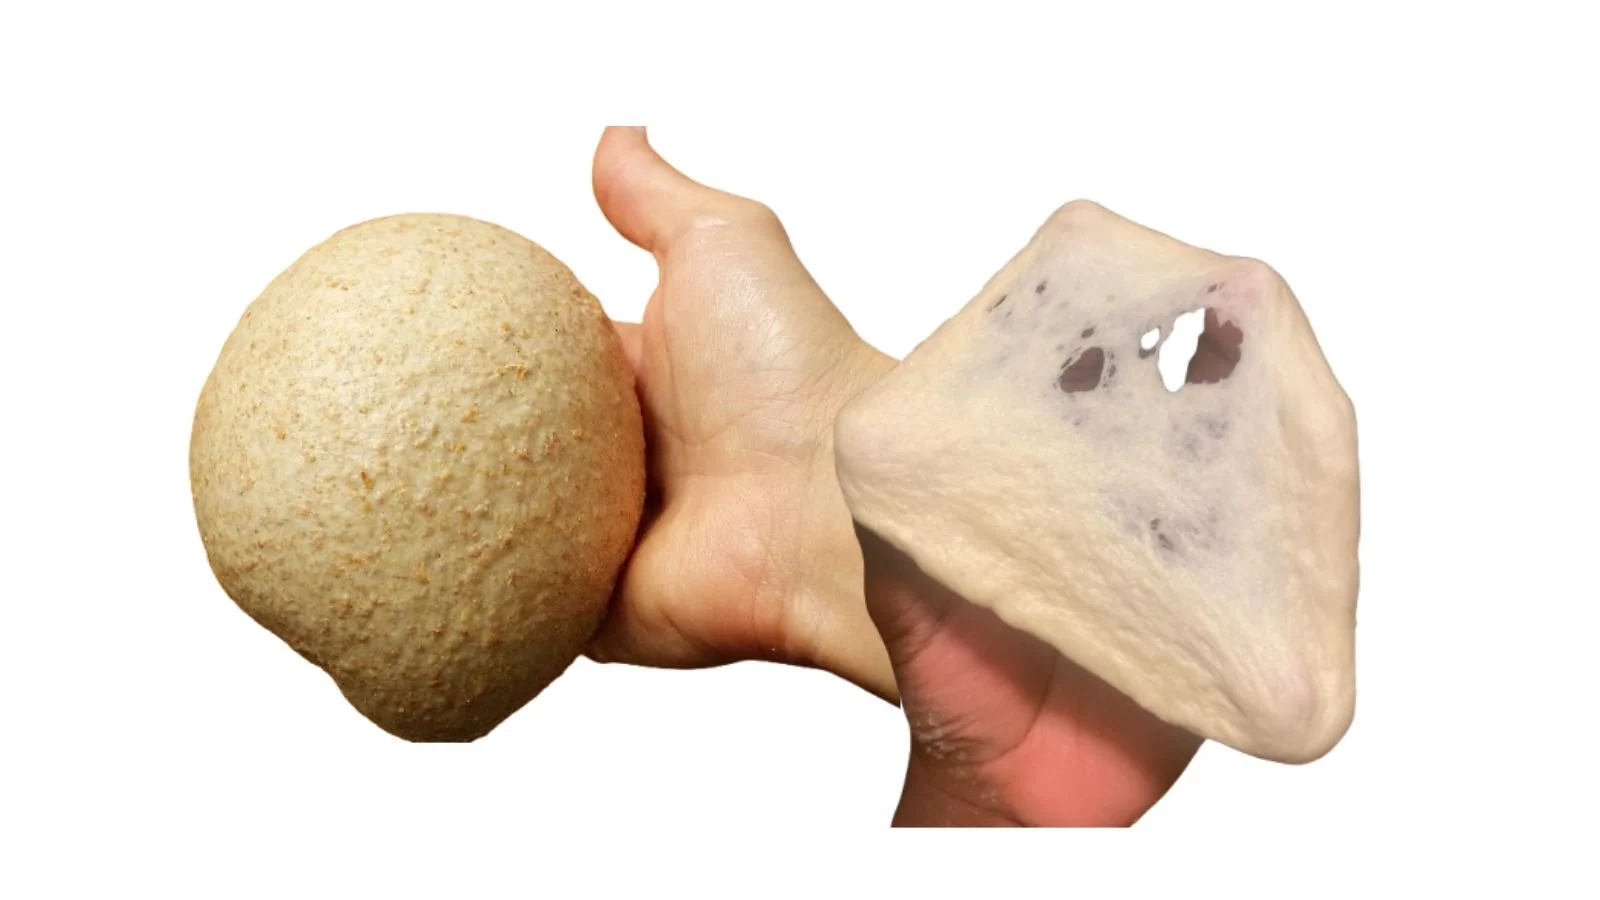
it resists you or has already softened?
it holds its shape or spreads?
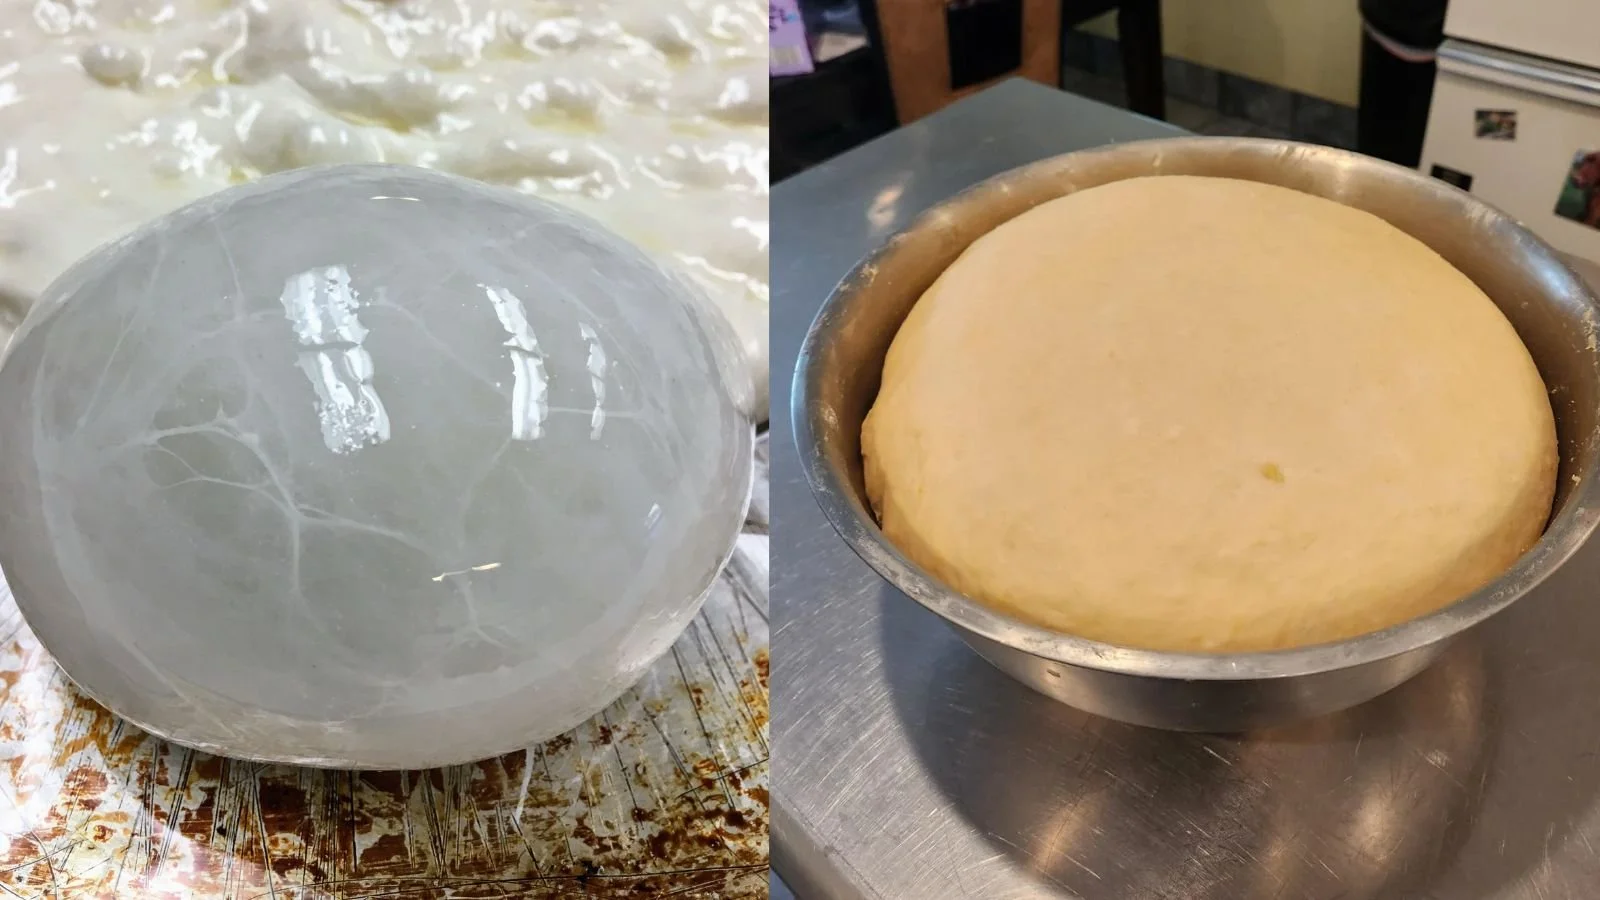
wet vs. stiff enrich dough
If you gently move the bowl, a wet bread dough may wobble softly, almost like jelly.
But that is not a universal sign. A stiff bun dough or an enriched dough will behave differently.
And stickiness by itself doesn’t prove anything. The dough may be sticky because of its hydration (70-80%), temperature, mixing stage, or the flour itself. It doesn’t automatically mean you should add more flour.
With your nose: how is the smell changing?
The dough or starter may smell:
like fresh flour;
almost neutral;
gently cultured or yogurt-like;
strongly yeasty;
sharply alcoholic;
unpleasantly sour.
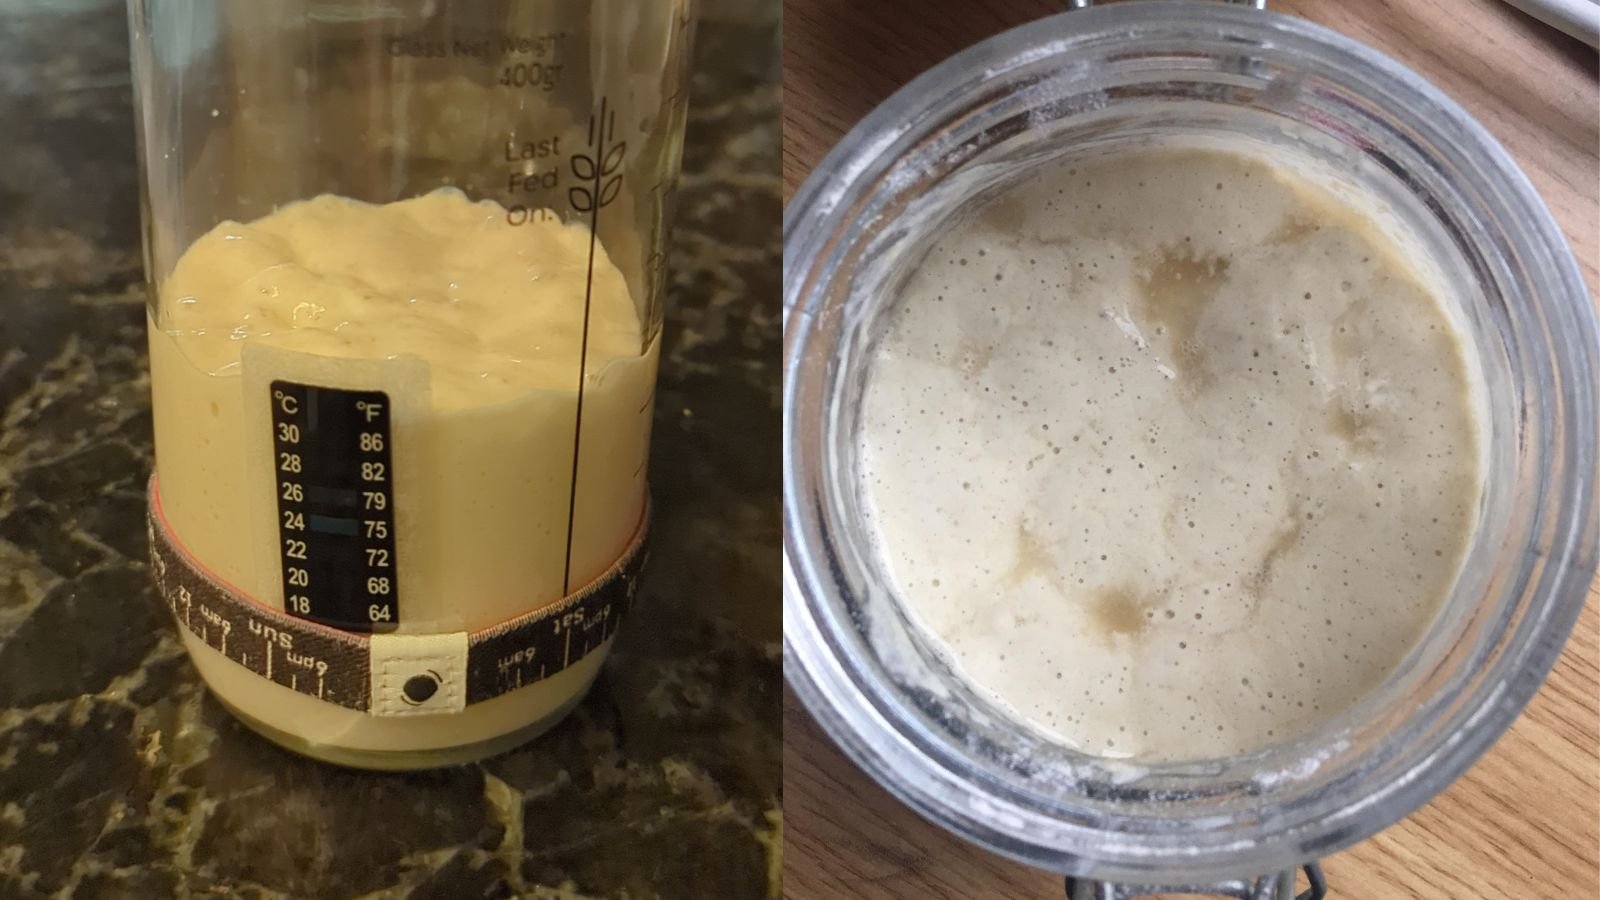
a healthy active fresh starter, which smells like yogurt
vs. an acidic starter which needs feeding, smells like alcohol
Temperature: why it’s easy to het confused without it
Temperature has a HUGE effect on the speed of the process.
At around 20°C (68°F), sourdough fermentation can easily take all night. Sourdough dough usually ferments more slowly than dough made with commercial yeast.
At around 28-30°C (82-86°F), yeasted dough can rise very quickly — sometimes in just 30–60 minutes, depending on how much yeast you used. And putting it in the refrigerator doesn’t stop fermentation immediately. It keep rising very fast even there!
That’s why I adjust the amount of yeast and % of sourdough starter depending on the season and usually use less in summer.
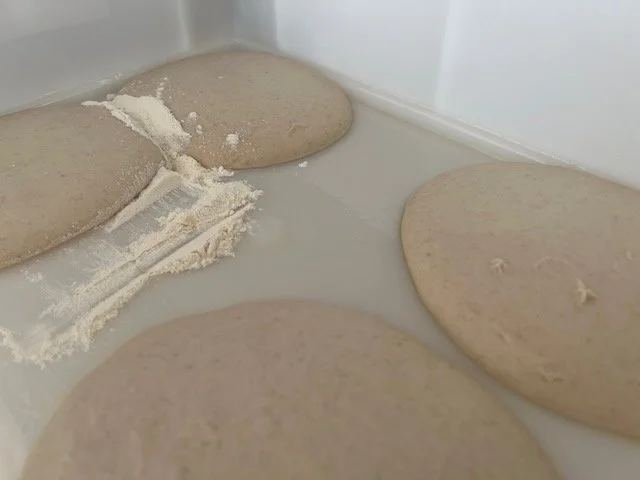
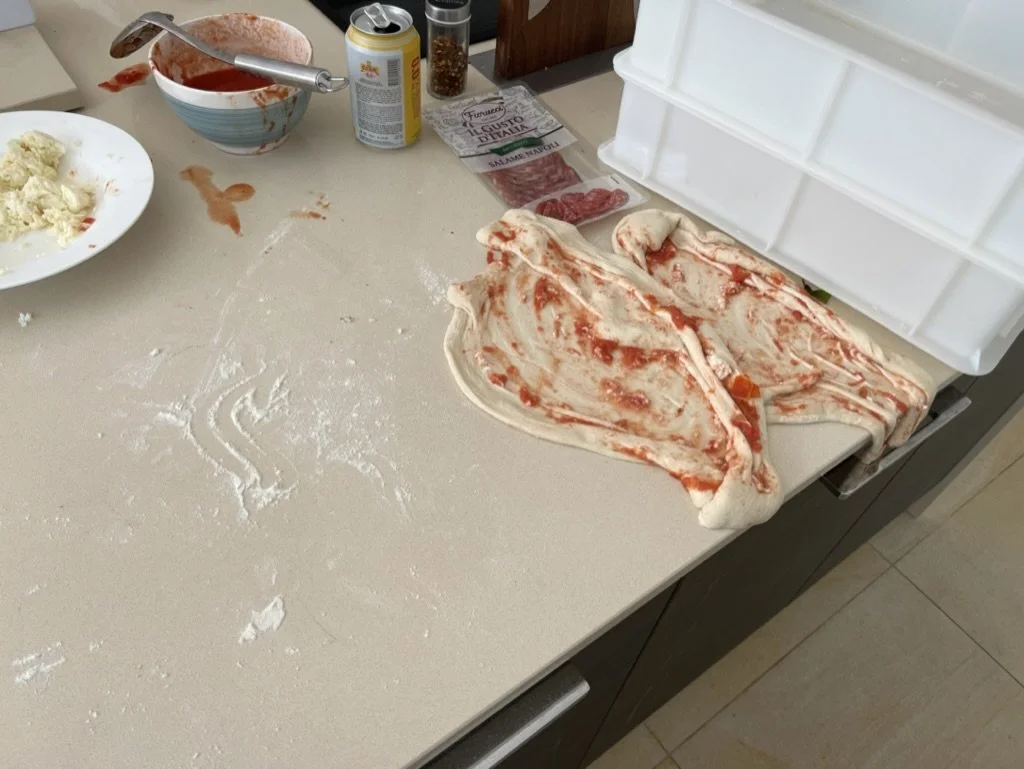
the effects of high temperatures at home and an excessive amount of yeast
5. A universal diagnosis: too early, ready, or too late
Stage 1. Mixing and Kneading
Too early to stop
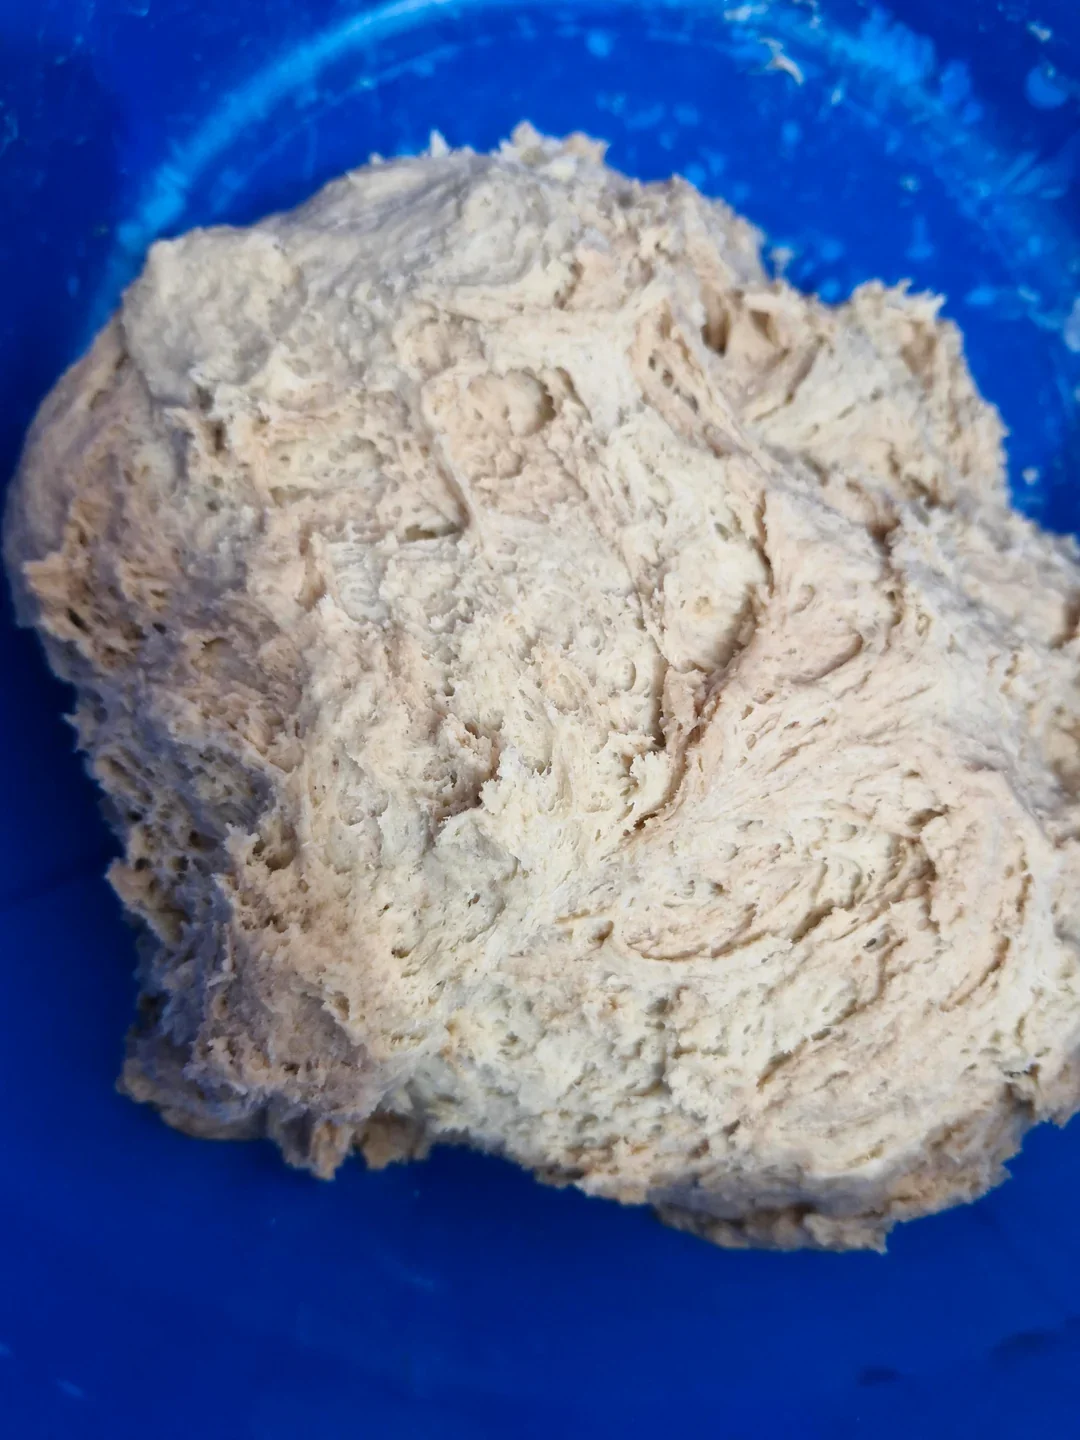
You may see: dry patches of flour.
Things to check: have the ingredients had enough time to combine.
Sometimes, simply mixing the flour and water and leaving them to rest for 30 minutes is enough to let the flour fully hydrate.
You see:
unincorporated water or fat;
an uneven mass;
dough that falls apart or tears easily.
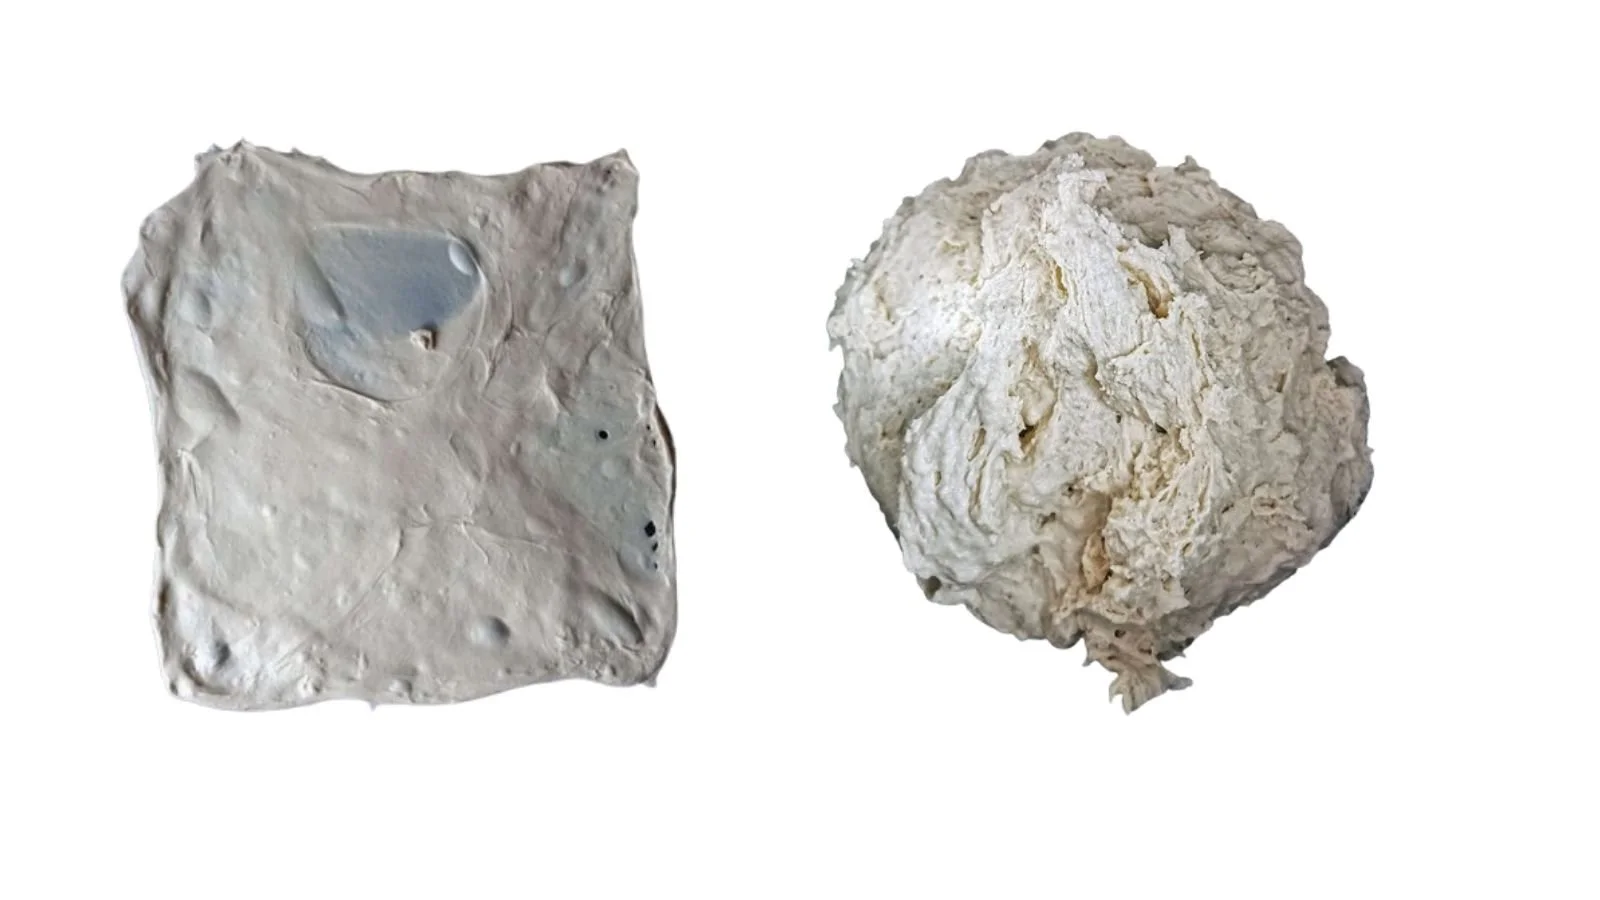
This means the gluten hasn't developed enough.
Mix by hand for 5 minutes, then let the dough rest for 20 minutes. Check the dough and repeat one more round if needed.
The dough is ready to stop mixing and kneading
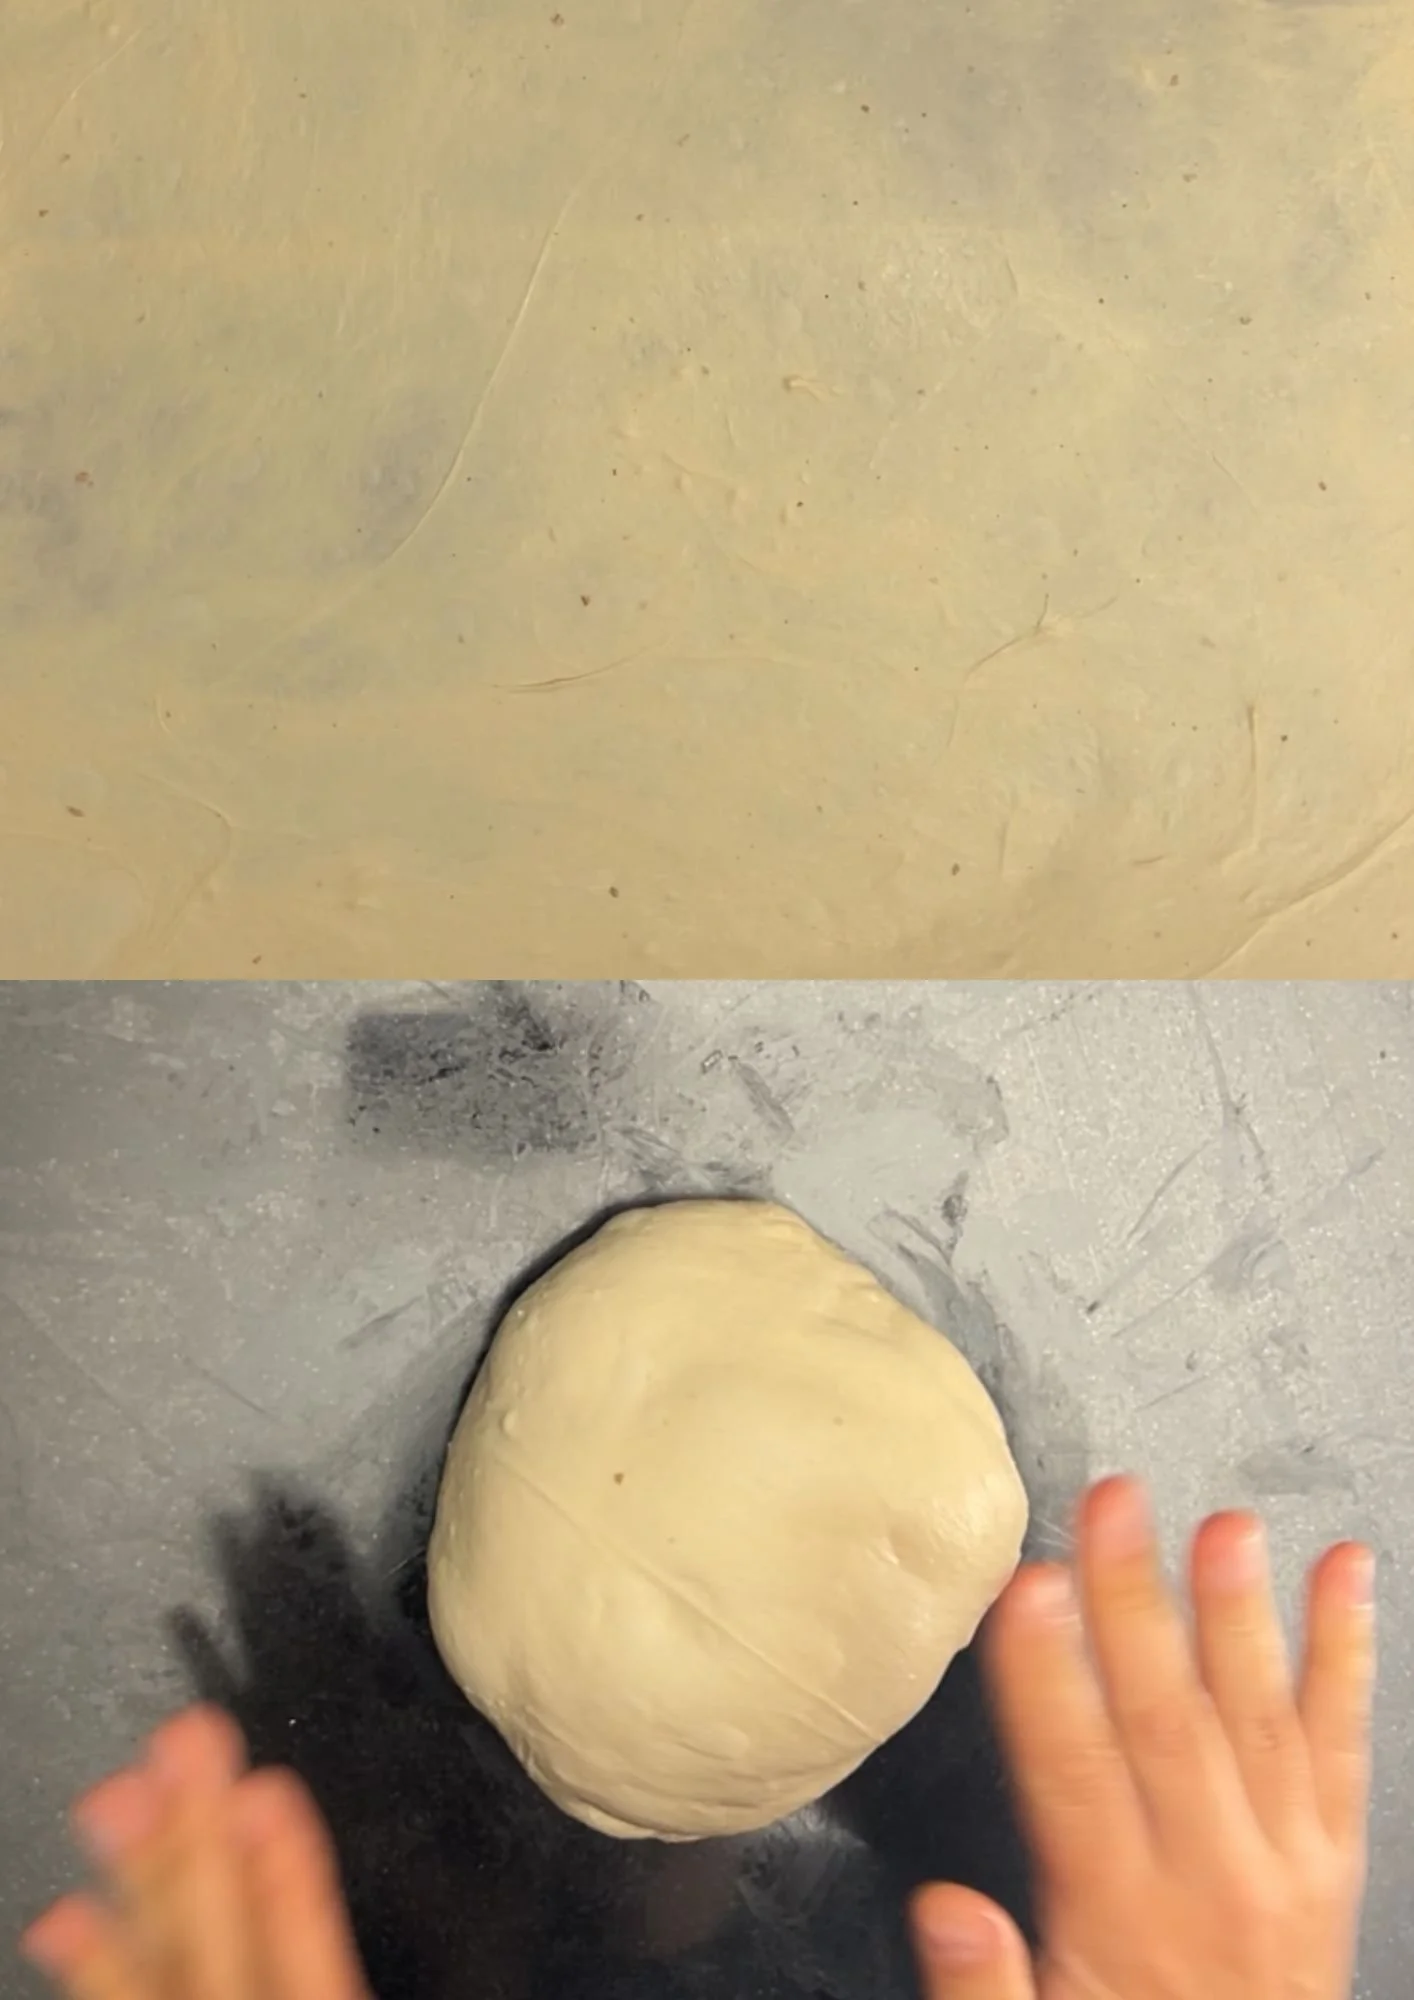
You can see and feel that:
the dough has become even;
it looks smoother and more gathered;
it stretches better than it did at the beginning;
it stays connected;
it becomes stronger after a rest;
the water and fat are fully incorporated;
the dough has not overheated.
A windowpane test can be useful, but not every dough needs to stretch into a perfect transparent sheet.
What matters is that you can see a real improvement in structure compared with the beginning.
You’ve Gone Too Far
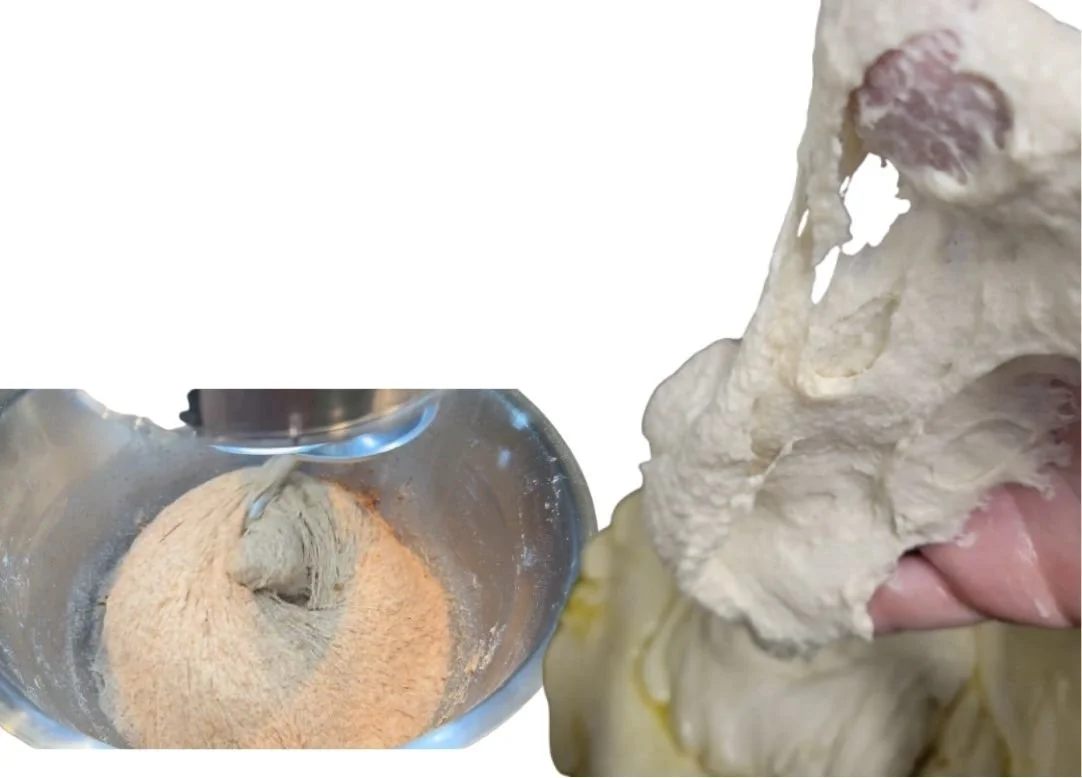
You see:
dough that falls apart and slips through your fingers.
Why?
The mixer may have overheated the dough.
The dough may have fermented too warm. At around 28–30°C (82–86°F), fermentation speeds up and the dough can overferment quickly.
The hydration may also be too high for your flour, especially above 70%. In that case, the dough stays weak, sticky, and difficult to handle.
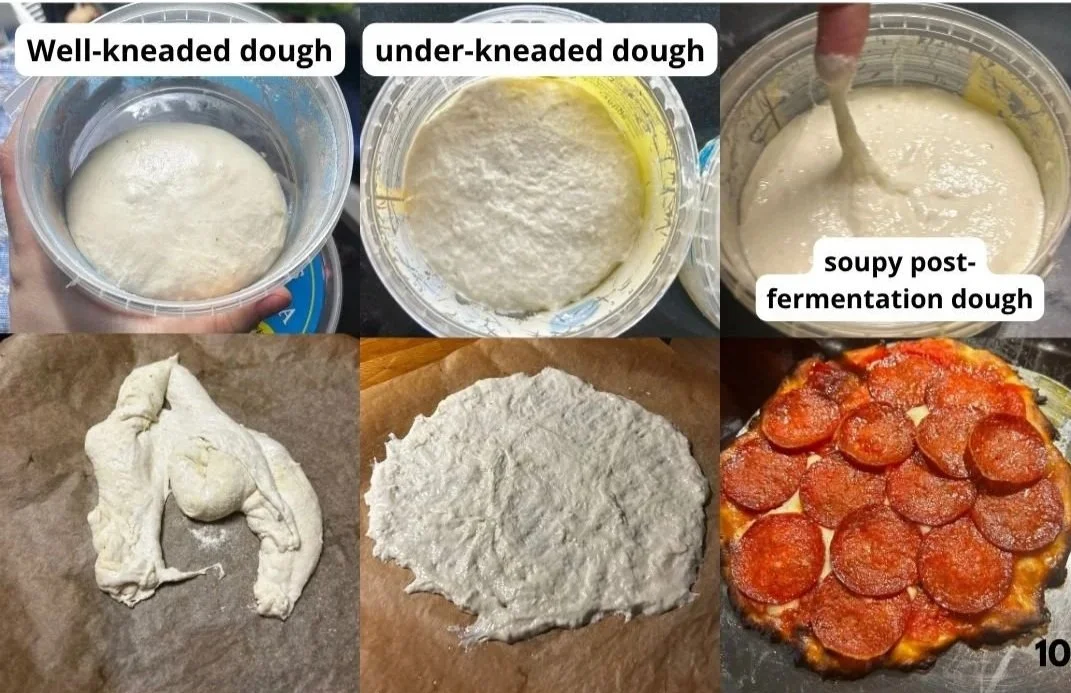
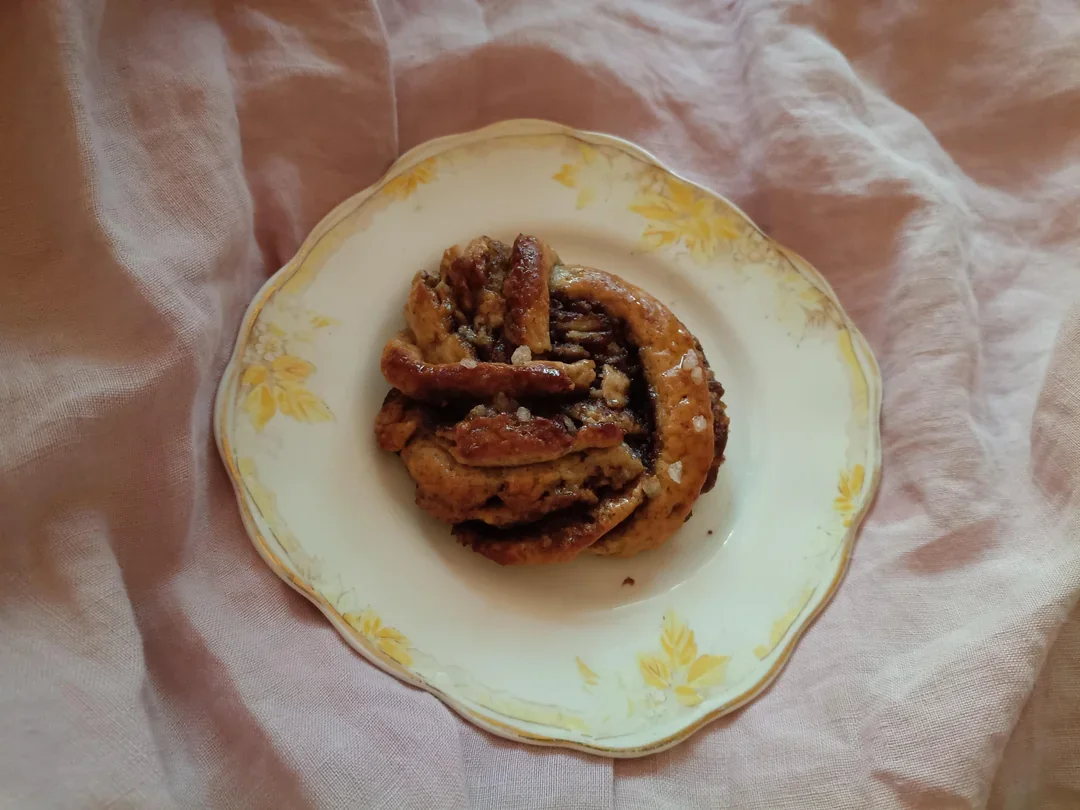
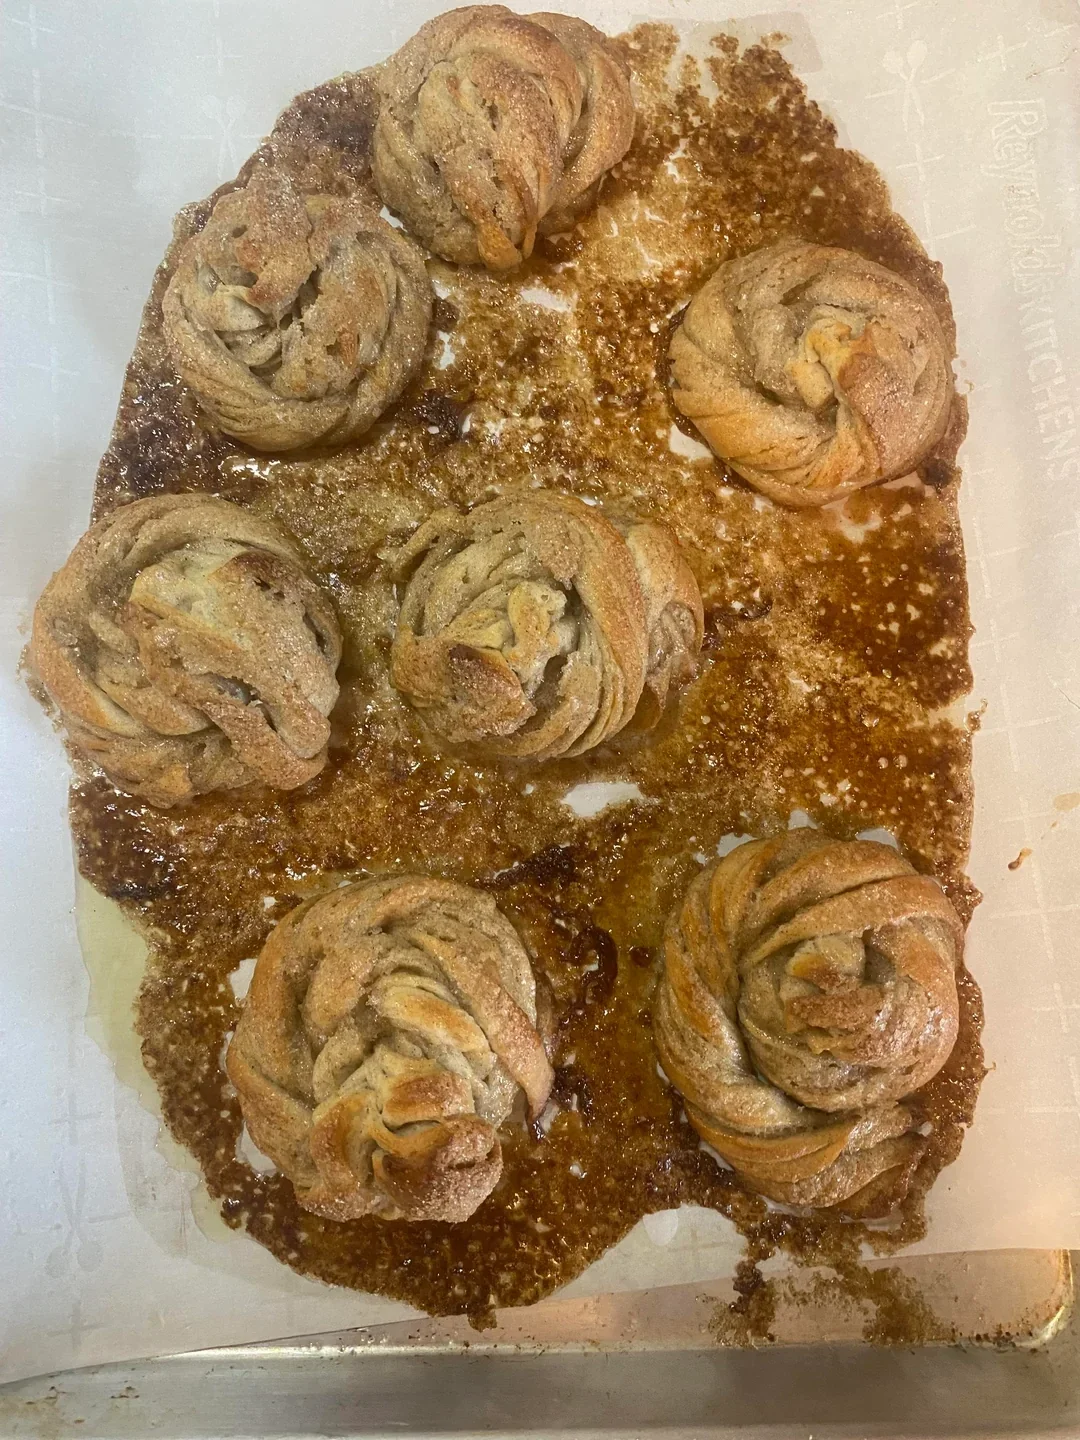
What the baked product look like when mixing was poor and the gluten hasn't developed enough. Or the dough was overheated with mixer.
Stage 2. Bulk Fermentation
This stage can be done in two different ways.
1. Activate the yeast
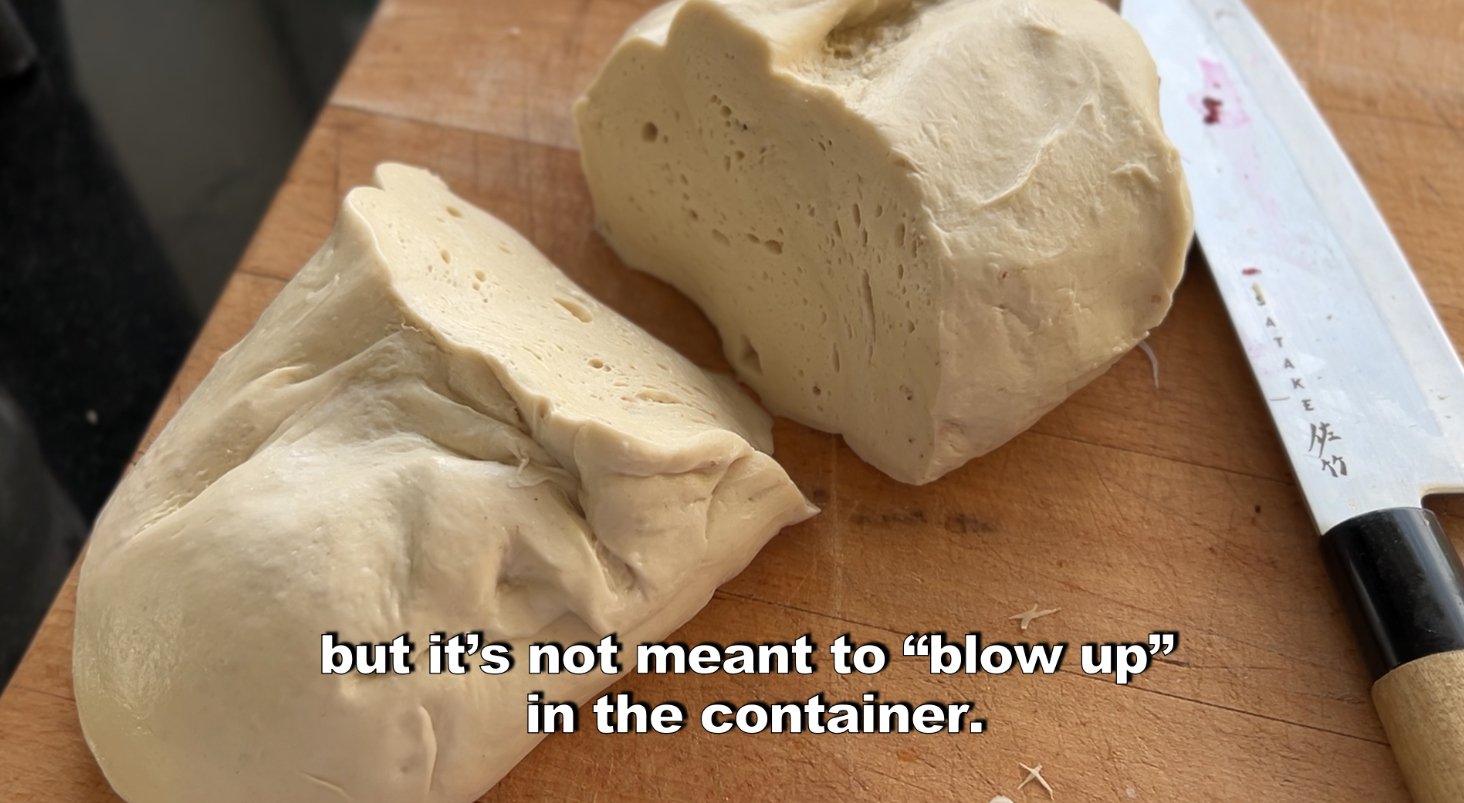
For pizza and most yeast buns, I usually move on once the yeast is active. The dough doesn't need to double in size at this stage. I usually mix the dough and refrigerate it right away. During the short one-hour hand-mixing process, the yeast has time to activate, but the dough won’t double in size. Before shaping, I cut the dough open. If I see small air pockets throughout the dough, I know the yeast has done its job and it's ready to use.
2. Let the dough double in size
For sourdough bread, you usually let the dough continue fermenting until it becomes airy and roughly doubles in volume.
How to check if The Bulk is done?
If you're using the first method and refrigerating the dough right after mixing, cut it open before shaping.
If you don't see small air pockets inside, the yeast may not have activated. This usually means the yeast was weak, inactive, or didn't have the right conditions to start fermenting.
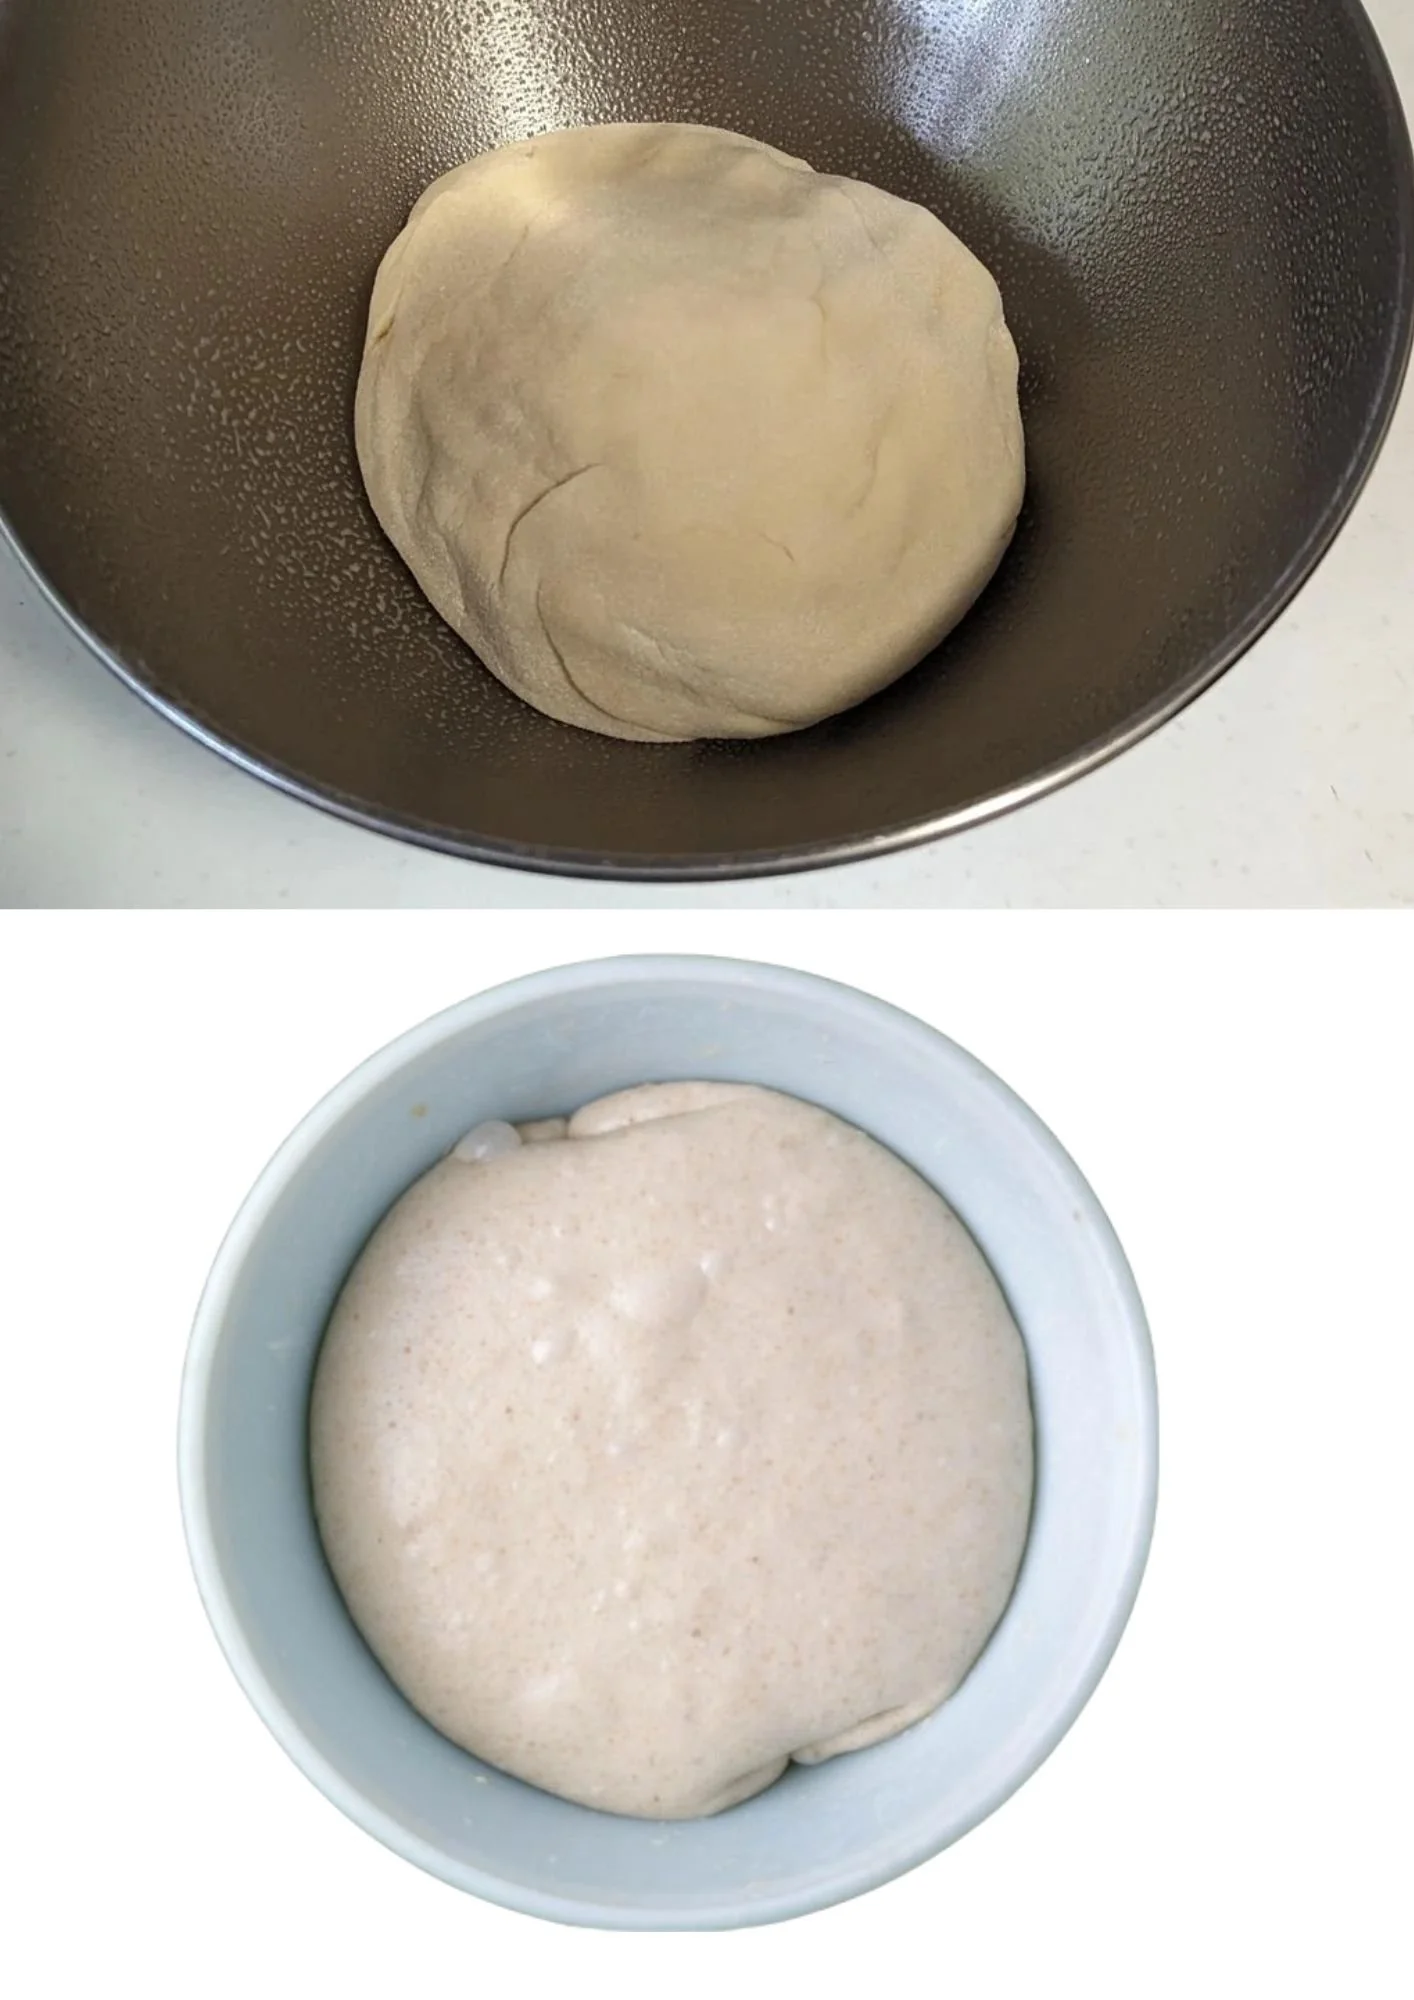
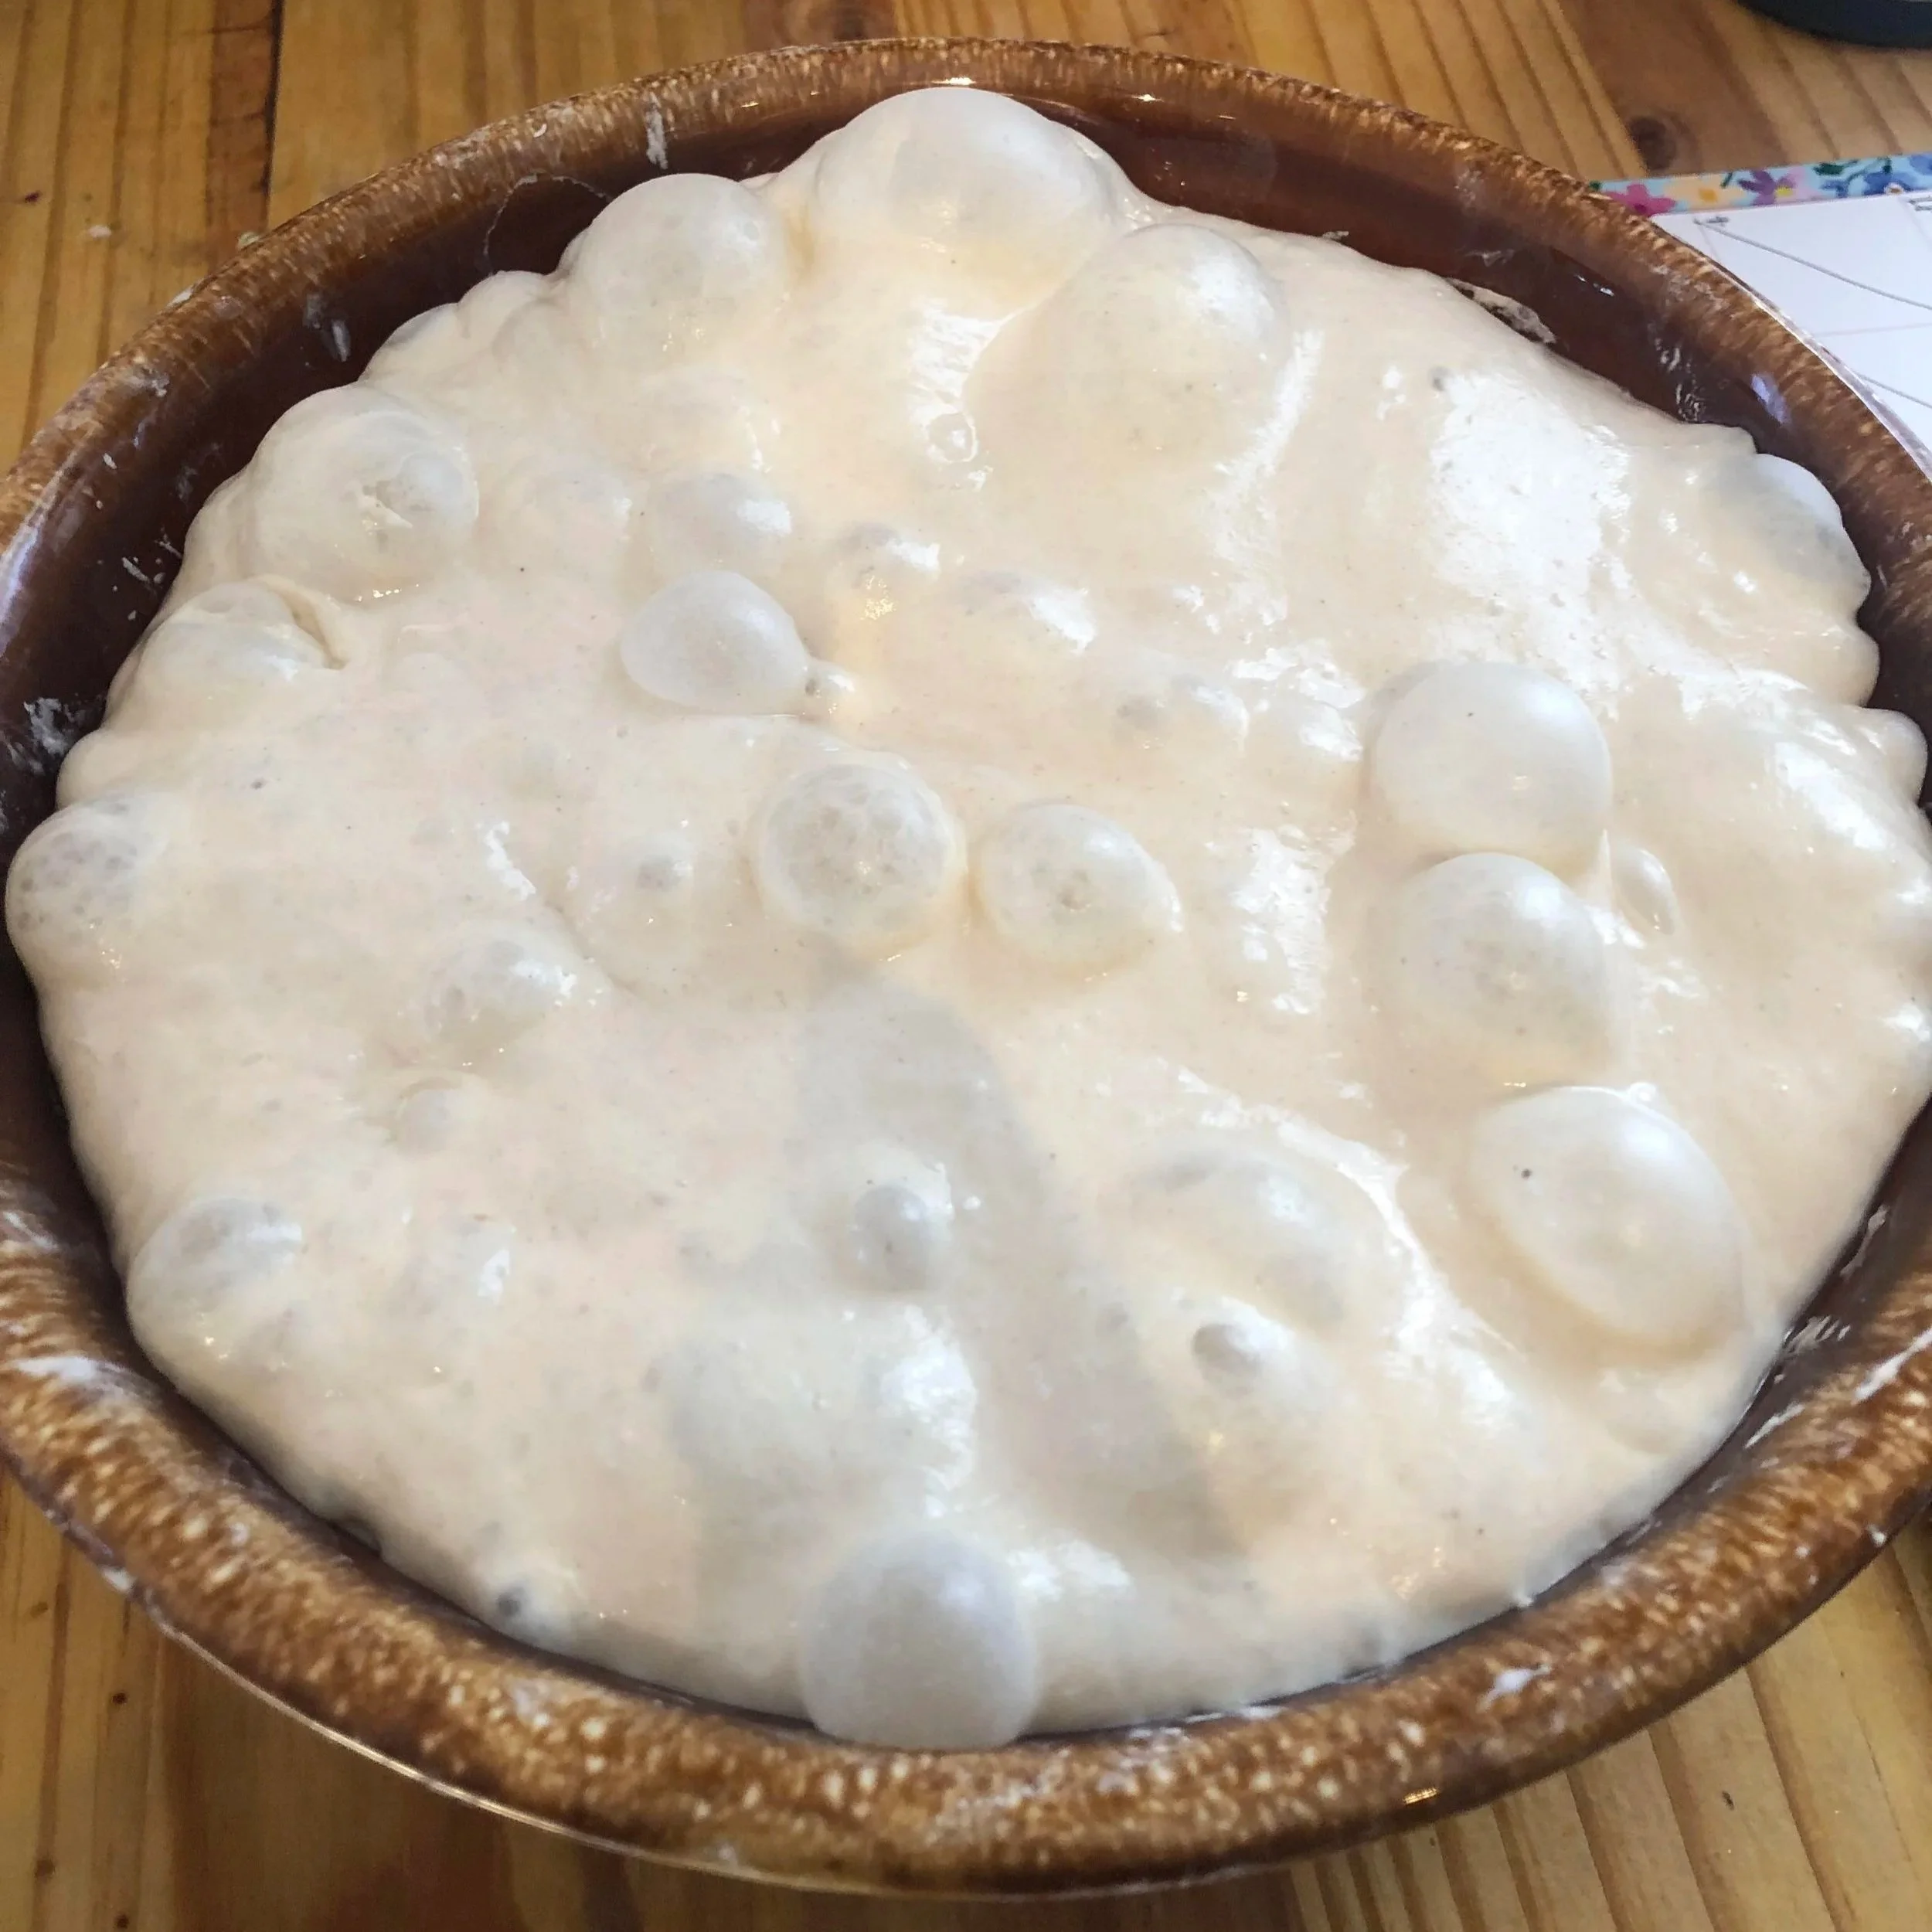
For sourdough bread, the dough should become noticeably lighter and increase in volume during bulk fermentation. When you give the bowl a shake, the dough wobbles like jelly. And it squelches under your fingers, when you touch it.
If it shows little or no rise, even after a long time, bulk fermentation is not complete. The sourdough may be too weak, or the dough may need more time or a warmer temperature.
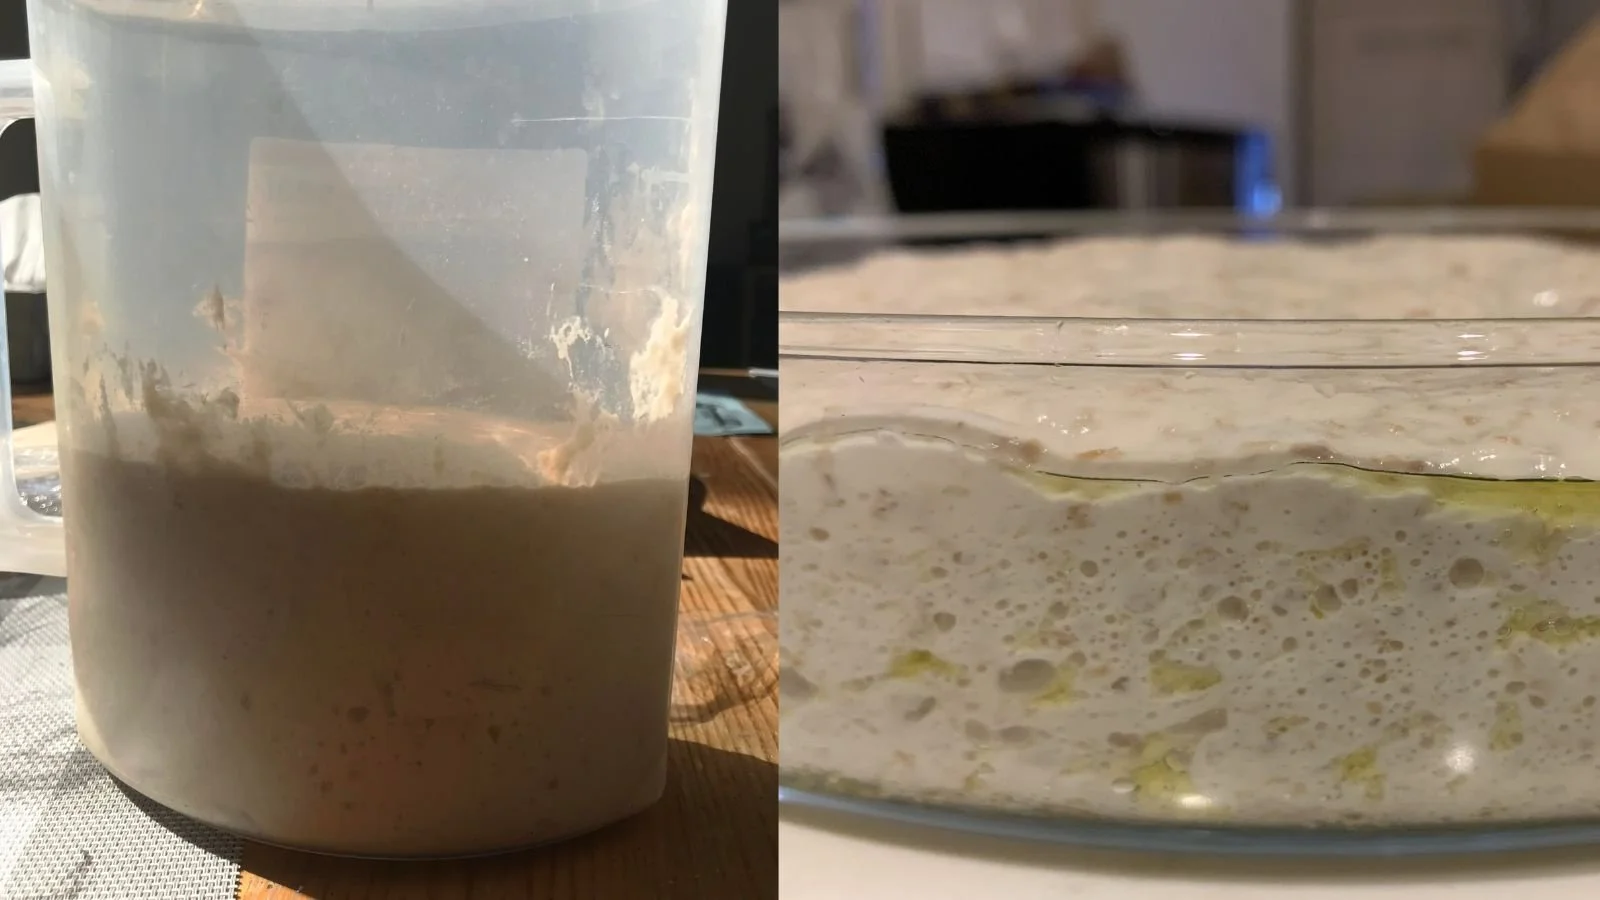
Poor bulk fermentation
vs.
Well-fermented dough
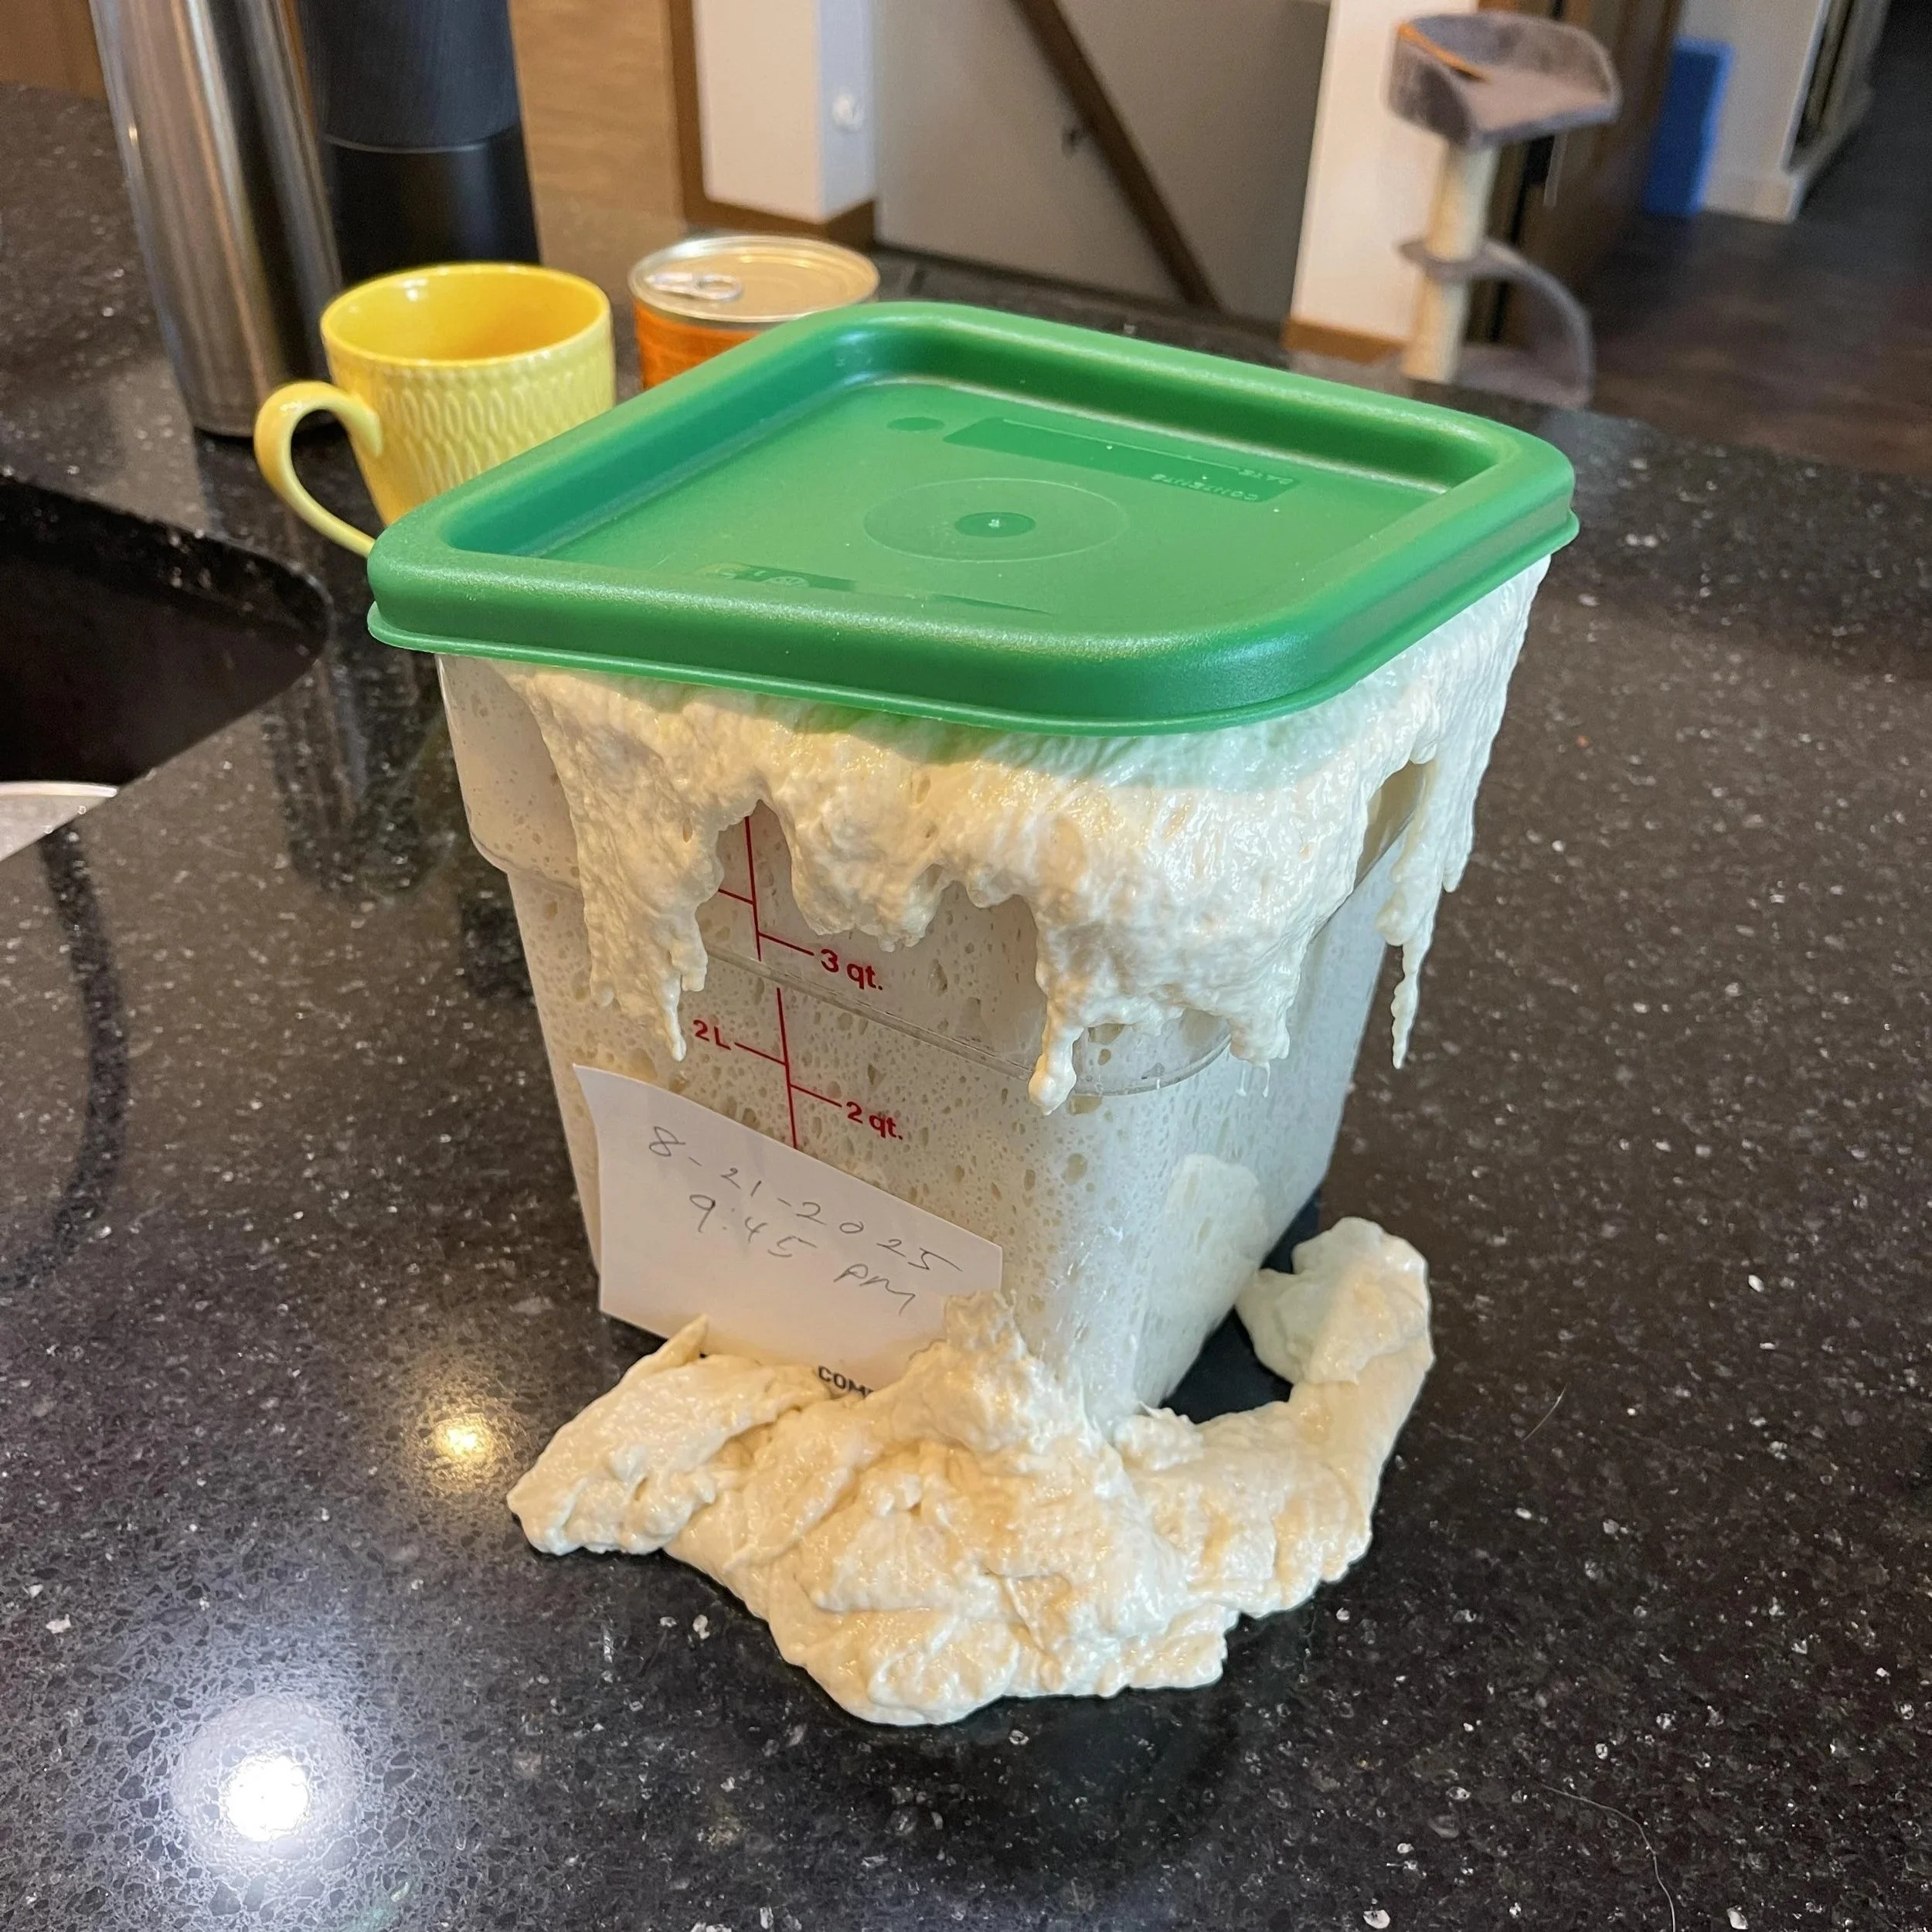
Too late
Possible signs:
the dough has stopped holding its shape;
it has spread noticeably;
the surface has collapsed;
the structure feels weak;
the dough sticks and tears easily;
after rising, the volume has started to shrink.
Stage 3. Shaping
The goal of shaping is to give the dough a form and create surface tension without destroying all the gas inside.
Too early to shape
If you're using the first bulk method “activate the yeast” and refrigerating the dough right after mixing, cut it open before shaping. If you don't see small air pockets inside, the yeast probably didn't activate. The yeast may have been weak or expired. As a result, the dough will be dense and won't rise properly.
If you're using the second method, where the dough is expected to rise during bulk fermentation, watch the volume. If the dough has barely risen after several hours, it either needs more time or a warmer temperature. If there are no small air pockets inside, the sourdough is probably too weak or the dough has been fermenting too cold.
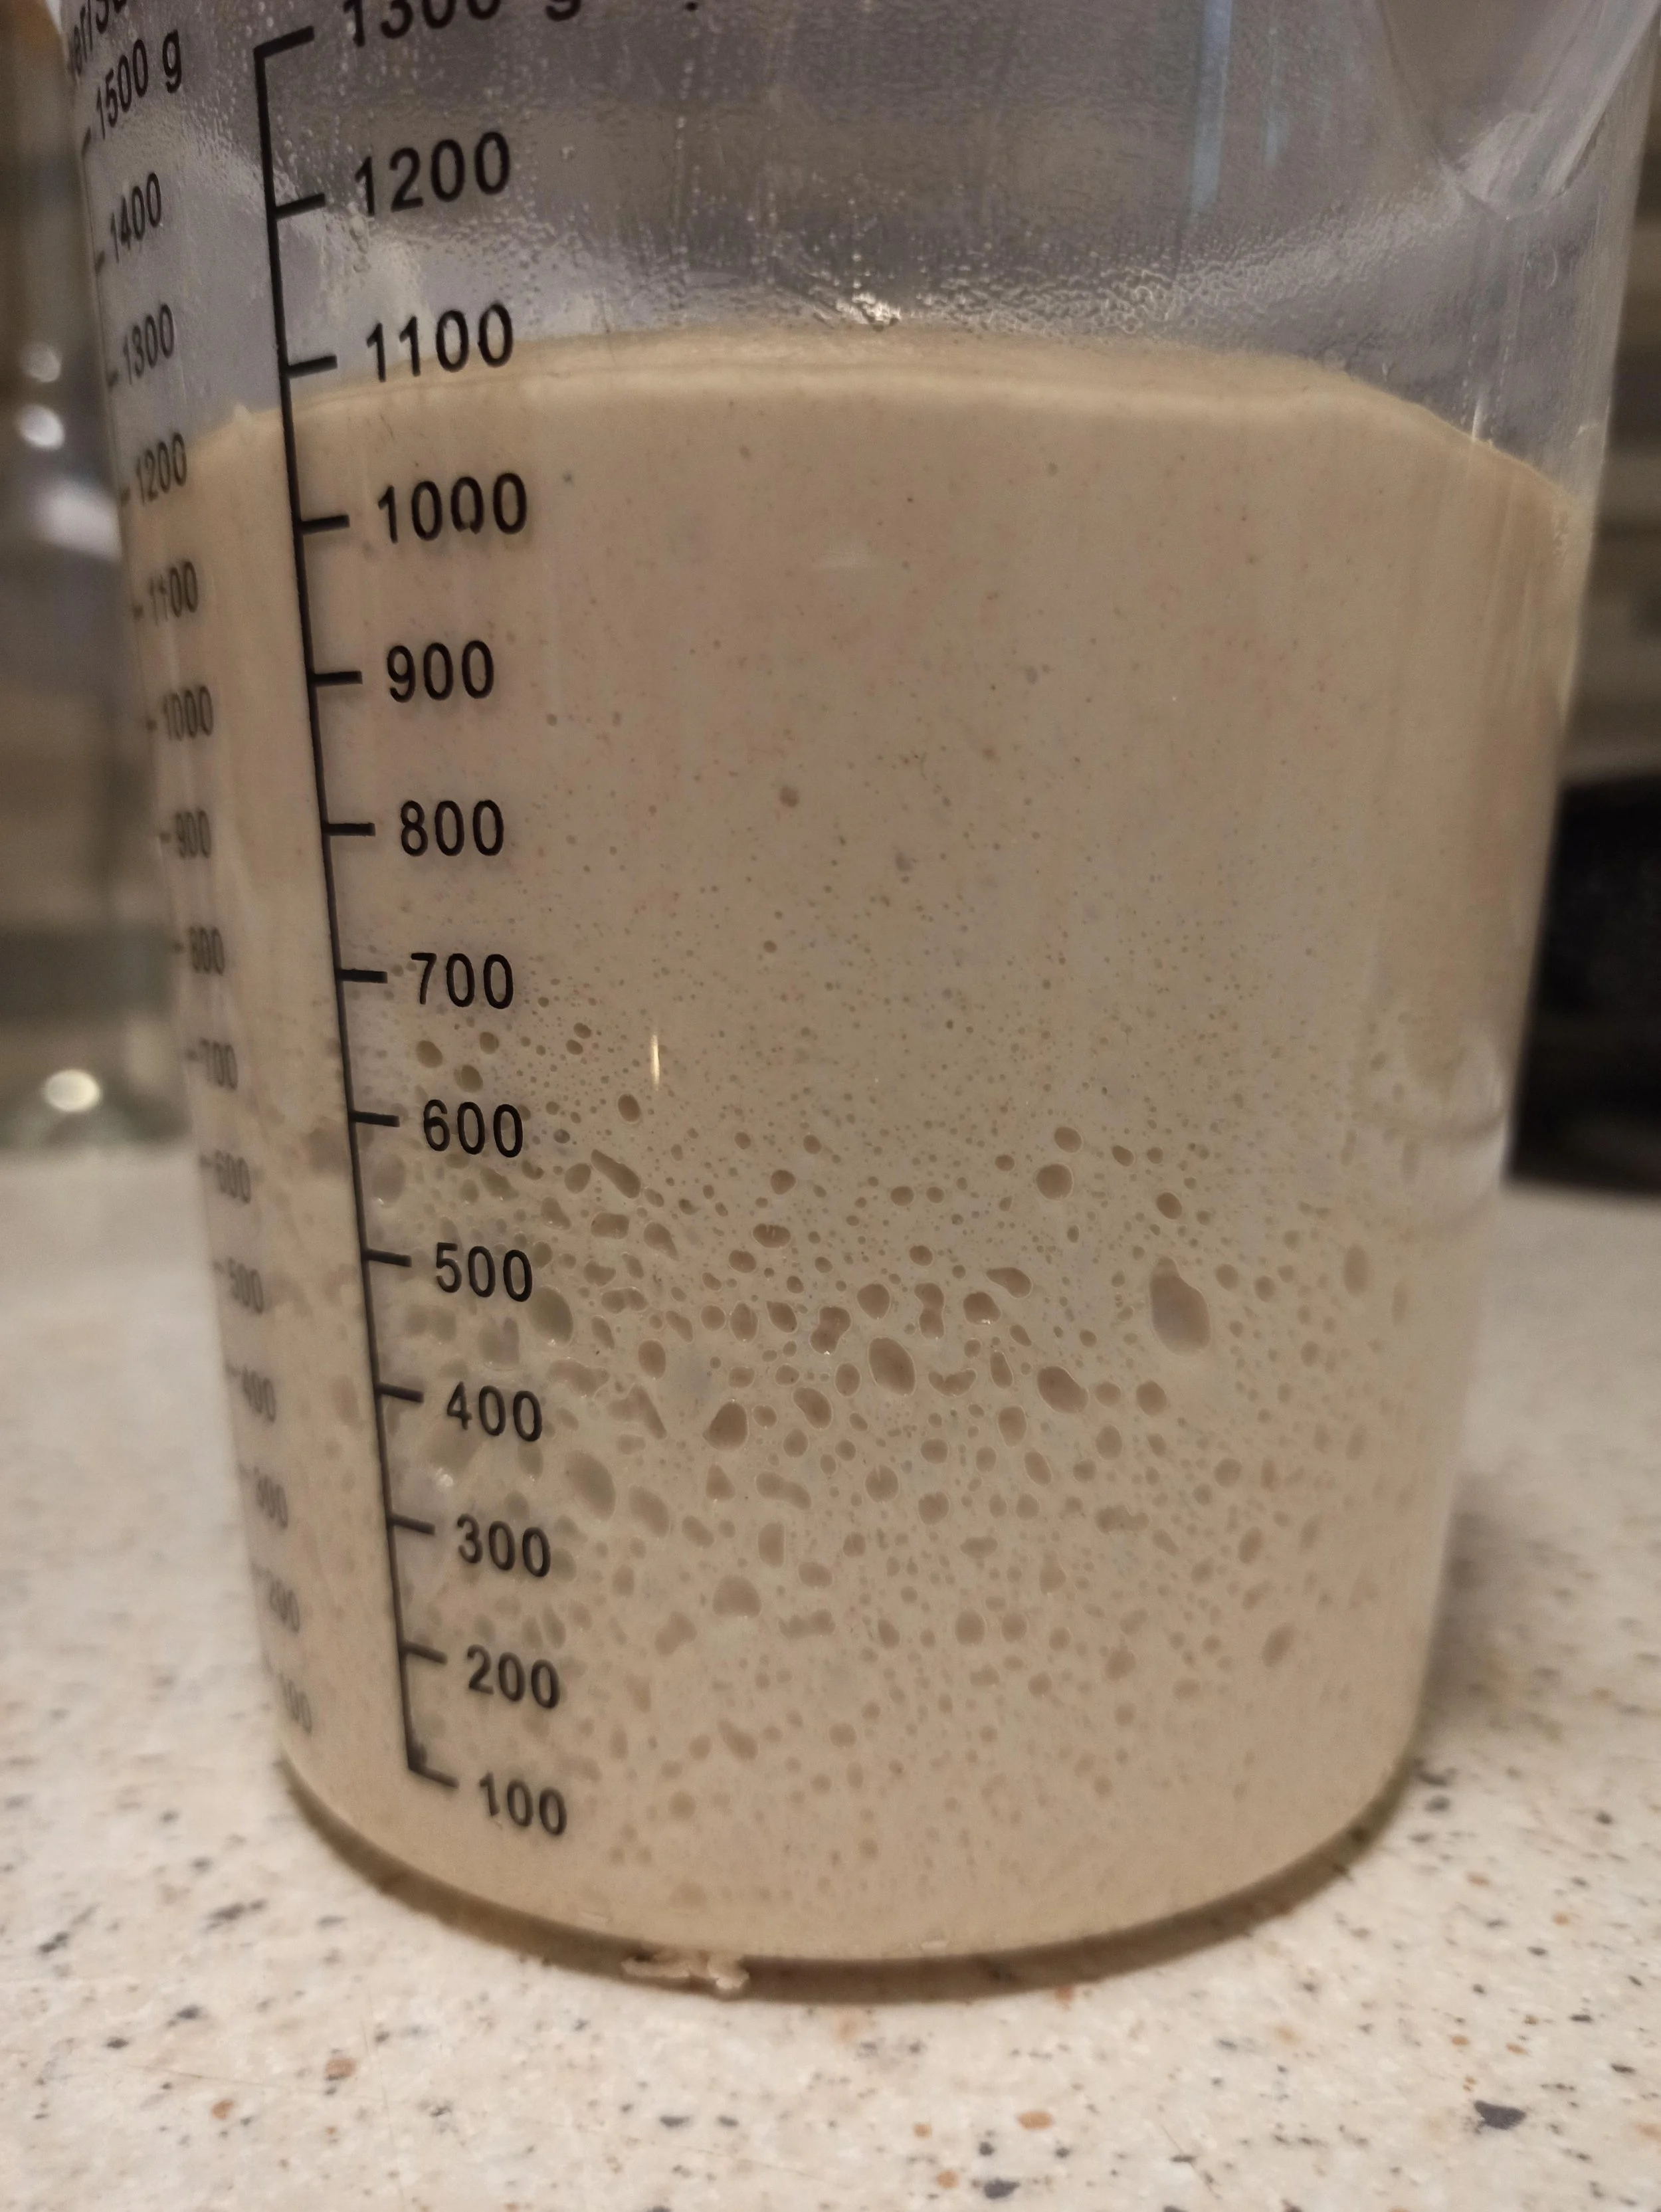
It's convenient to ferment the dough in a transparent container so you can mark the starting level and easily compare how much it has risen.
Ready to Shape
With the yeast activation method, the dough contains small air pockets but is still dense. It hasn't risen much after a night in the fridge, isn't sticky, and holds its shape. Perfect!
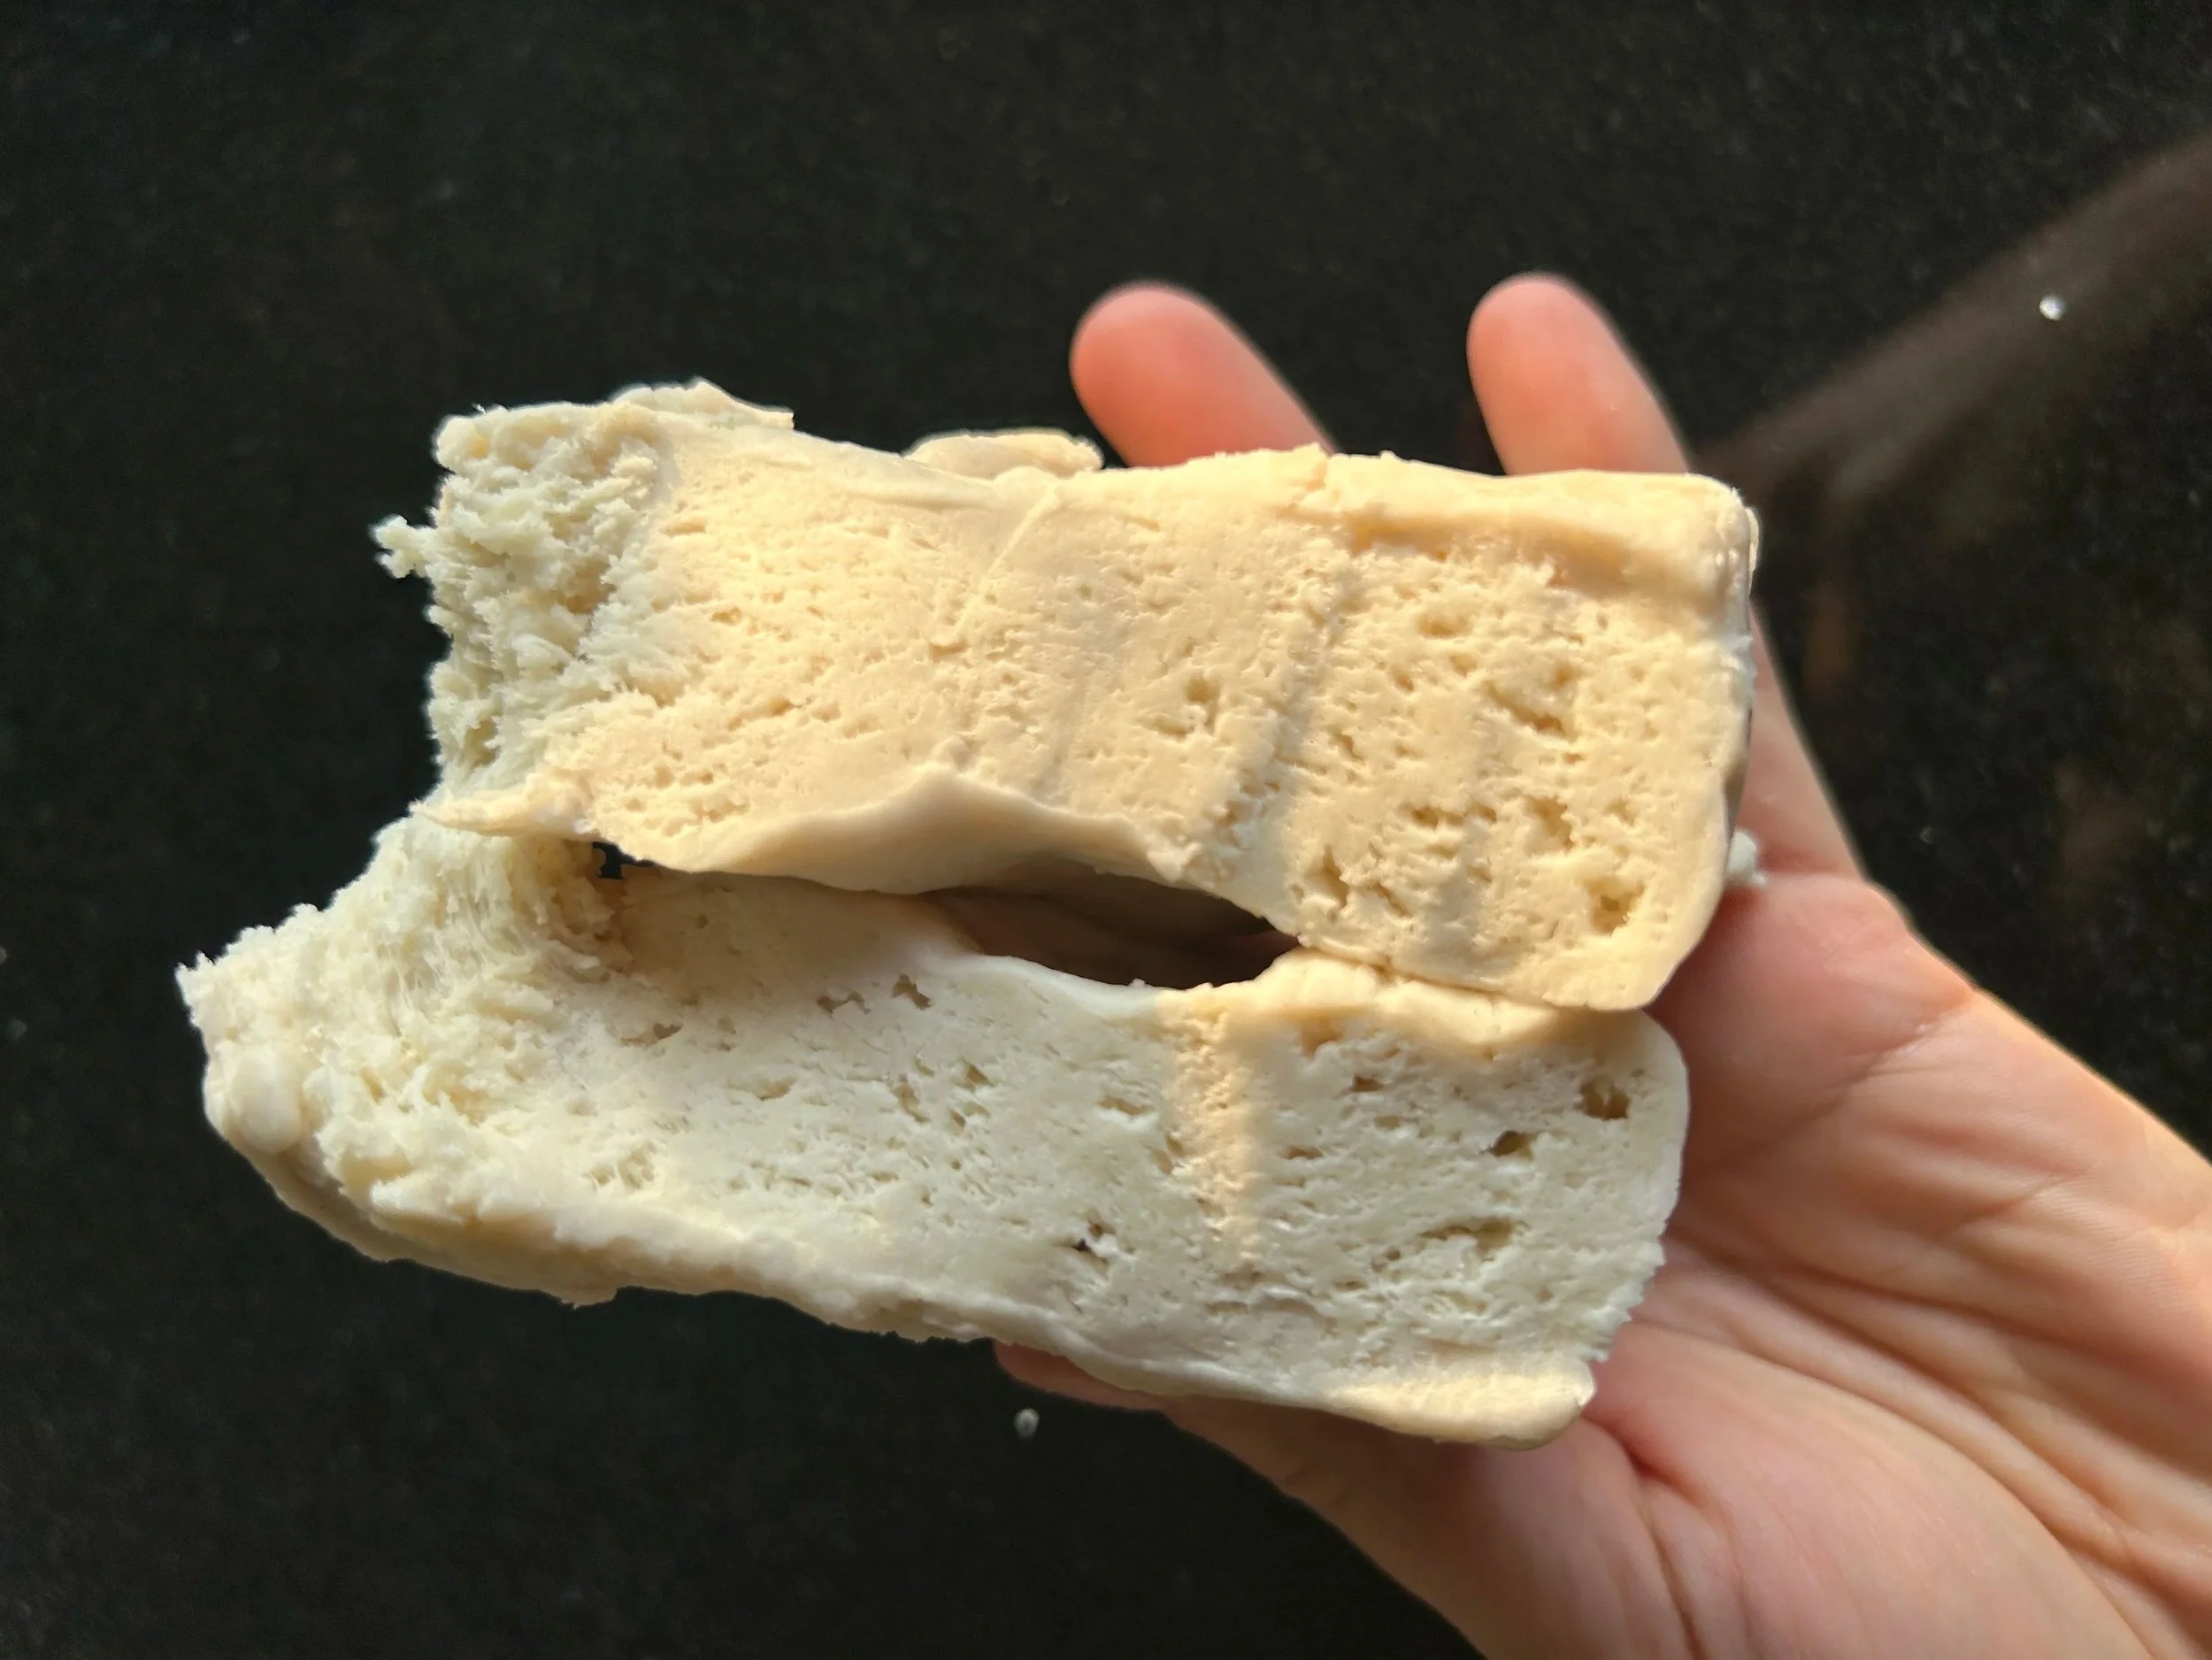
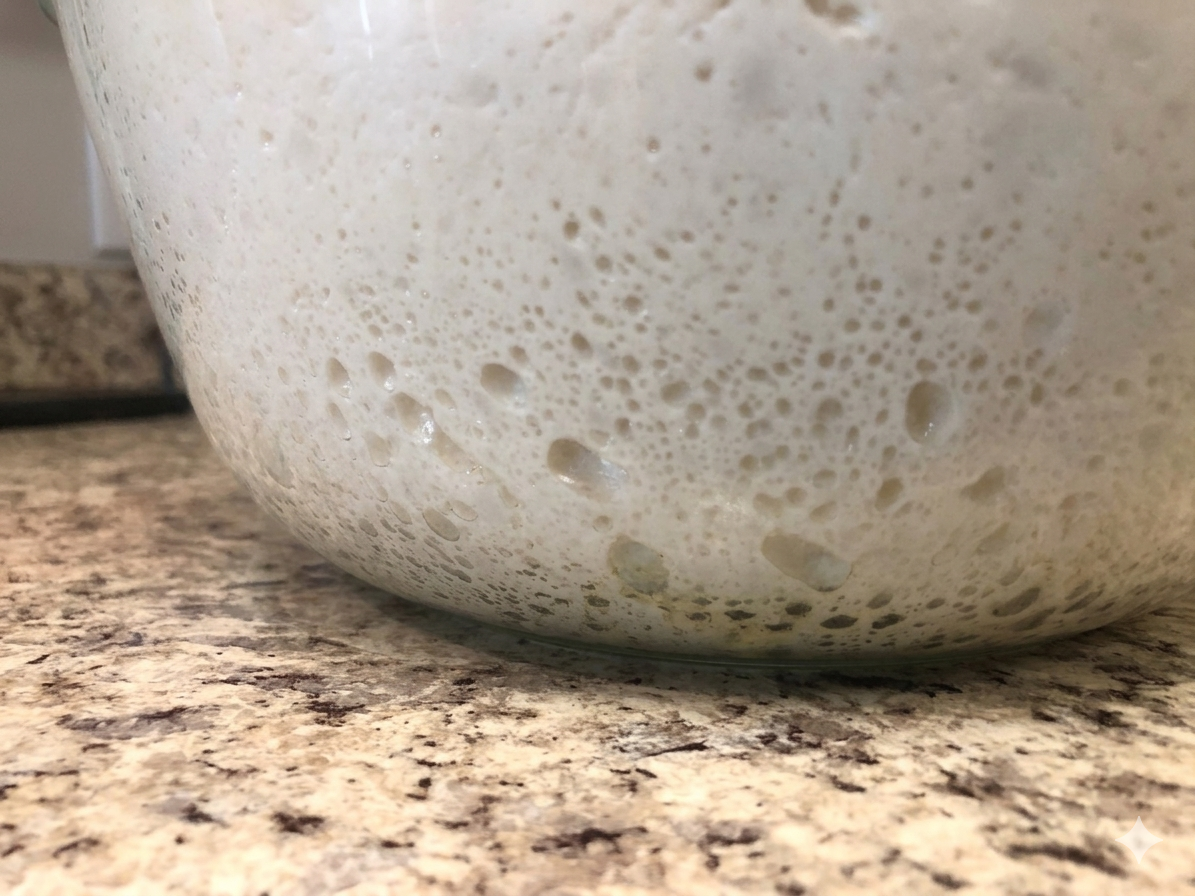
Method 2: Sourdough Dough
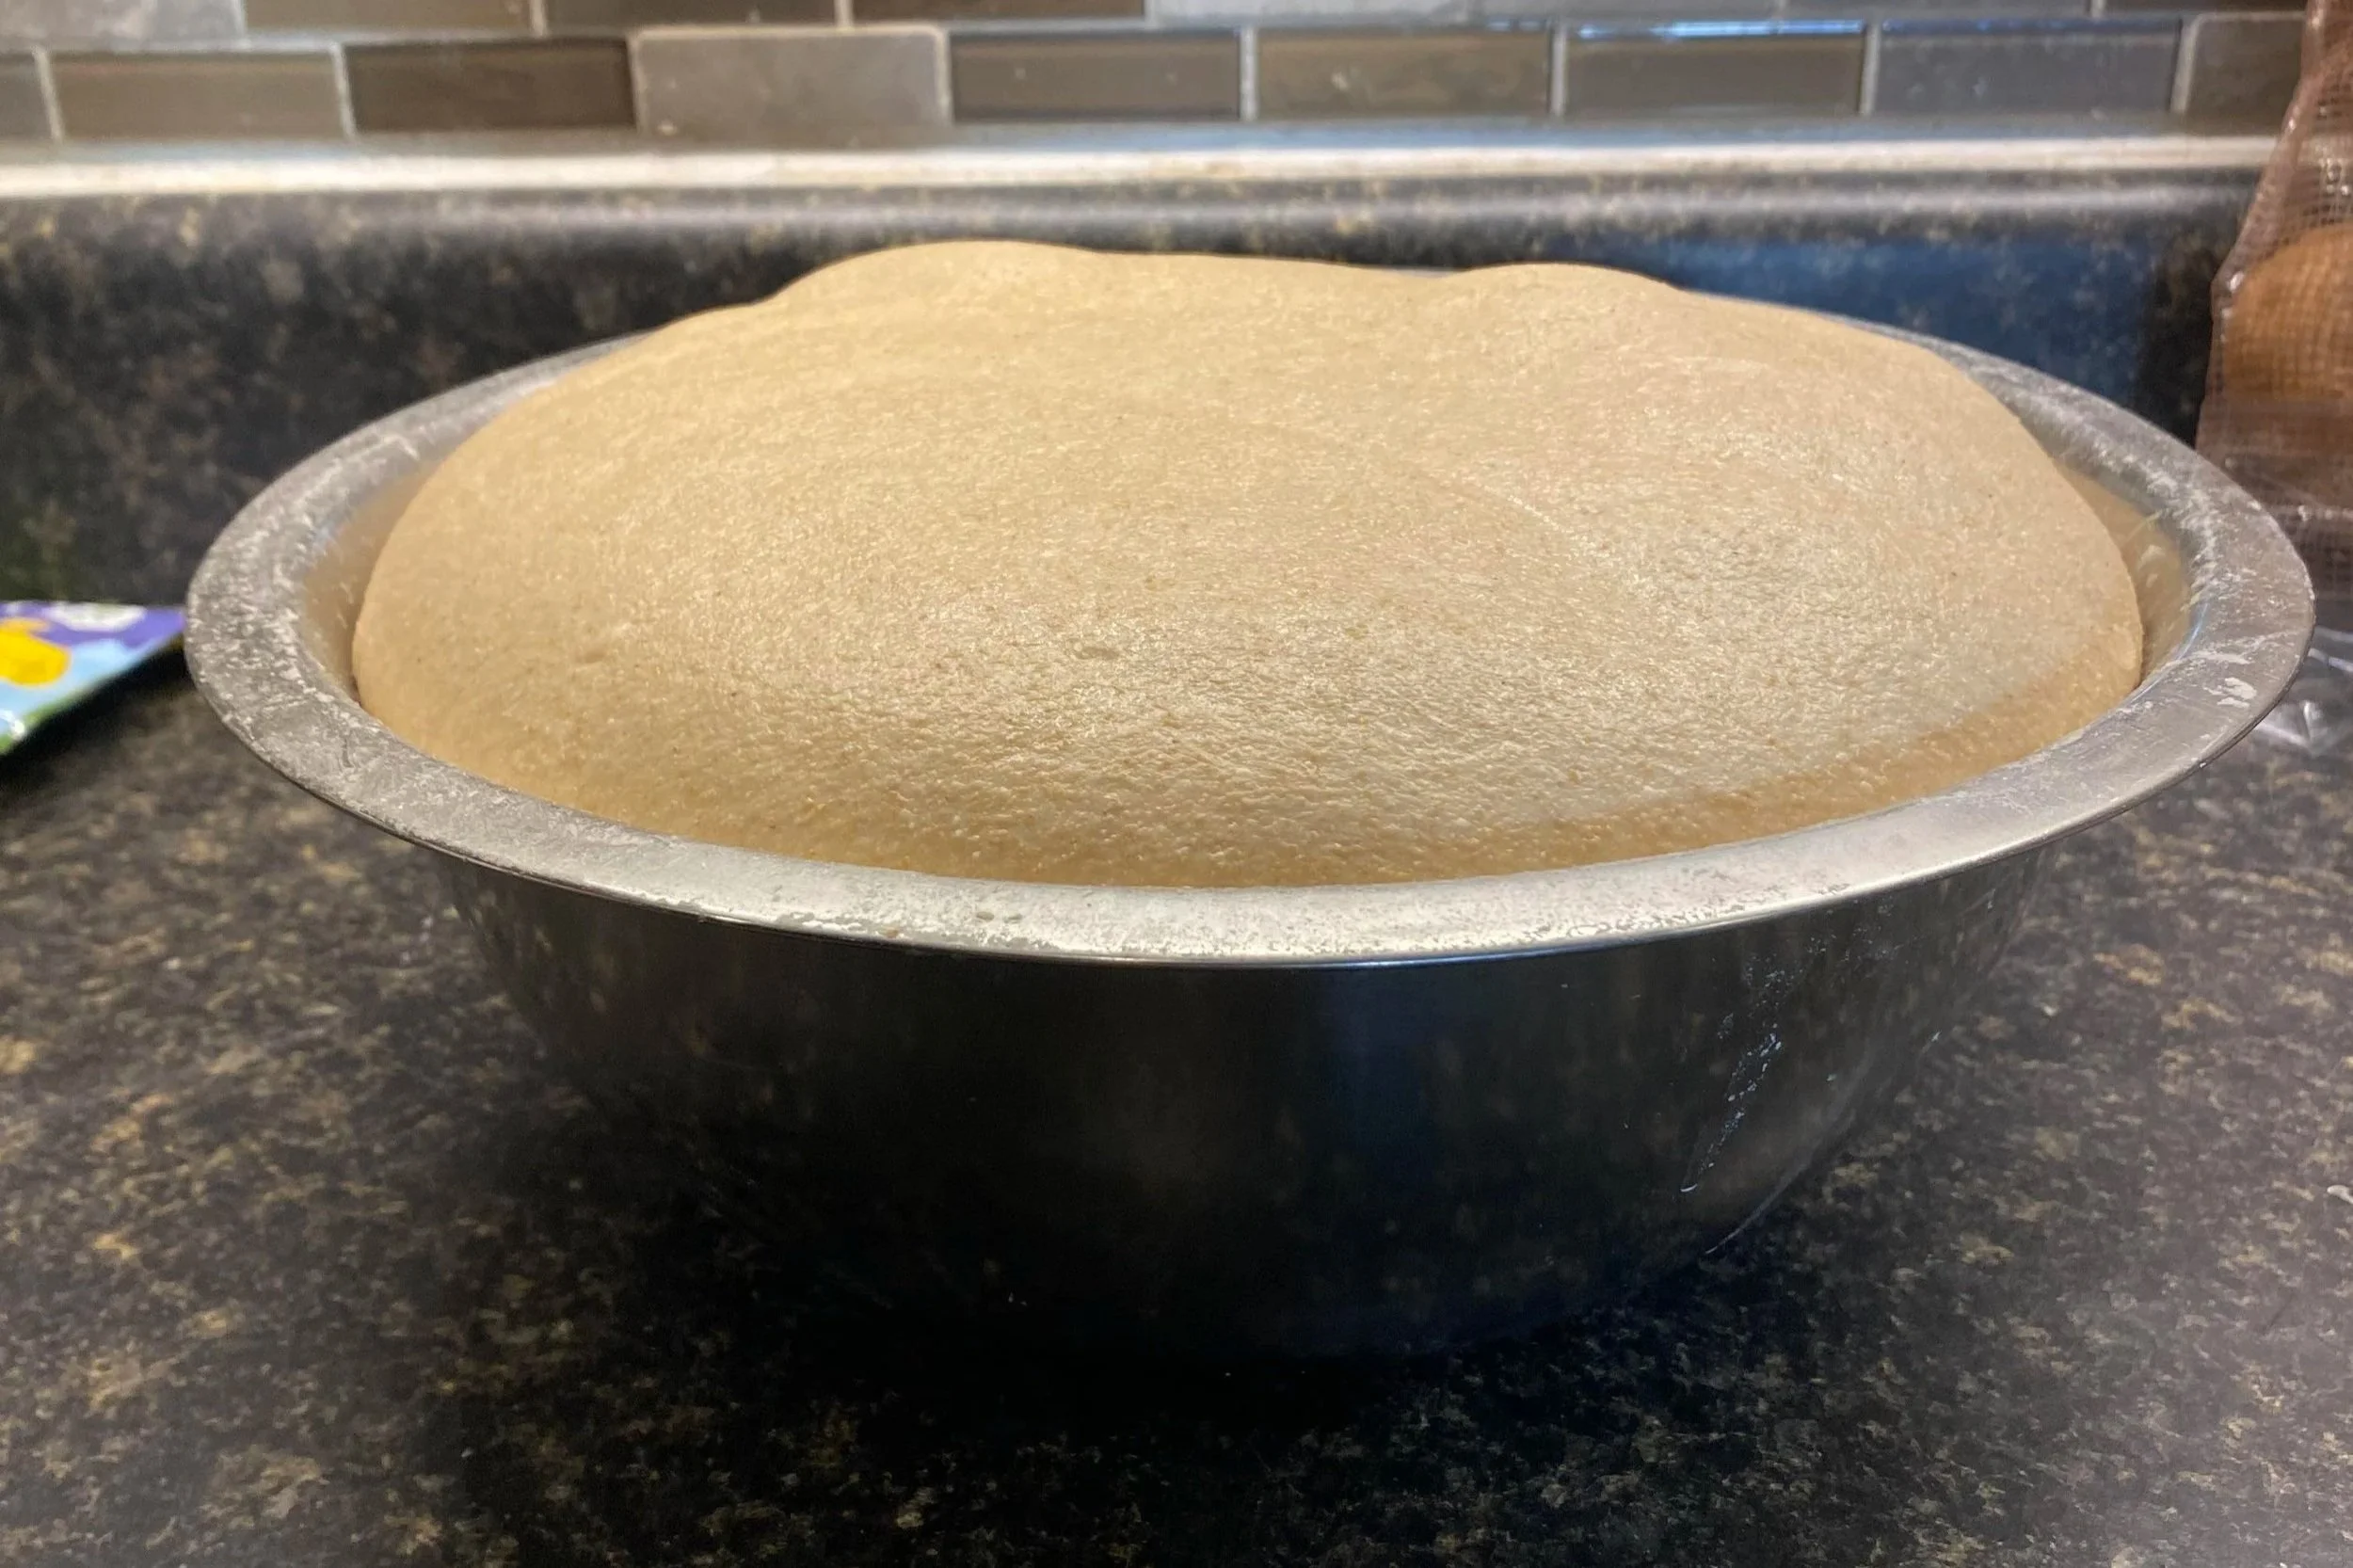
The dough has noticeably increased in volume. With sourdough bread, it should also feel light and jiggly. If you gently shake the bowl, the dough will wobble like jelly.
it still has structure;
you can create tension;
there is gas inside;
the surface does not break down when you handle it gently.
Stage 4. Final Proof
This is the last stage before baking.
The dough needs to fill with gas again while still holding its shape. I'll explain using pizza as an example!
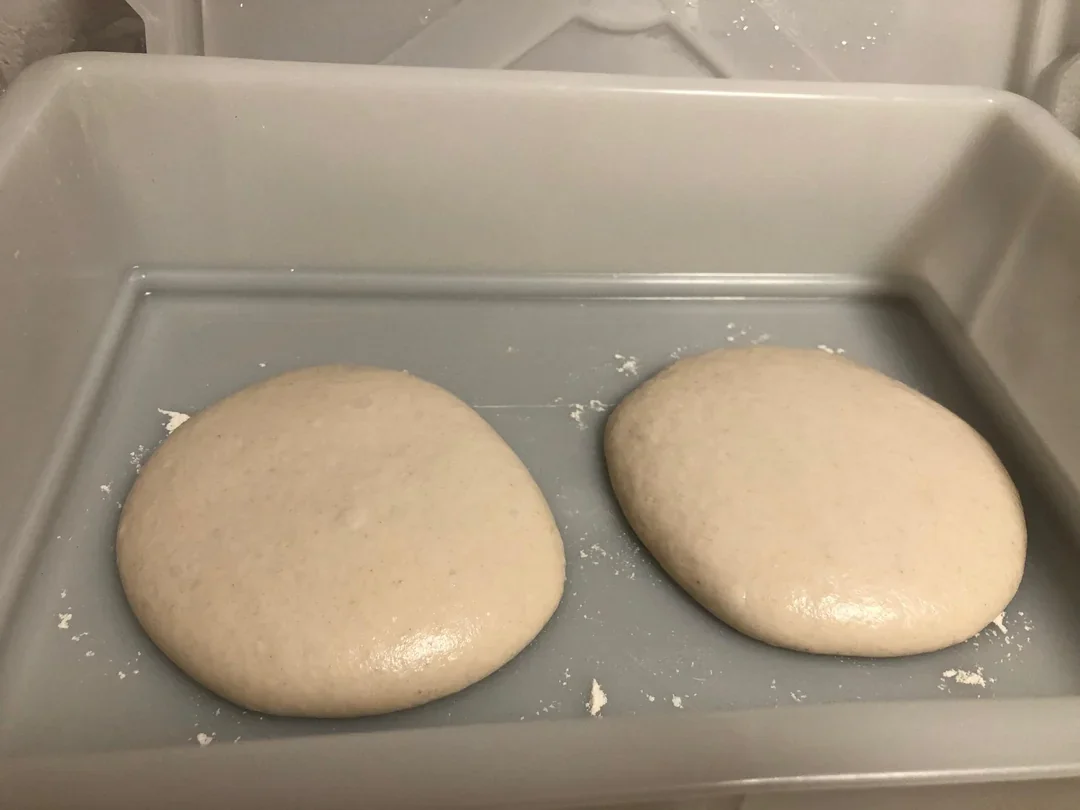
Too Early to Bake
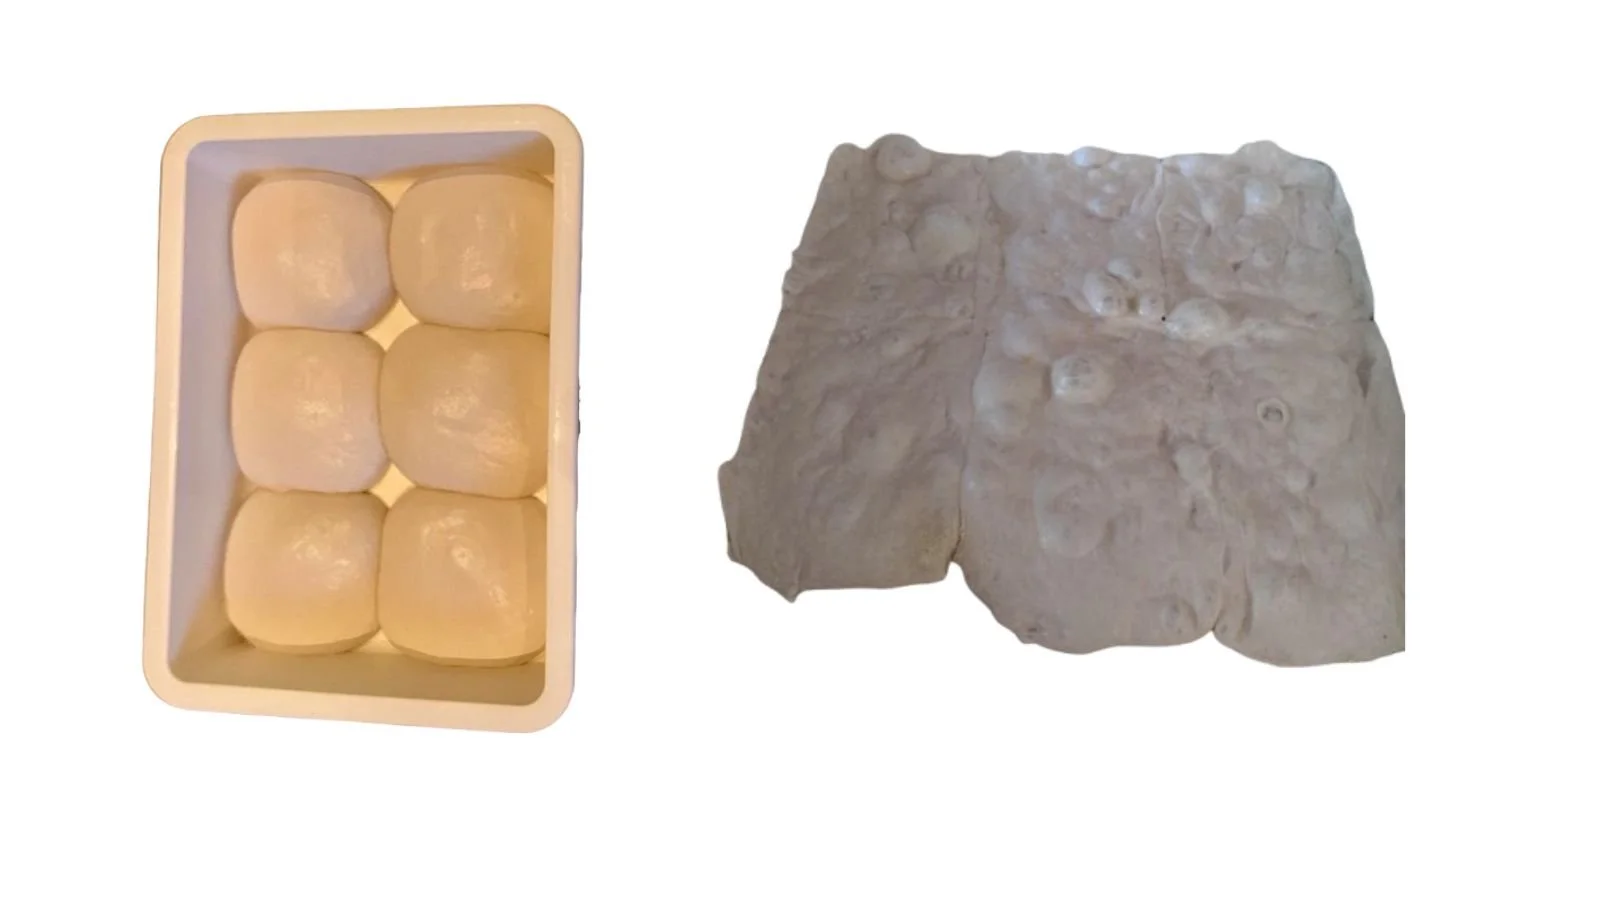
The dough balls have barely increased in volume and still look flat. When you press them with a finger, they feel firm and spring back quickly.
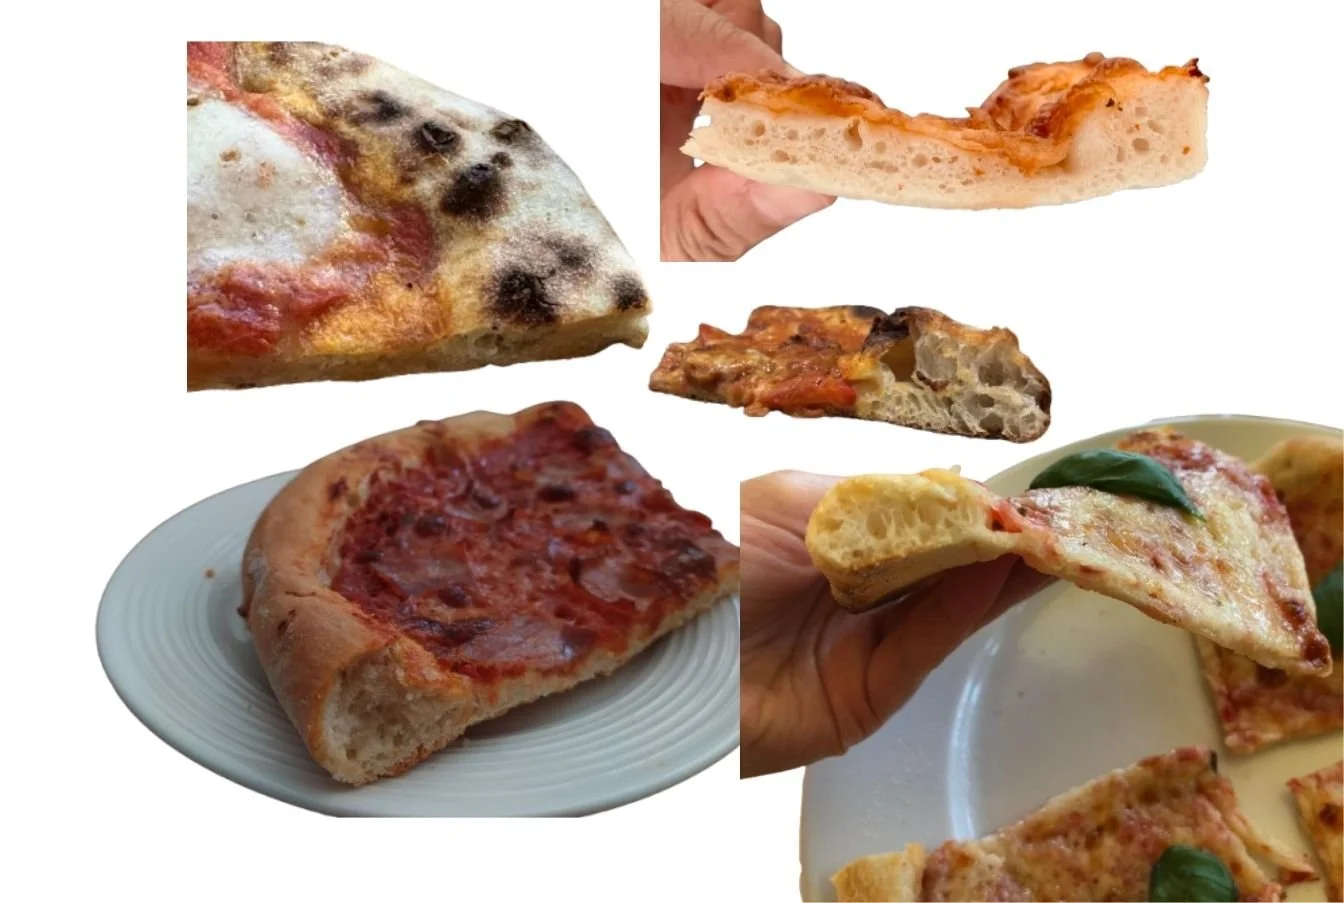
What the baked product look like when the dough hasn't developed enough gas
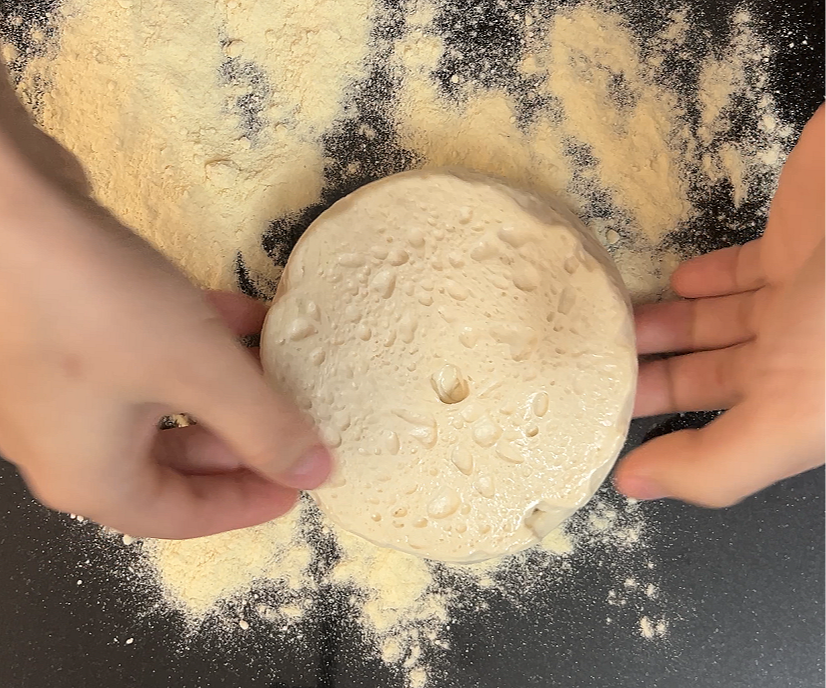
Ready to Bake
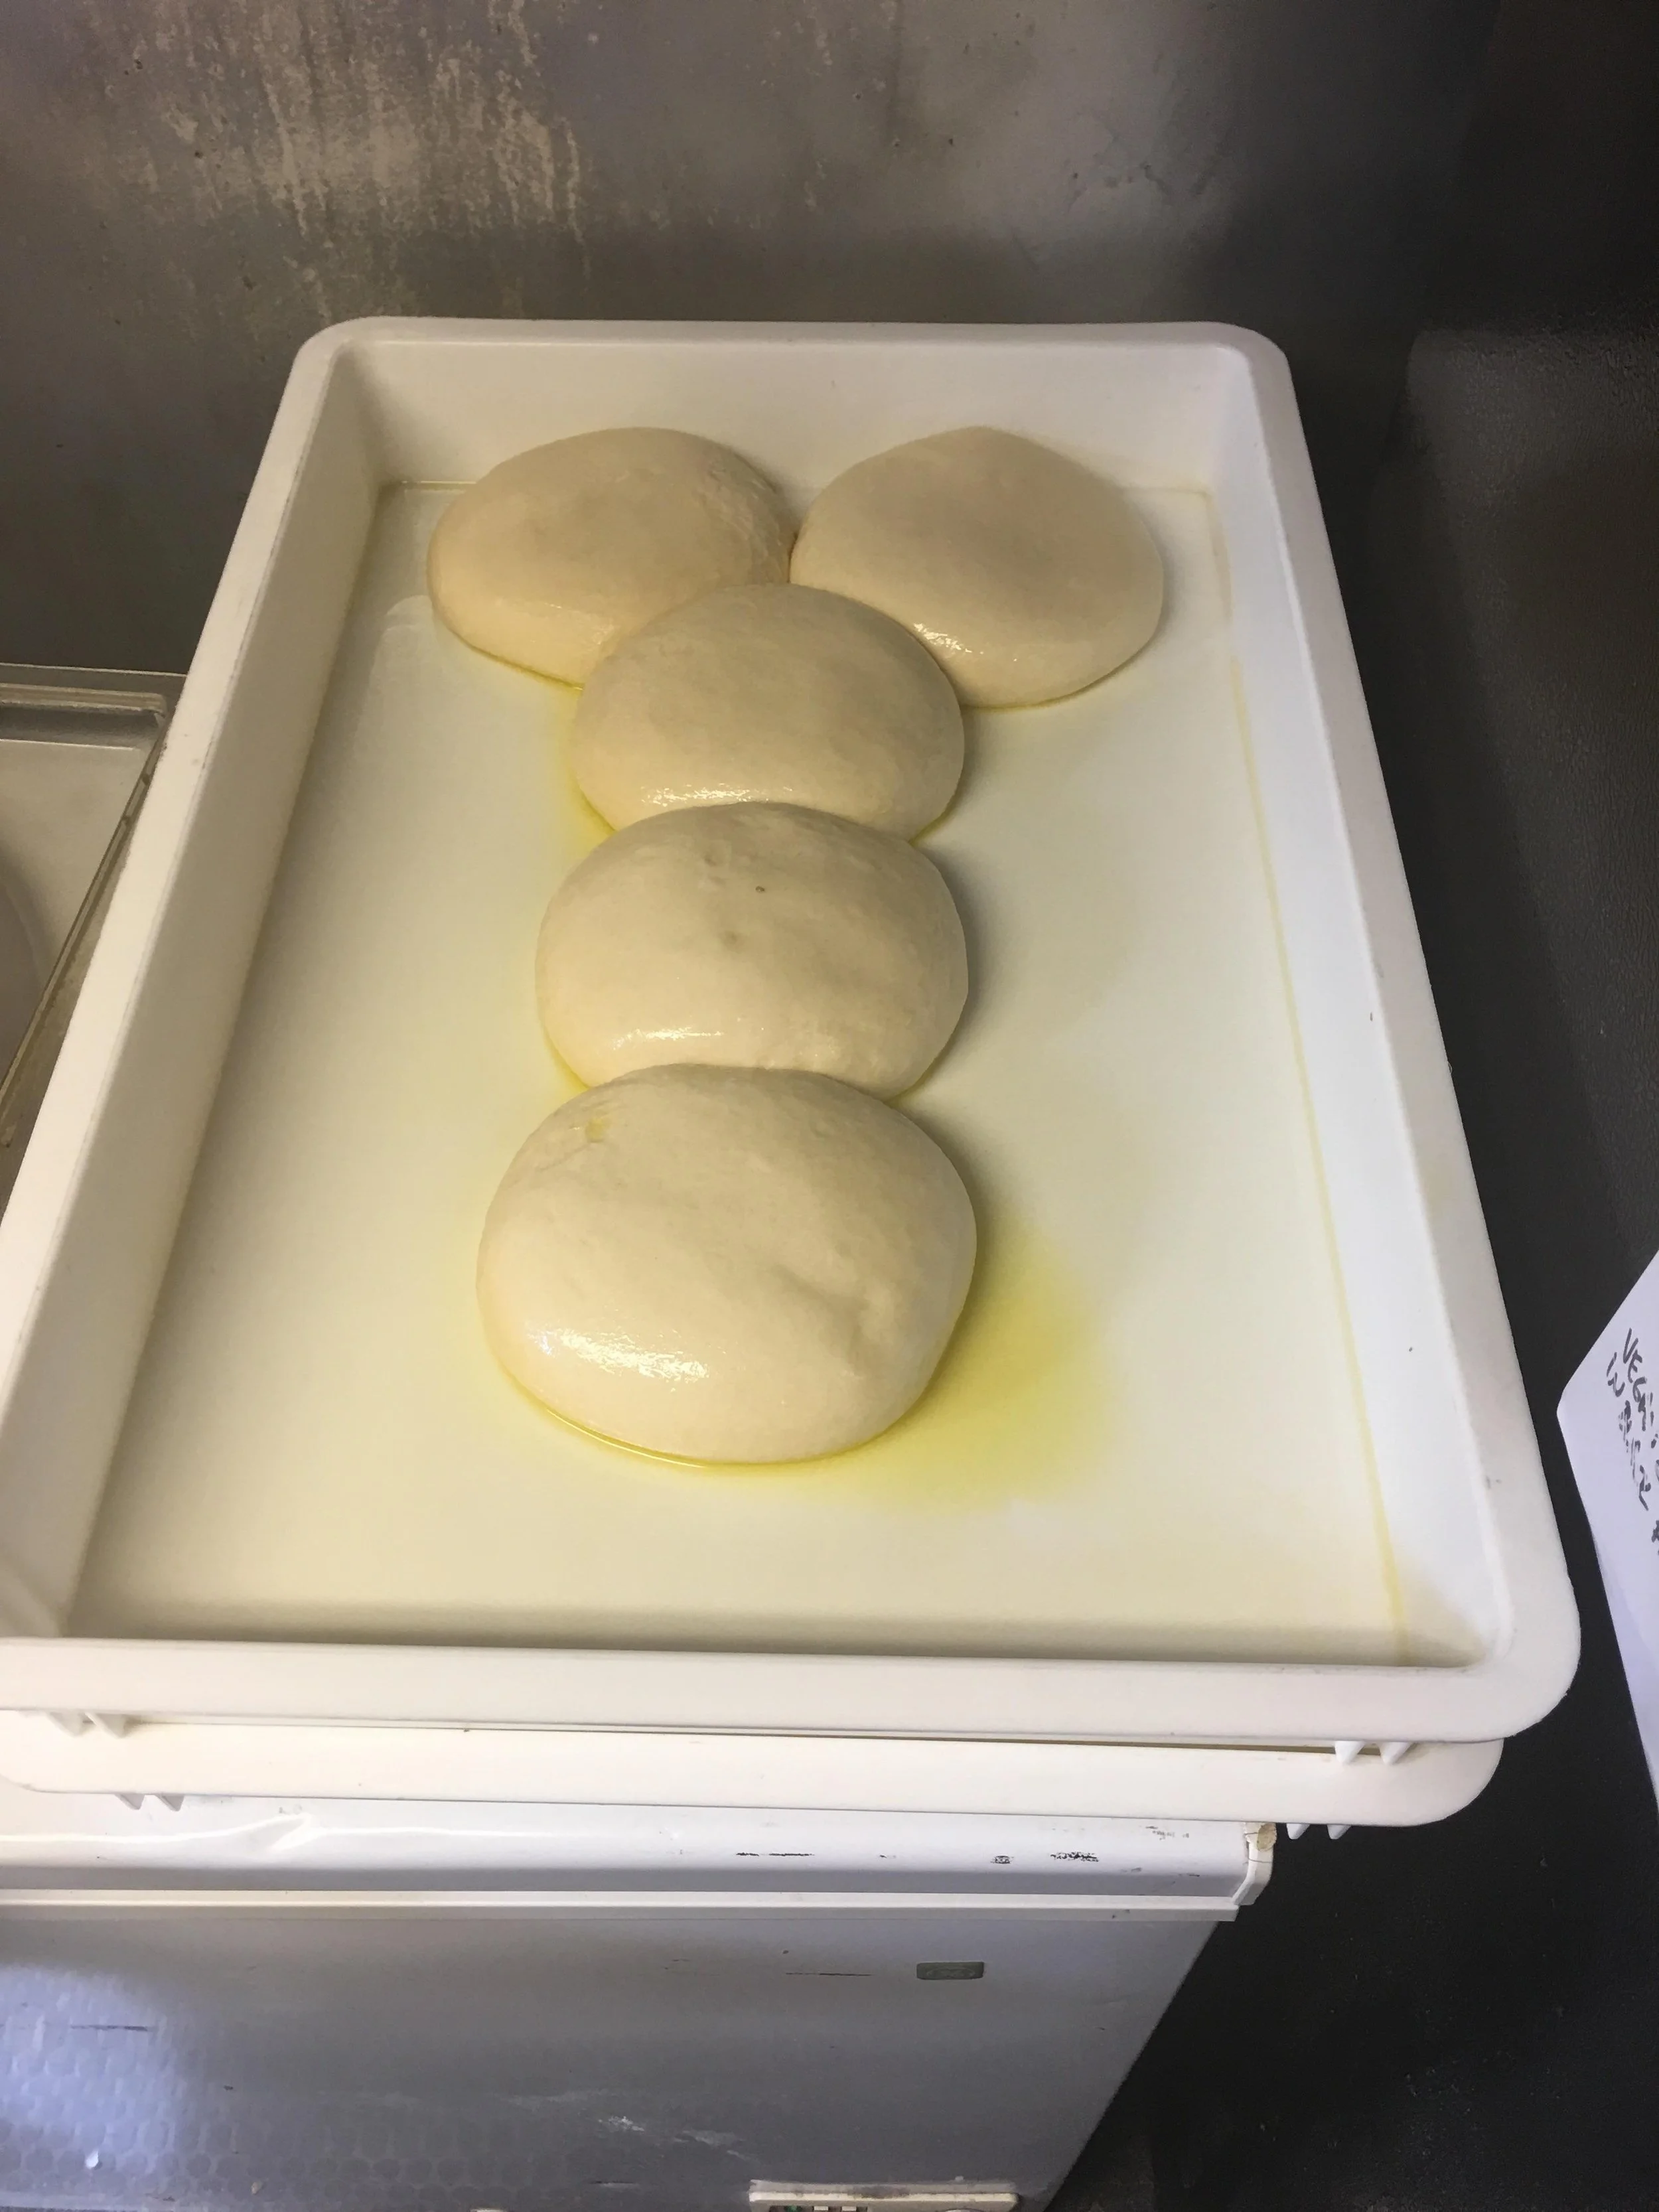
The dough balls have doubled in volume and hold their shape. You can see bubbles through the sides and tell that they are filled with gas. When you take them out, they are not sticky, do not stretch too much, and do not tear.
Too Late
When you take the dough ball out, it stretches and sticks. When you try to open it, it tears. You can't transfer it to the peel because it sticks, and you can't get it into the oven without making a mess.
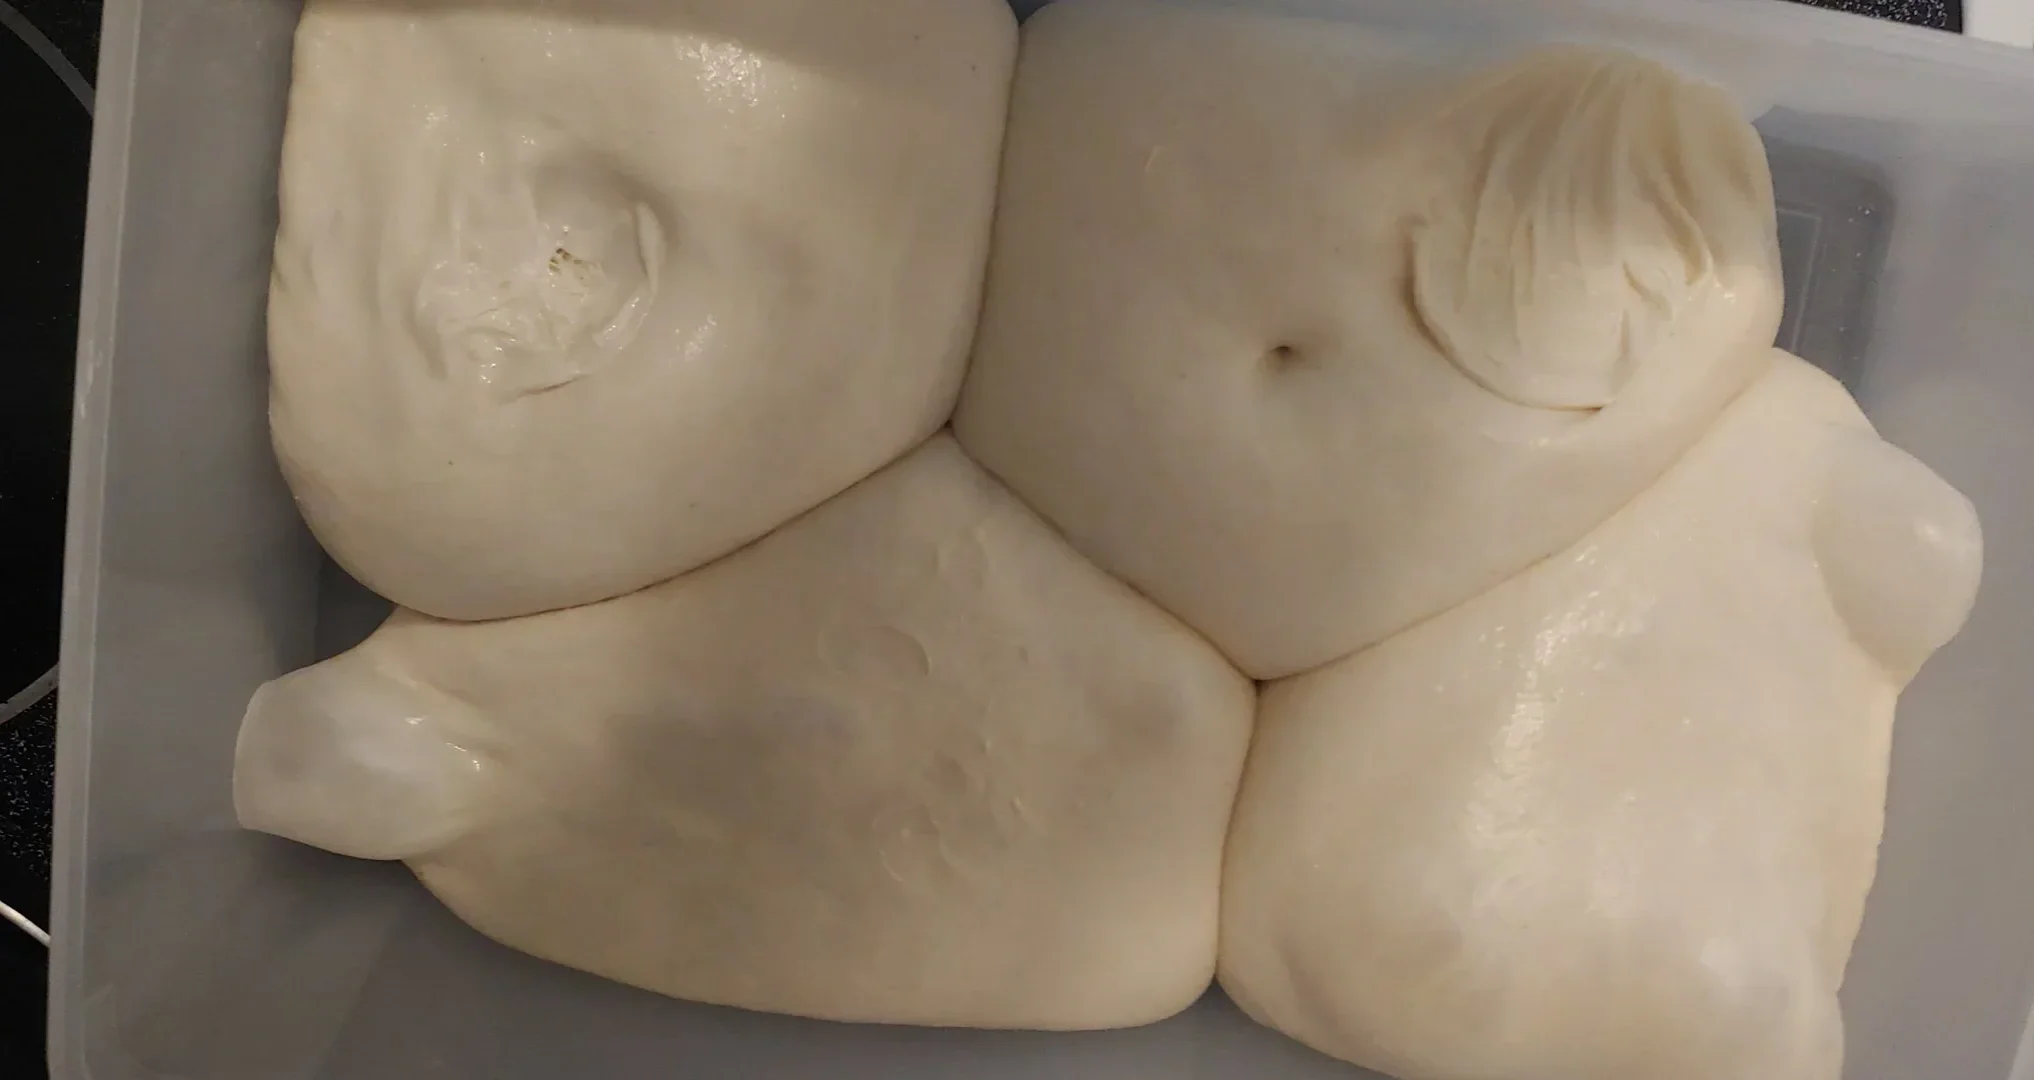
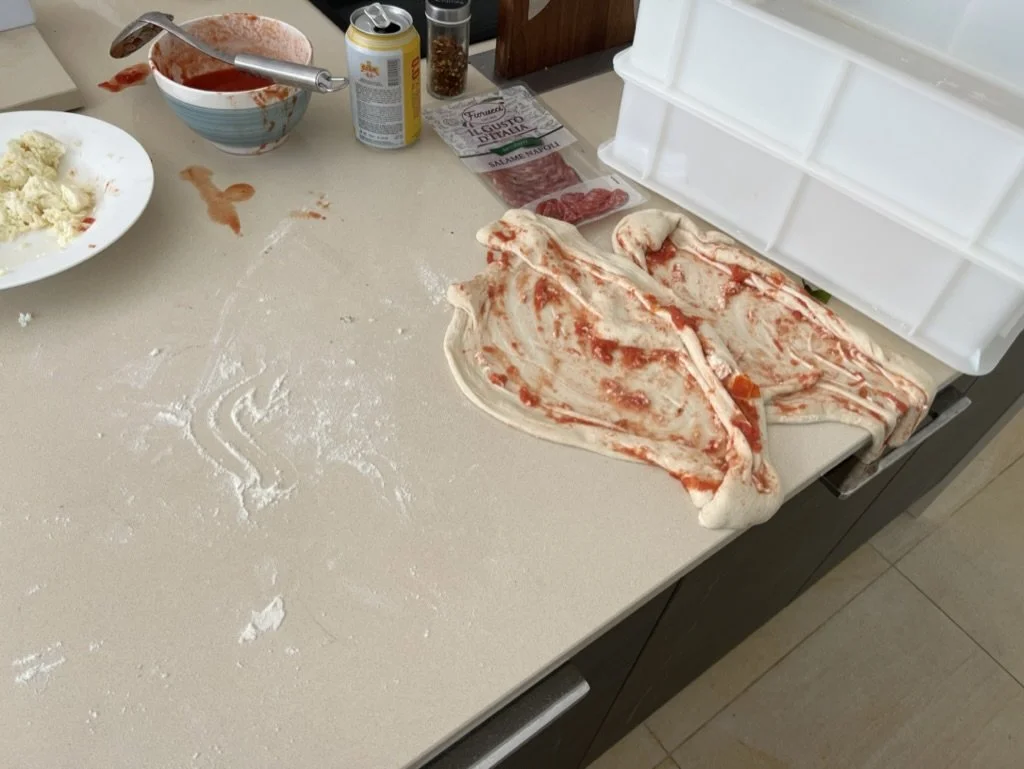
Consequences of leaving the dough to rest for too long during the proofing stage
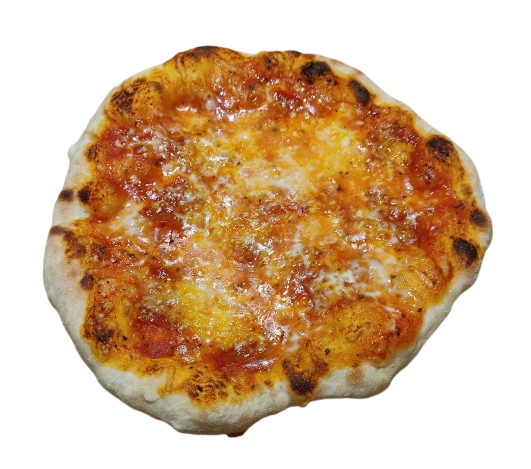
After overproofing, the dough feels weak and slack. Baked goods often has poor oven spring and a pale crust.
6. What should you do if it doesn't turn out right again?
Step 1. Name the specific problem
The same sign can point to more than one problem, and that's completely normal. Once you start paying attention to these signs, learning to read them, fixing problems one at a time, and experimenting, your results will keep getting better.
I'm not going to teach you what your problem is — you probably already know. Maybe your bread is dense and tough, or your pizza doesn't rise the way you want it to.
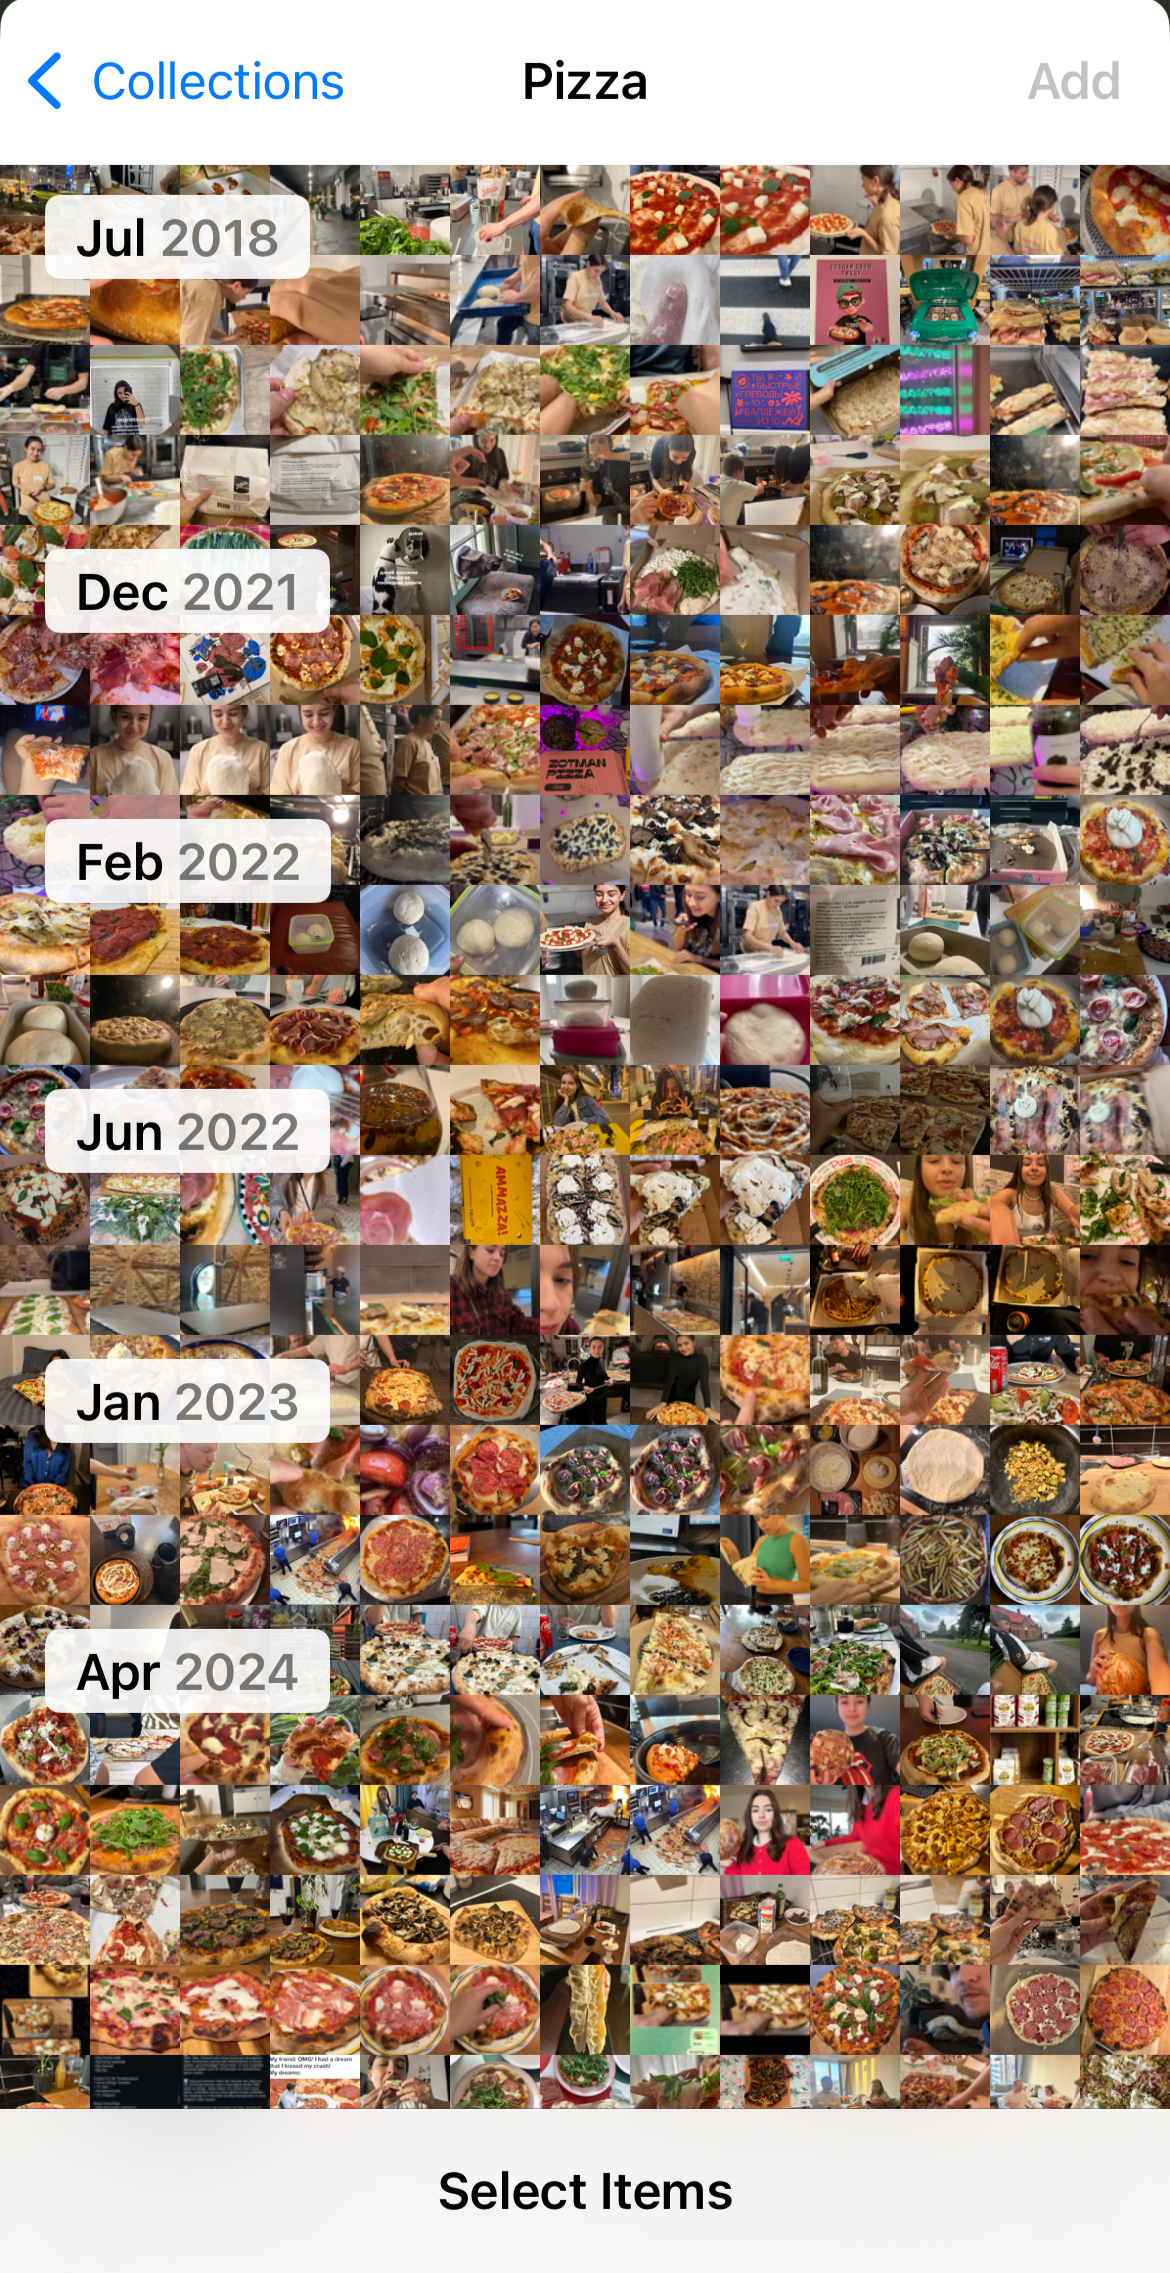
I recommend taking a photo of every bake. Comparing photos over time makes it much easier to notice improvements and spot recurring problems.
Step 2. Remember what this stage was supposed to do
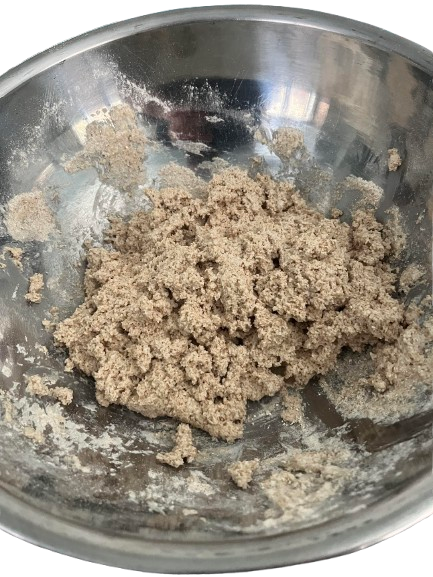
Mixing
The ingredients combine evenly.
Kneading & Resting
The dough becomes more connected and stronger. Water redistributes, and the dough relaxes or strengthens.
Bulk fermentation
Gas builds up, and the volume and structure change.
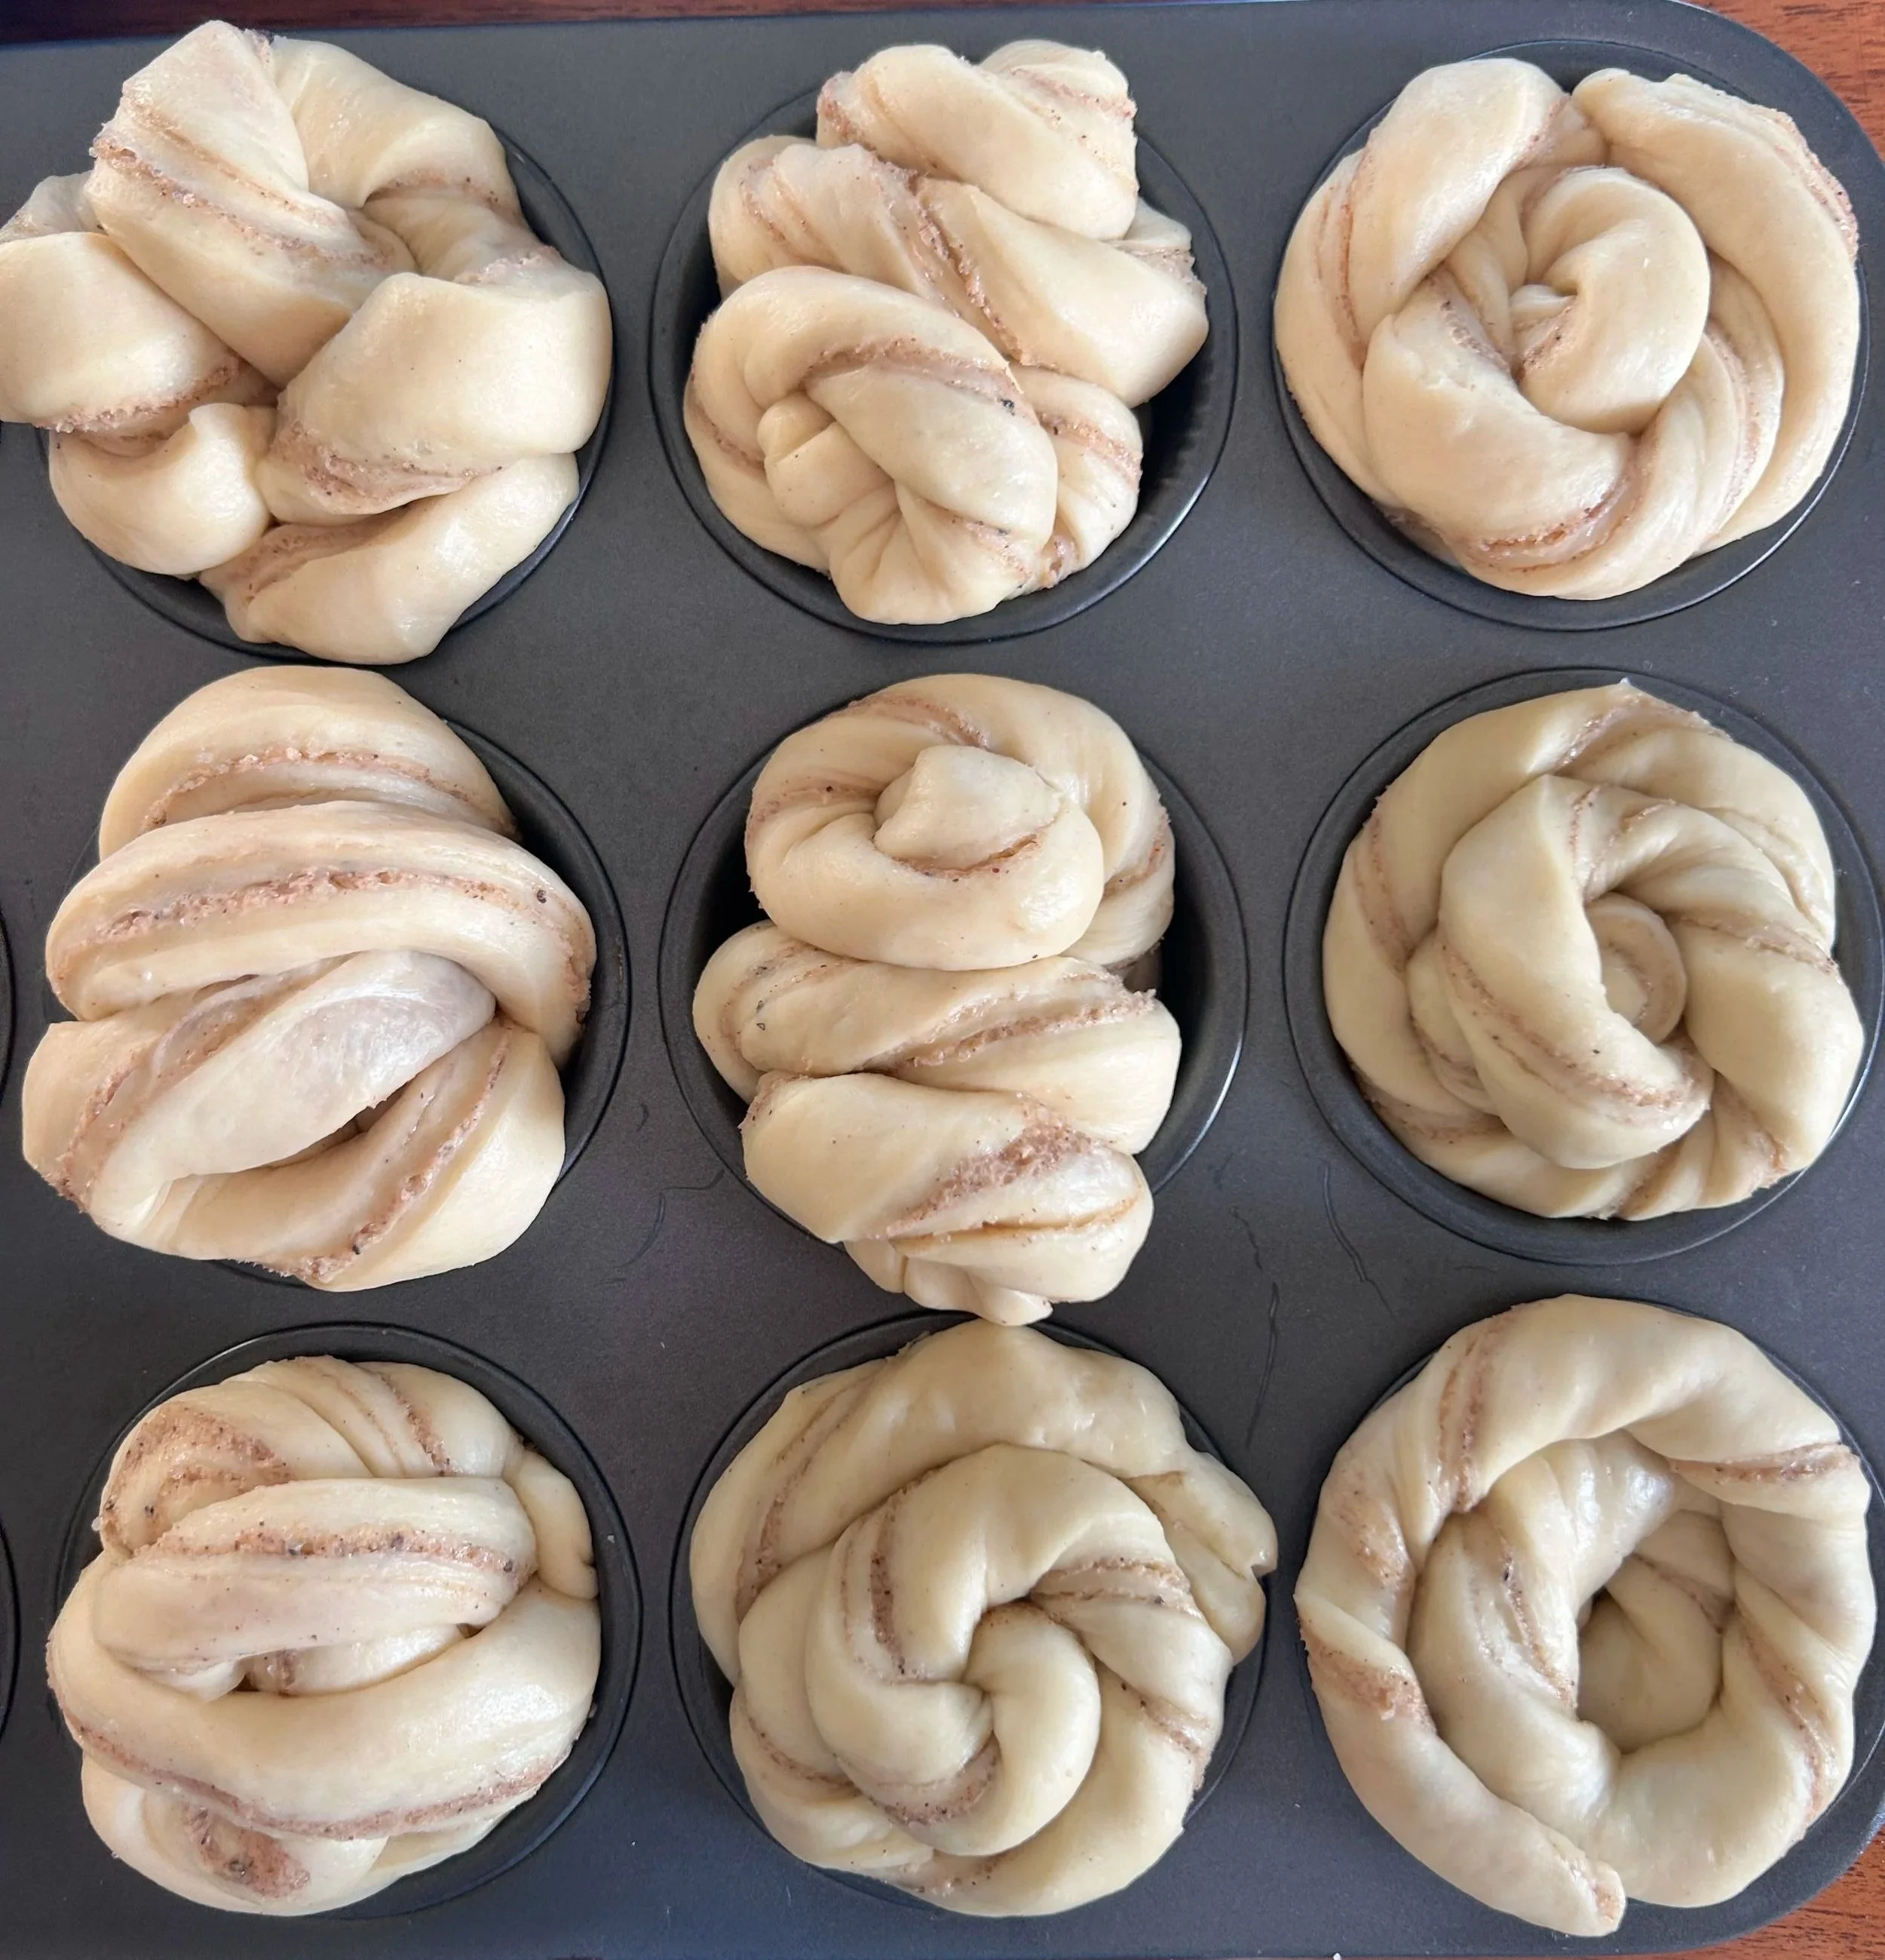
Shaping
Form and surface tension are created.
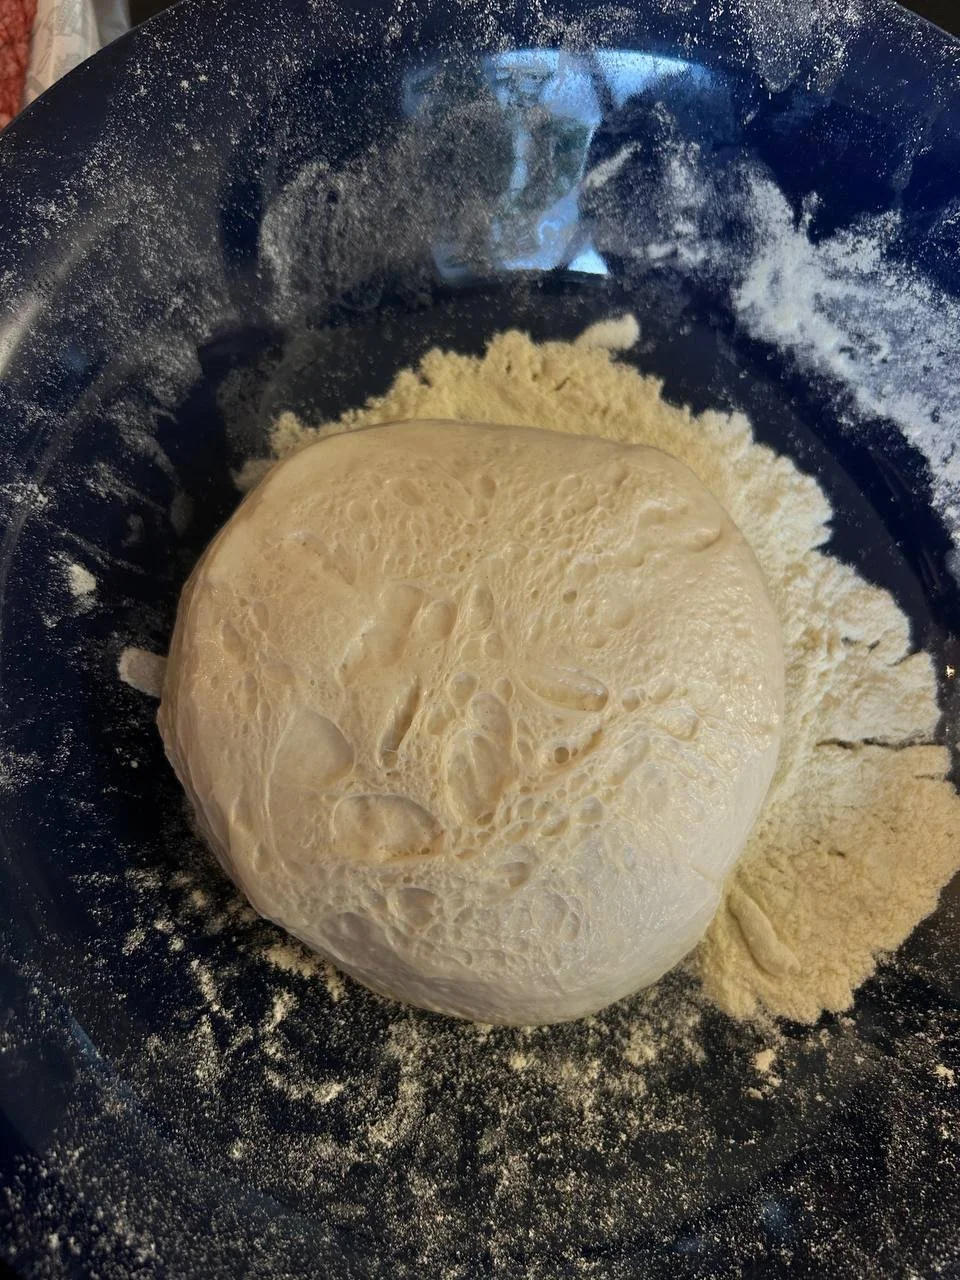
Final proof
The dough fills with gas while keeping its shape.
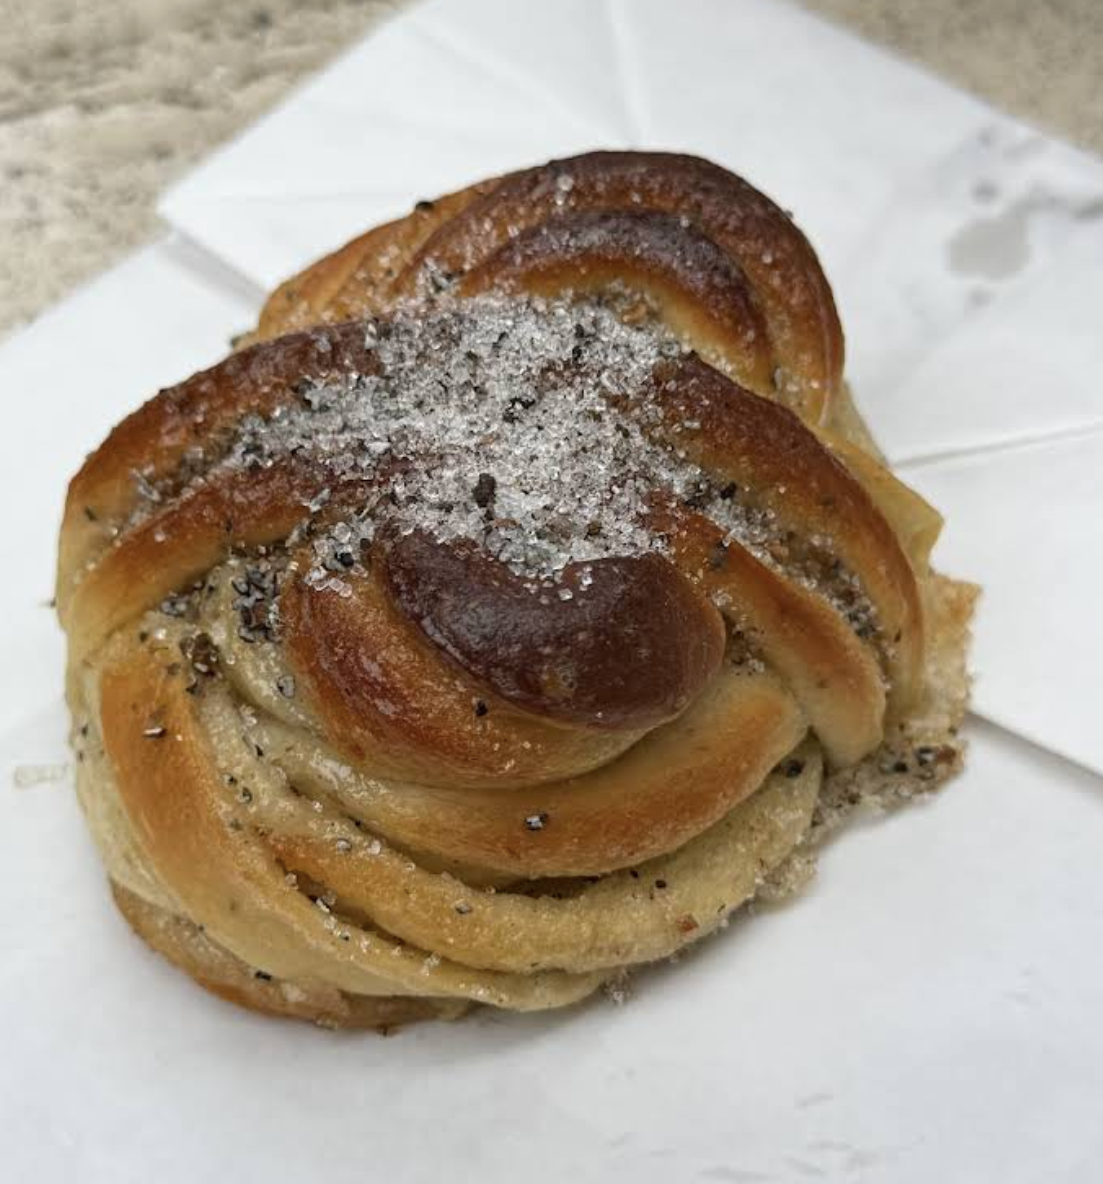
Baking
The structure sets, and the product gains lift and color.
Step 3. Check four things
Temperature.
Time and the actual stage of the process.
Consistency and structure.
The activity of the yeast or starter.
Step 4. Don’t change the formula too quickly
When mixing, before adding flour or water:
check the temperature;
give the dough a 20 min rest;
see whether it changes after resting;
make sure the real problem is actually the amount of flour or water.
Sometimes you think you need to add flour immediately, and ten minutes later the rested dough becomes much more manageable on its own.
the dough after 2 sets of 20 minute rests.
Step 5. Change one thing
For example:
give it more time;
move it somewhere warmer;
cool it down;
keep mixing;
stop mixing;
let it rest;
shorten the next stage;
use less yeast next time.
Step 6. Look at the dough again
Something is wrong → name the specific sign → check temperature and stage → change one variable → look at the dough again.
All the stages affect one another. If bulk fermentation was short, final proof may take longer. If the dough developed for a long time before shaping, it may have less time left afterward.
You can’t treat every stage as a completely separate event.
Want to understand yeasted and sourdough dough more deeply?
You follow the recipe, but the dough still sticks, tears, spreads, or turns out dense? And then you’re left wondering what went wrong…
In my free newsletter, I’ll share simple explanations, real examples, troubleshooting tips, and plenty of baking inspiration to help you understand what your dough is telling you.
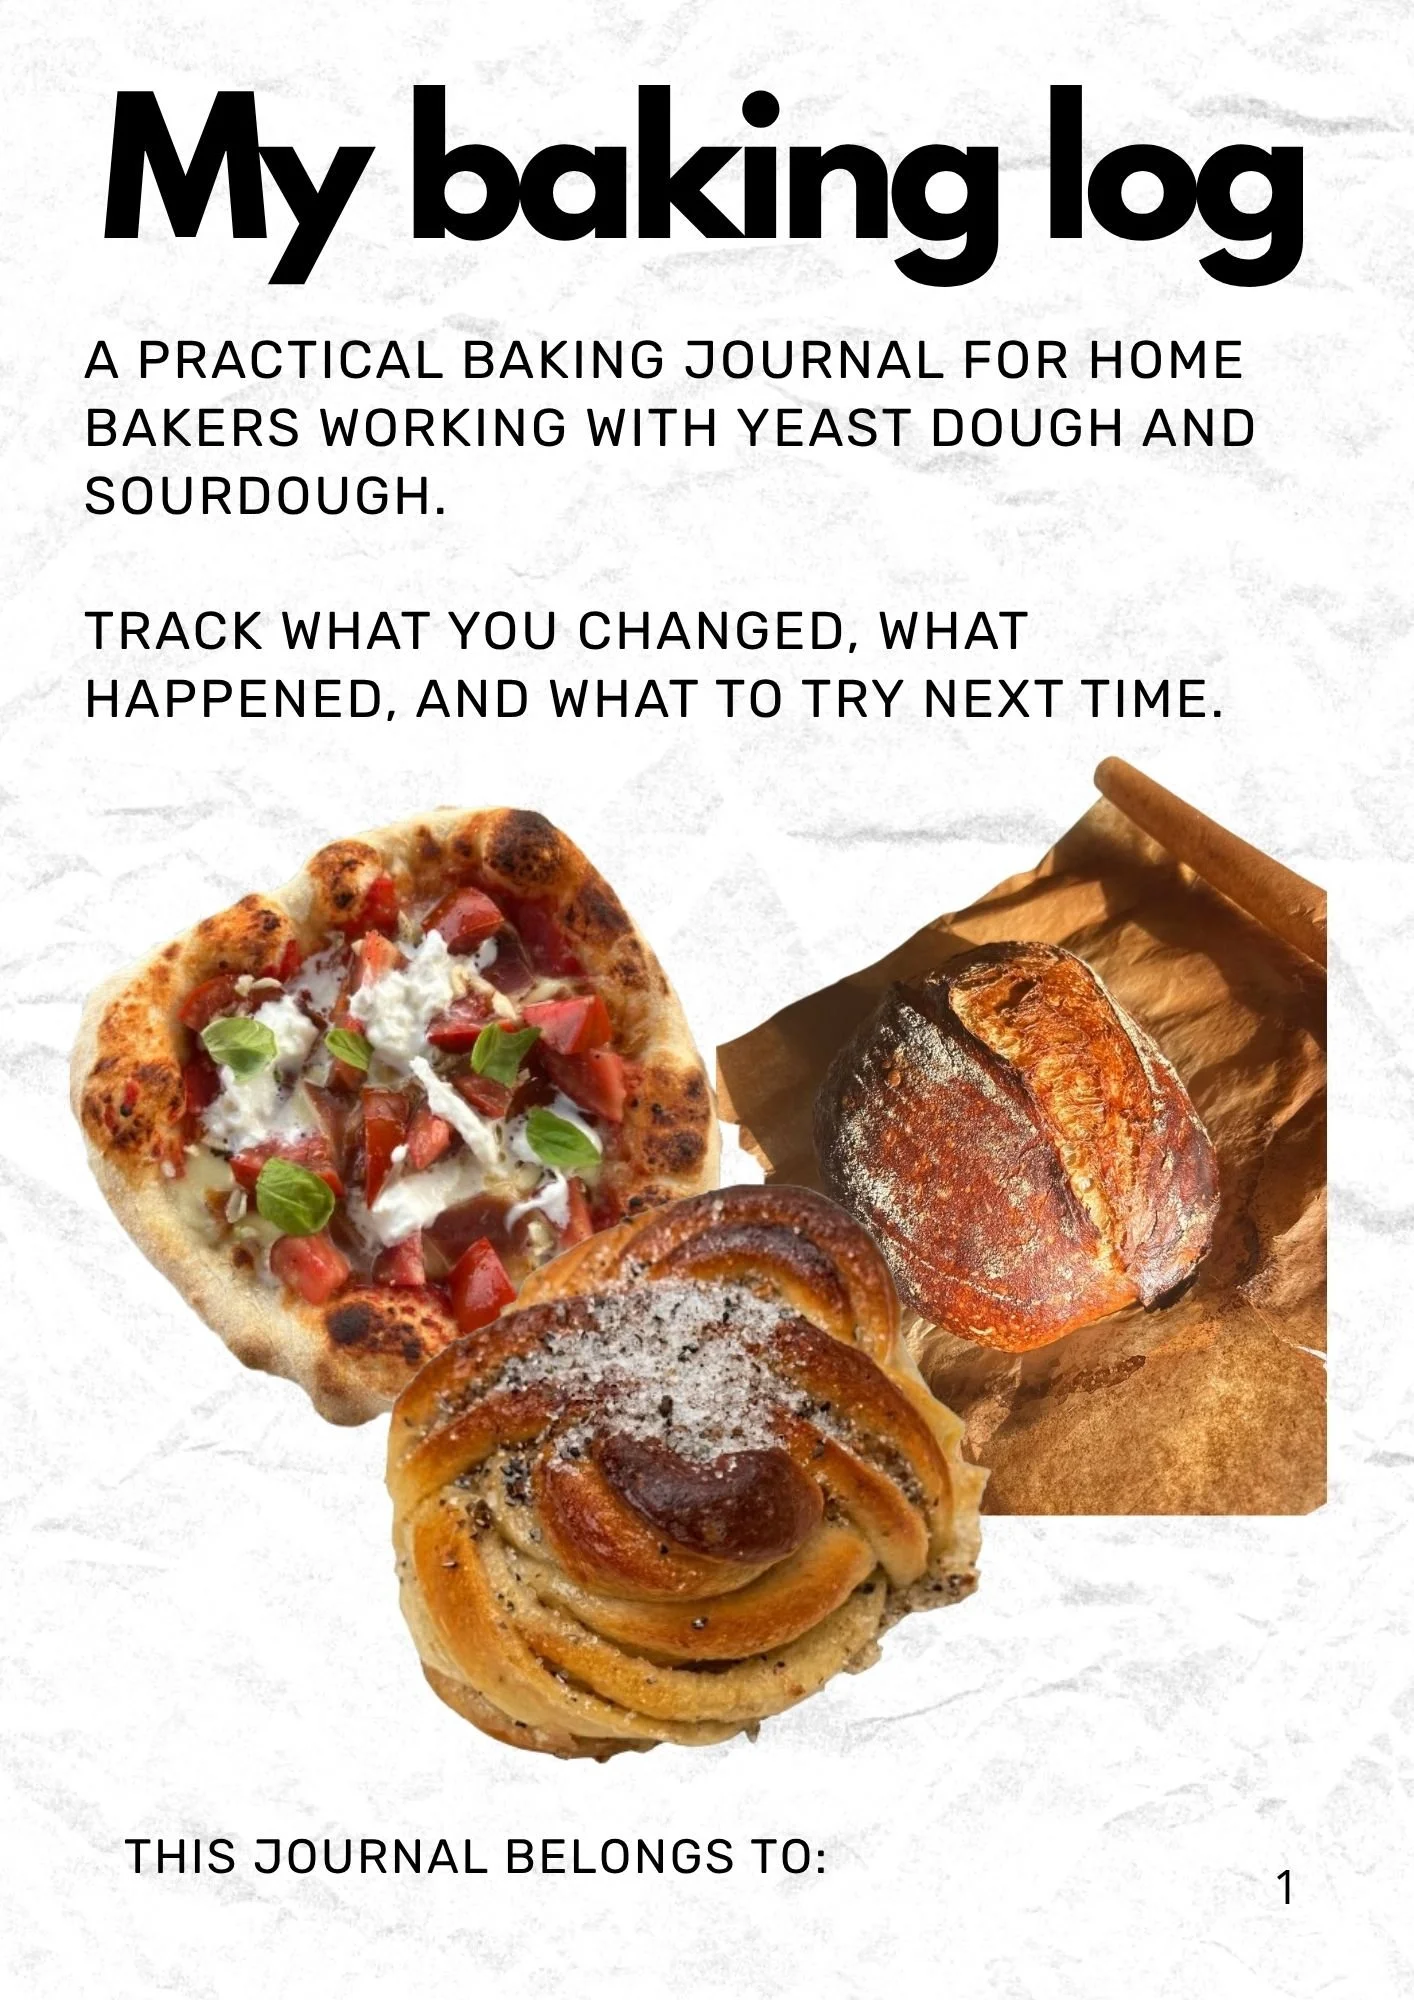
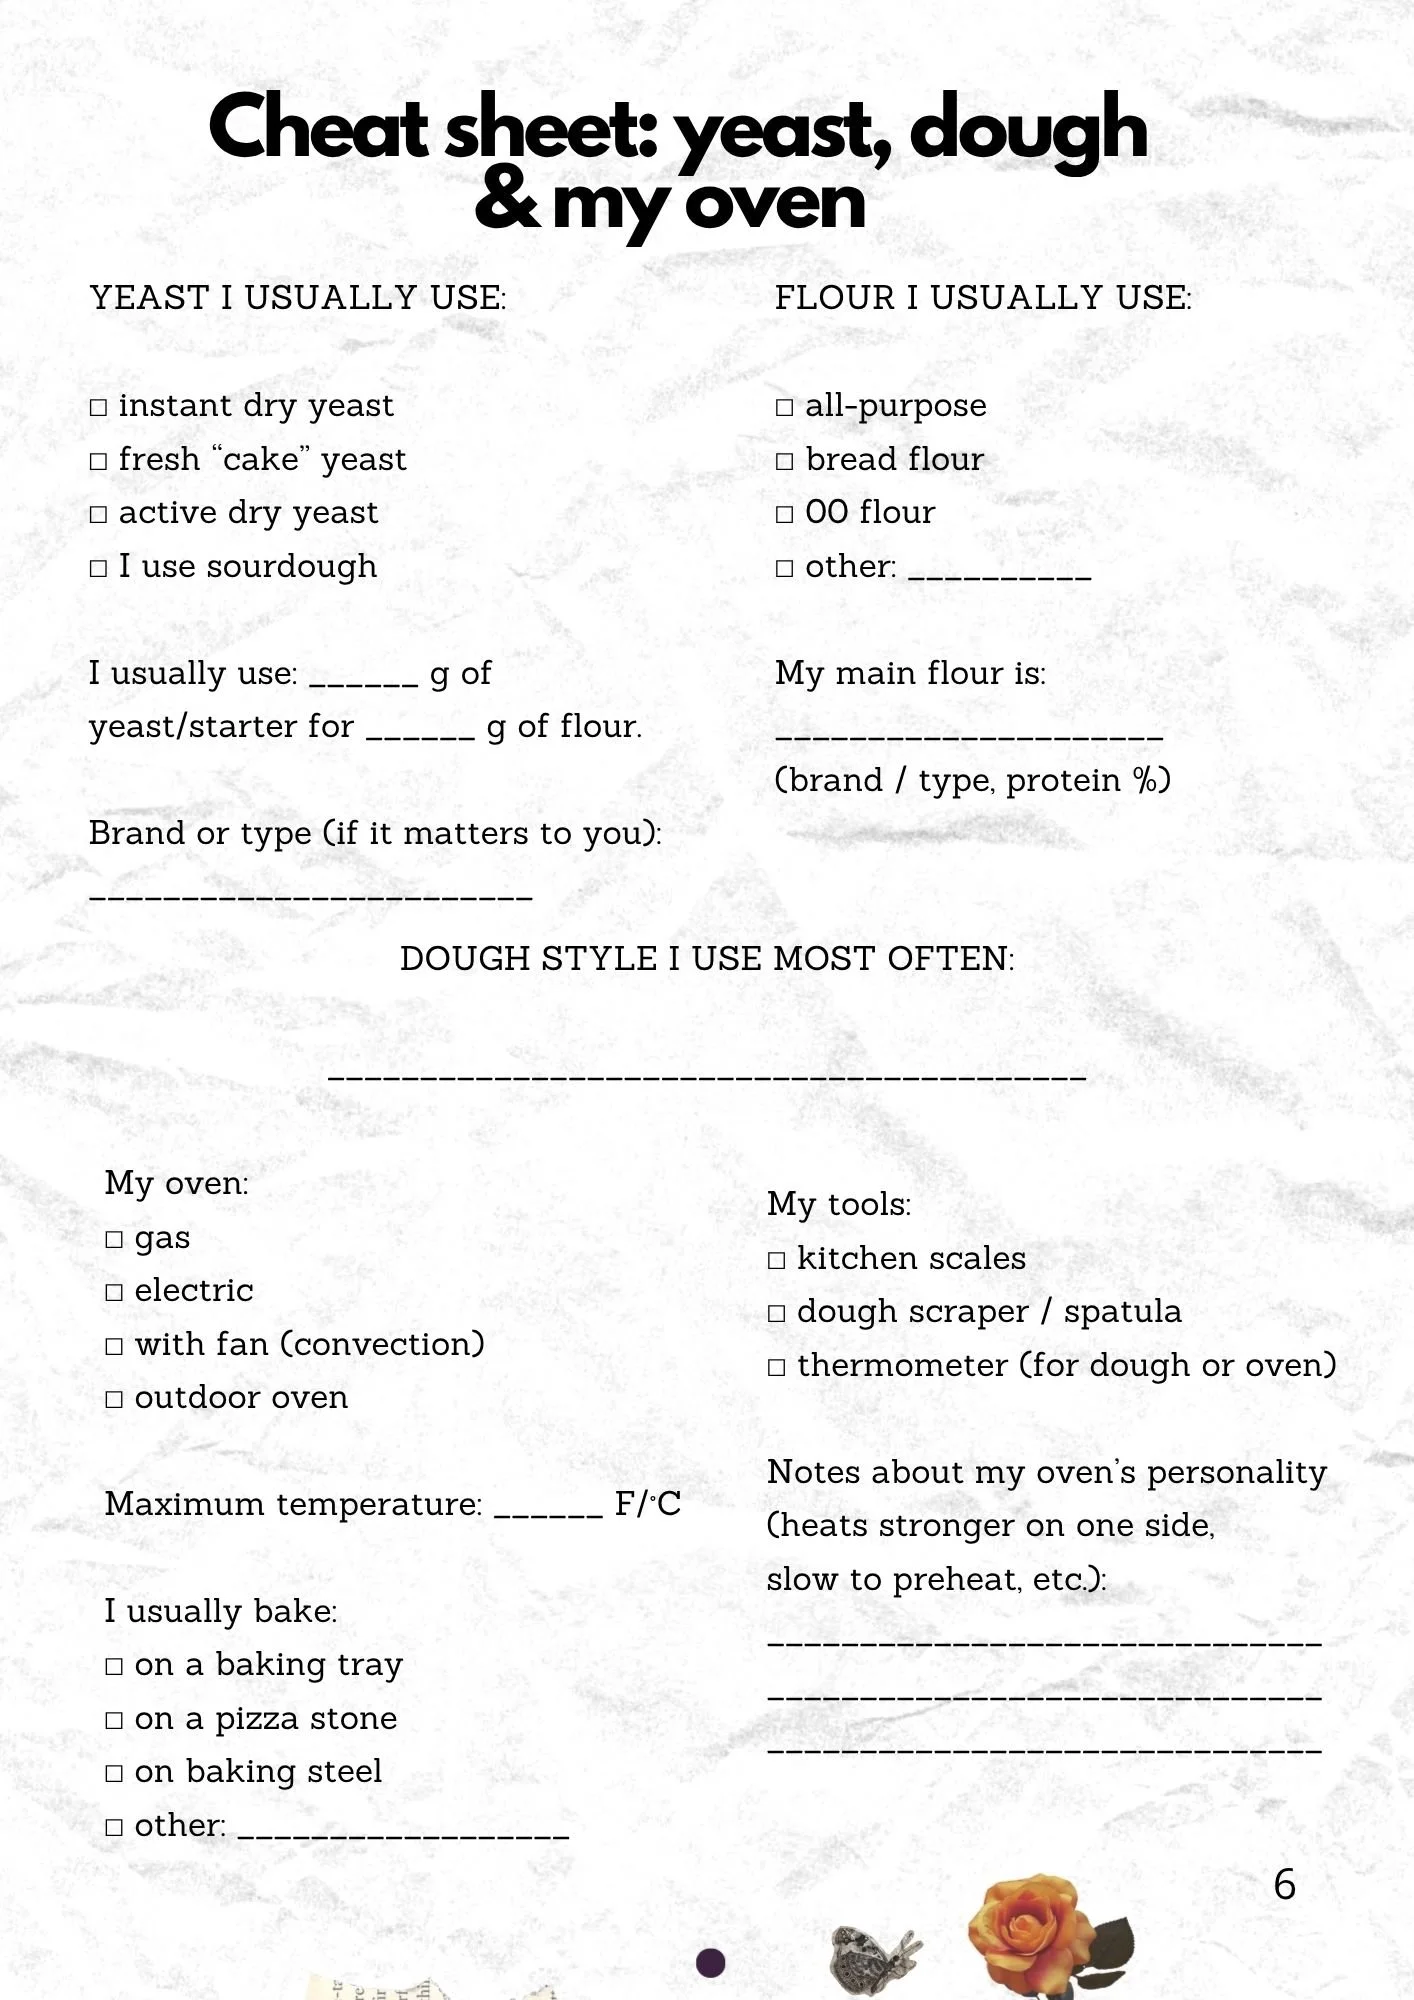
You’ll also get my Baking Log as a welcome gift — a place to track your bakes, make notes, and compare results. So you can bake with more confidence and know what to change next time.