
How to Make a Light, Airy Pizza Crust at Home (No Pizza Oven Needed)

Most home bakers follow online recipes, but the crust still turns out dense, bready, or chewy. Here’s the truth: it’s not your recipe — it’s your process.
With four simple adjustments — hydration, fermentation, flour, and heat — your homemade pizza can become light, airy, and blistered. And no, you don’t need a wood-fired oven.
This method also works for pita, focaccia, and even bread.

1. Hydration: Use More Water
Dry dough = dry, dense crust. For airy pizza, you need more water than most recipes suggest. Bakers call this hydration.
Wood-fired oven (≈500 °C / 930 °F): 60–65% hydration works fine. The bake is so fast that the dough stays moist.
Home oven (250–300 °C / 480–570 °F): you need higher hydration, 65–70% or more. That means 700 g water per 1 kg flour.

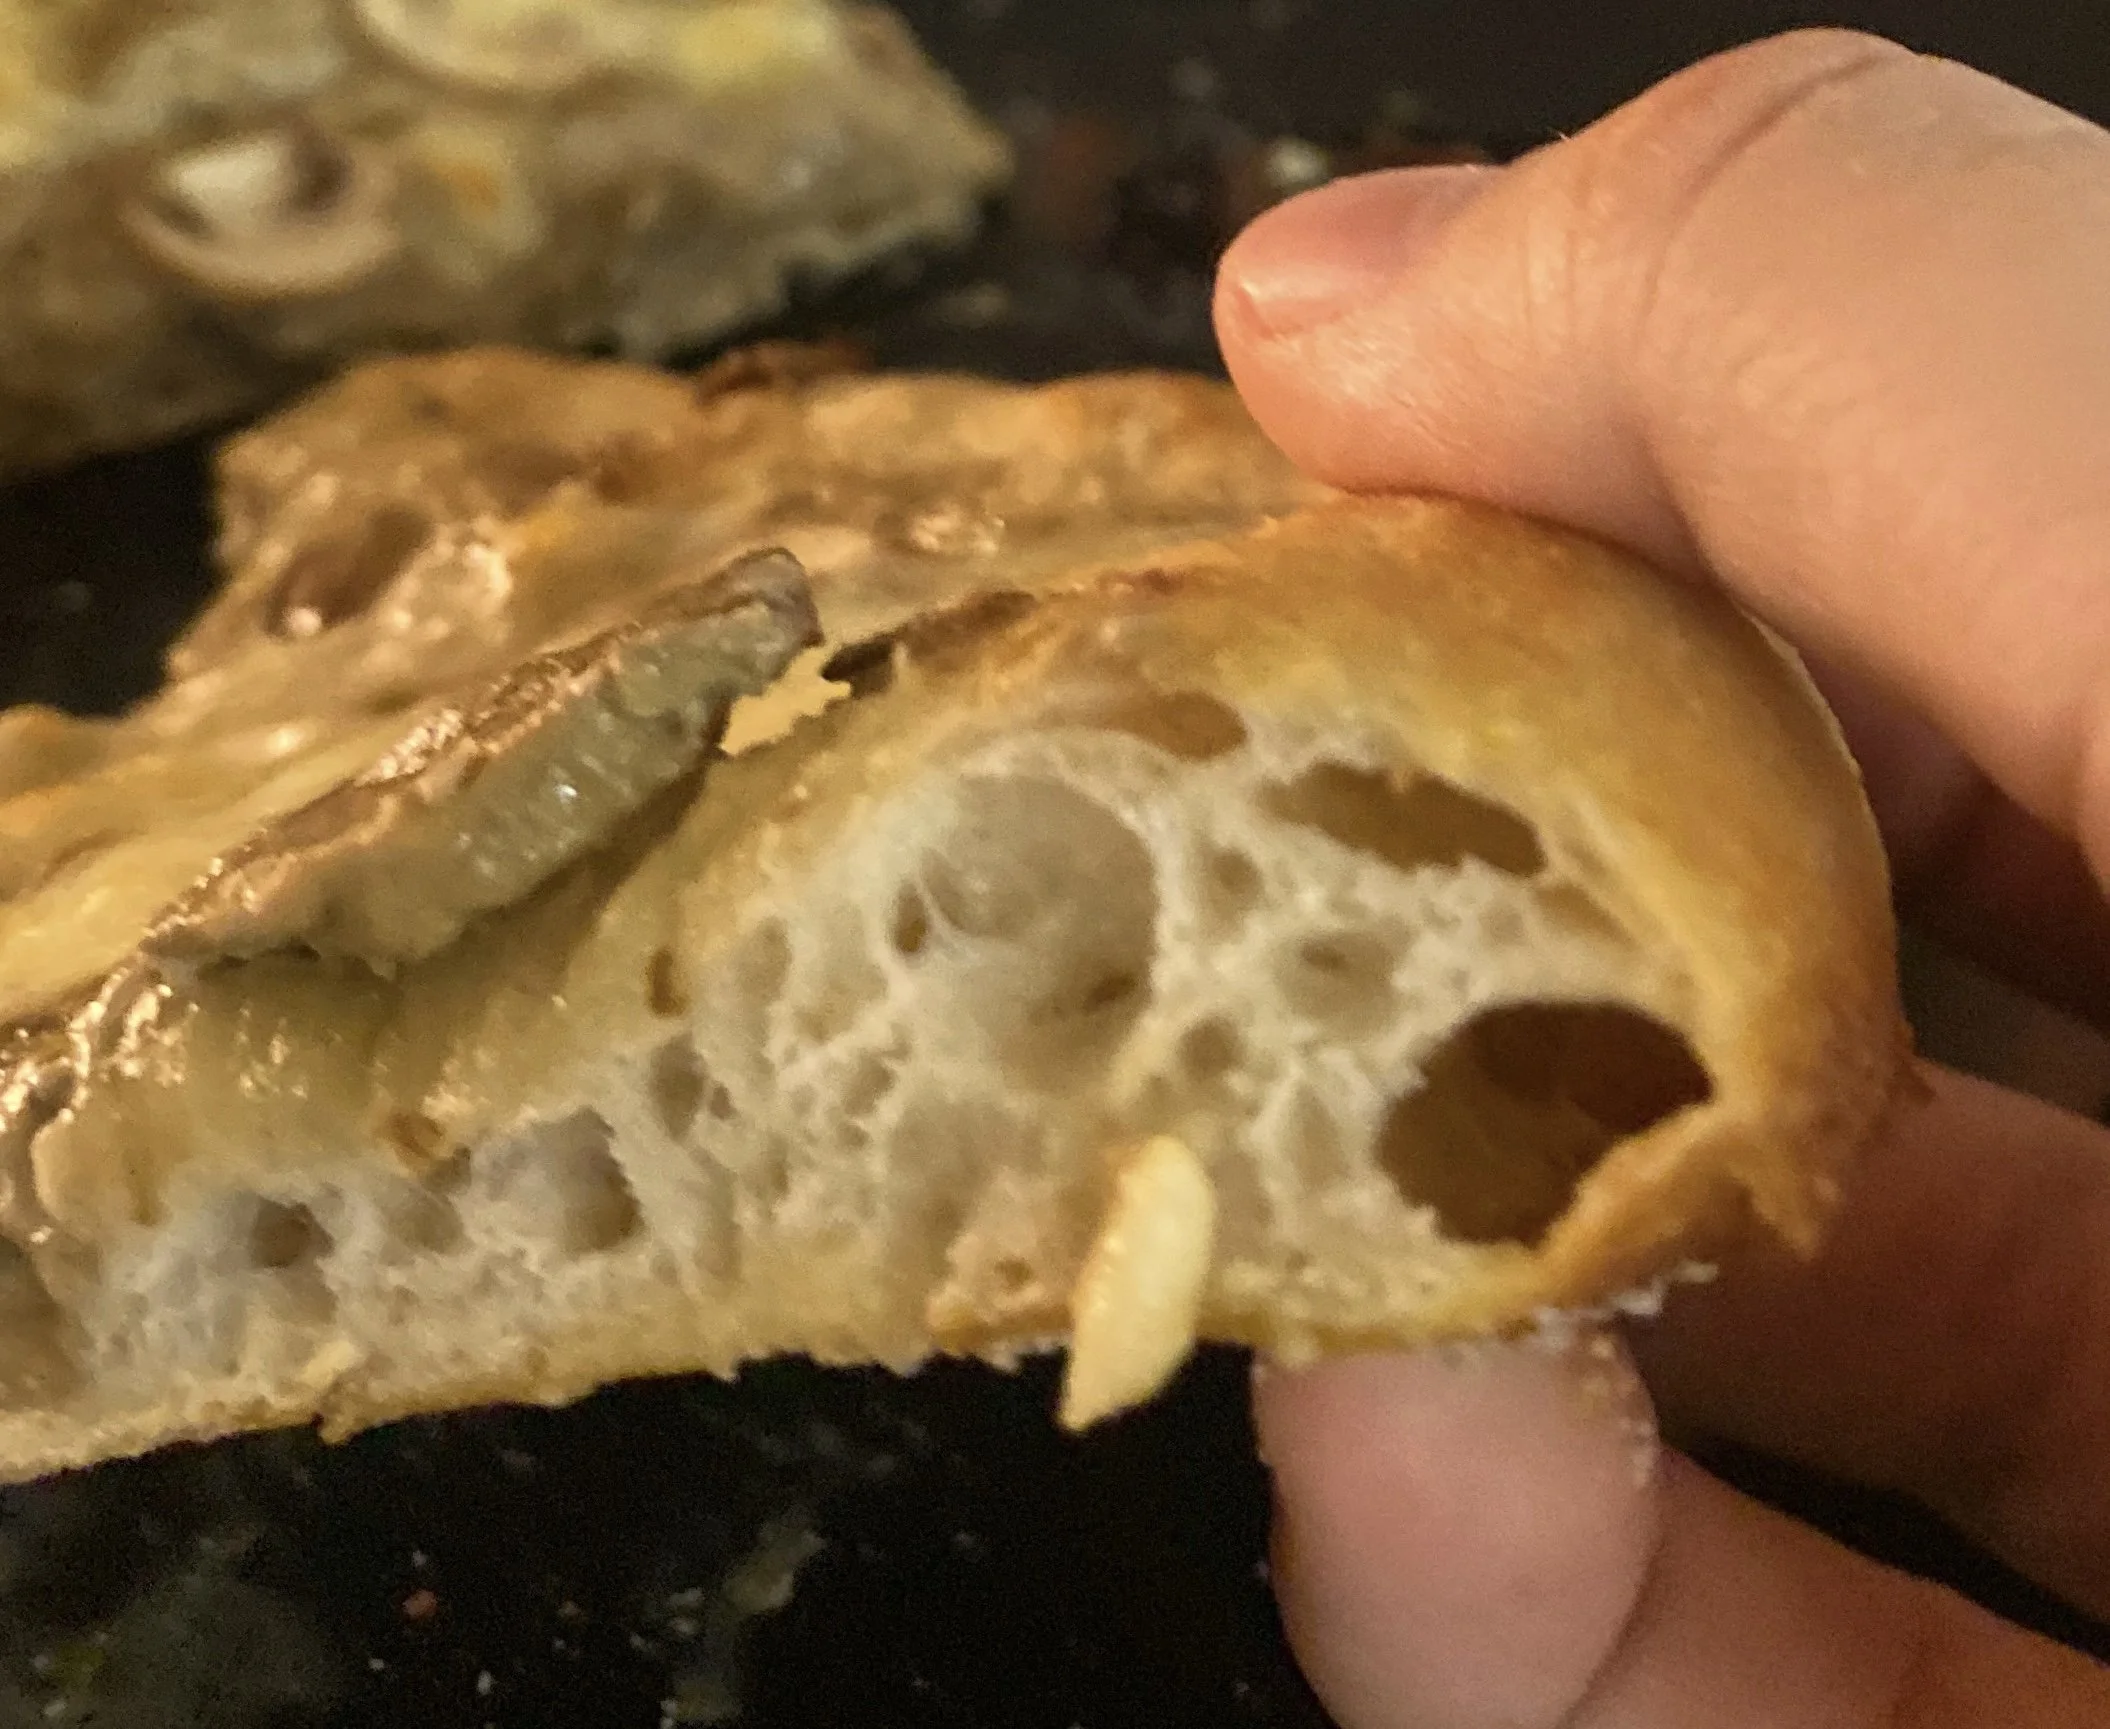
👉 More water = open crumb.
Low hydration = tight, bready crumb.
If you bake a 60% hydration dough in a home oven, it loses moisture before the crust sets. The result is dry and stiff. At 70%, the extra water protects against over-drying and creates bigger bubbles.
⚠️ But here’s the catch: all-purpose flour can’t handle it. It turns sticky, tears easily, and feels unmanageable.
Instead, I use:
00 flour — finely milled Italian flour, often around 12% protein.
Strong bread flour — 12–13% protein.
Both can absorb more water without collapsing. That’s what traps air and makes the crust balloon.
Important: not all 00 flours are strong. A 00 bag in Italy (W300) might handle 70% hydration, while a 00 bag in the US (W180) may collapse. Always test and experiment.


2. Ferment With Your Eyes, Not the Clock
Most recipes say: ferment for 2 hours. But fermentation speed depends on temperature, flour, and water.
If it’s hot in Naples, dough may double in 2 hours. In cold Scandinavia, the same dough may take 6 hours.
That’s why timers fail. The dough itself is your timer.
Use a clear container so you can watch from the side.
Your dough is ready when:
Bubbles form throughout, not just on the surface.
A gentle nudge makes it jiggle slowly.
A finger press reveals soft air underneath, and the mark bounces back gradually.
Too soon → the crust is dense.
Too late → the dough collapses, sticks to everything, and loses strength.
Example: In my kitchen, I press the side of the container and see if the dough “breathes.” If it feels alive, with bubbles shifting under the surface, it’s ready.

3. Real Heat, Not Just Hot Air
Home ovens max out around 250 °C (480 °F). That’s not enough to brown the base properly.
Air alone can’t crisp the dough. You need direct contact heat.
That’s where a pizza steel (or stone) comes in.
Steel stores more heat than oven air.
When you slide the dough onto it, heat transfers instantly — like the floor of a pizzeria oven.
The base crisps and blisters in minutes.
Example: I once baked on a steel at 270 °C / 520 °F. The crust puffed dramatically in 6 minutes, with leopard spots on the bottom. The same dough, baked on a tray, stayed pale and floppy.
If you want authentic results at home, a steel is the #1 upgrade.

4. Flour Strength: The W Factor
Flour isn’t just “00 vs all-purpose.” Strength matters. Bakers measure this in W value, which shows how much gas the dough can trap before breaking.
W250–W320: strong flour, perfect for pizza.
W180–W200: weaker flour, collapses with high hydration.
If the bag doesn’t list W, check protein:
12–13% protein ≈ strong flour.
9–11% protein ≈ weaker flour.
Example: A W180 flour at 65% hydration may spread into a sticky pancake. A W300 flour at 70% hydration will stay elastic, trapping bubbles and giving you a tall, airy crust.
5. Common Mistakes That Make Pizza Dense
Many home bakers struggle with the same pitfalls:
Low hydration. A 55% dough feels easy to handle — but bakes into bread, not pizza.
Weak flour. All-purpose flour with 10% protein collapses in the oven. Stronger flour = better rise.
Over-proofing. If you wait too long, the dough deflates, sticks, and bakes flat.
Cold bake. Baking at 220 °C / 430 °F dries the crust before it lifts. Always use your oven’s max setting.
No steel or stone. Baking on a tray = pale, chewy base. Contact heat makes the difference.
Fix these, and your pizza goes from “homemade bread with toppings” to real pizzeria crust.

Conclusion
Light, airy pizza crust isn’t a secret recipe. It’s four things: hydration, fermentation, flour strength, and heat.
Master these, and your home oven can deliver restaurant-quality results.
Want to go deeper? I teach the full process step by step in my course. Join the waitlist here
If you’re wondering how long to ferment your pizza dough, check out my detailed post here
Mini-FAQ
Q: Why is my homemade pizza crust dense?
A: Low hydration, weak flour, and insufficient fermentation. Use 65–70% hydration, bread or 00 flour, and ferment until bubbly.
Q: What hydration percentage gives airy crust?
A: 65–75%. At 70%, the dough is sticky but produces the best open crumb.
Q: Which flour is best for pizza?
A: Bread flour (12–13% protein) gives chew; 00 flour (~12%) balances airy and crisp.
Q: Is a pizza steel worth it?
A: Yes. Steel transfers heat instantly, crisping the base and giving true oven spring.